User management
Overview
Organization admins can invite users and assign roles. The role determines which resources a user can create, delete, or view. For the detailed permission model, see Role-based access control (RBAC).
User.UserInvite.CREATEpermission (Owner role or equivalent)
Organizations in the commercial/public zones (*.elice.cloud) cannot self-create the organization and the first admin account. The Elice operations team provisions both during onboarding, and admins then invite additional users with the procedure on this page. Elice-integrated organizations (*.elice.io) join automatically using their Elice account and don't go through this step.
Inviting a user
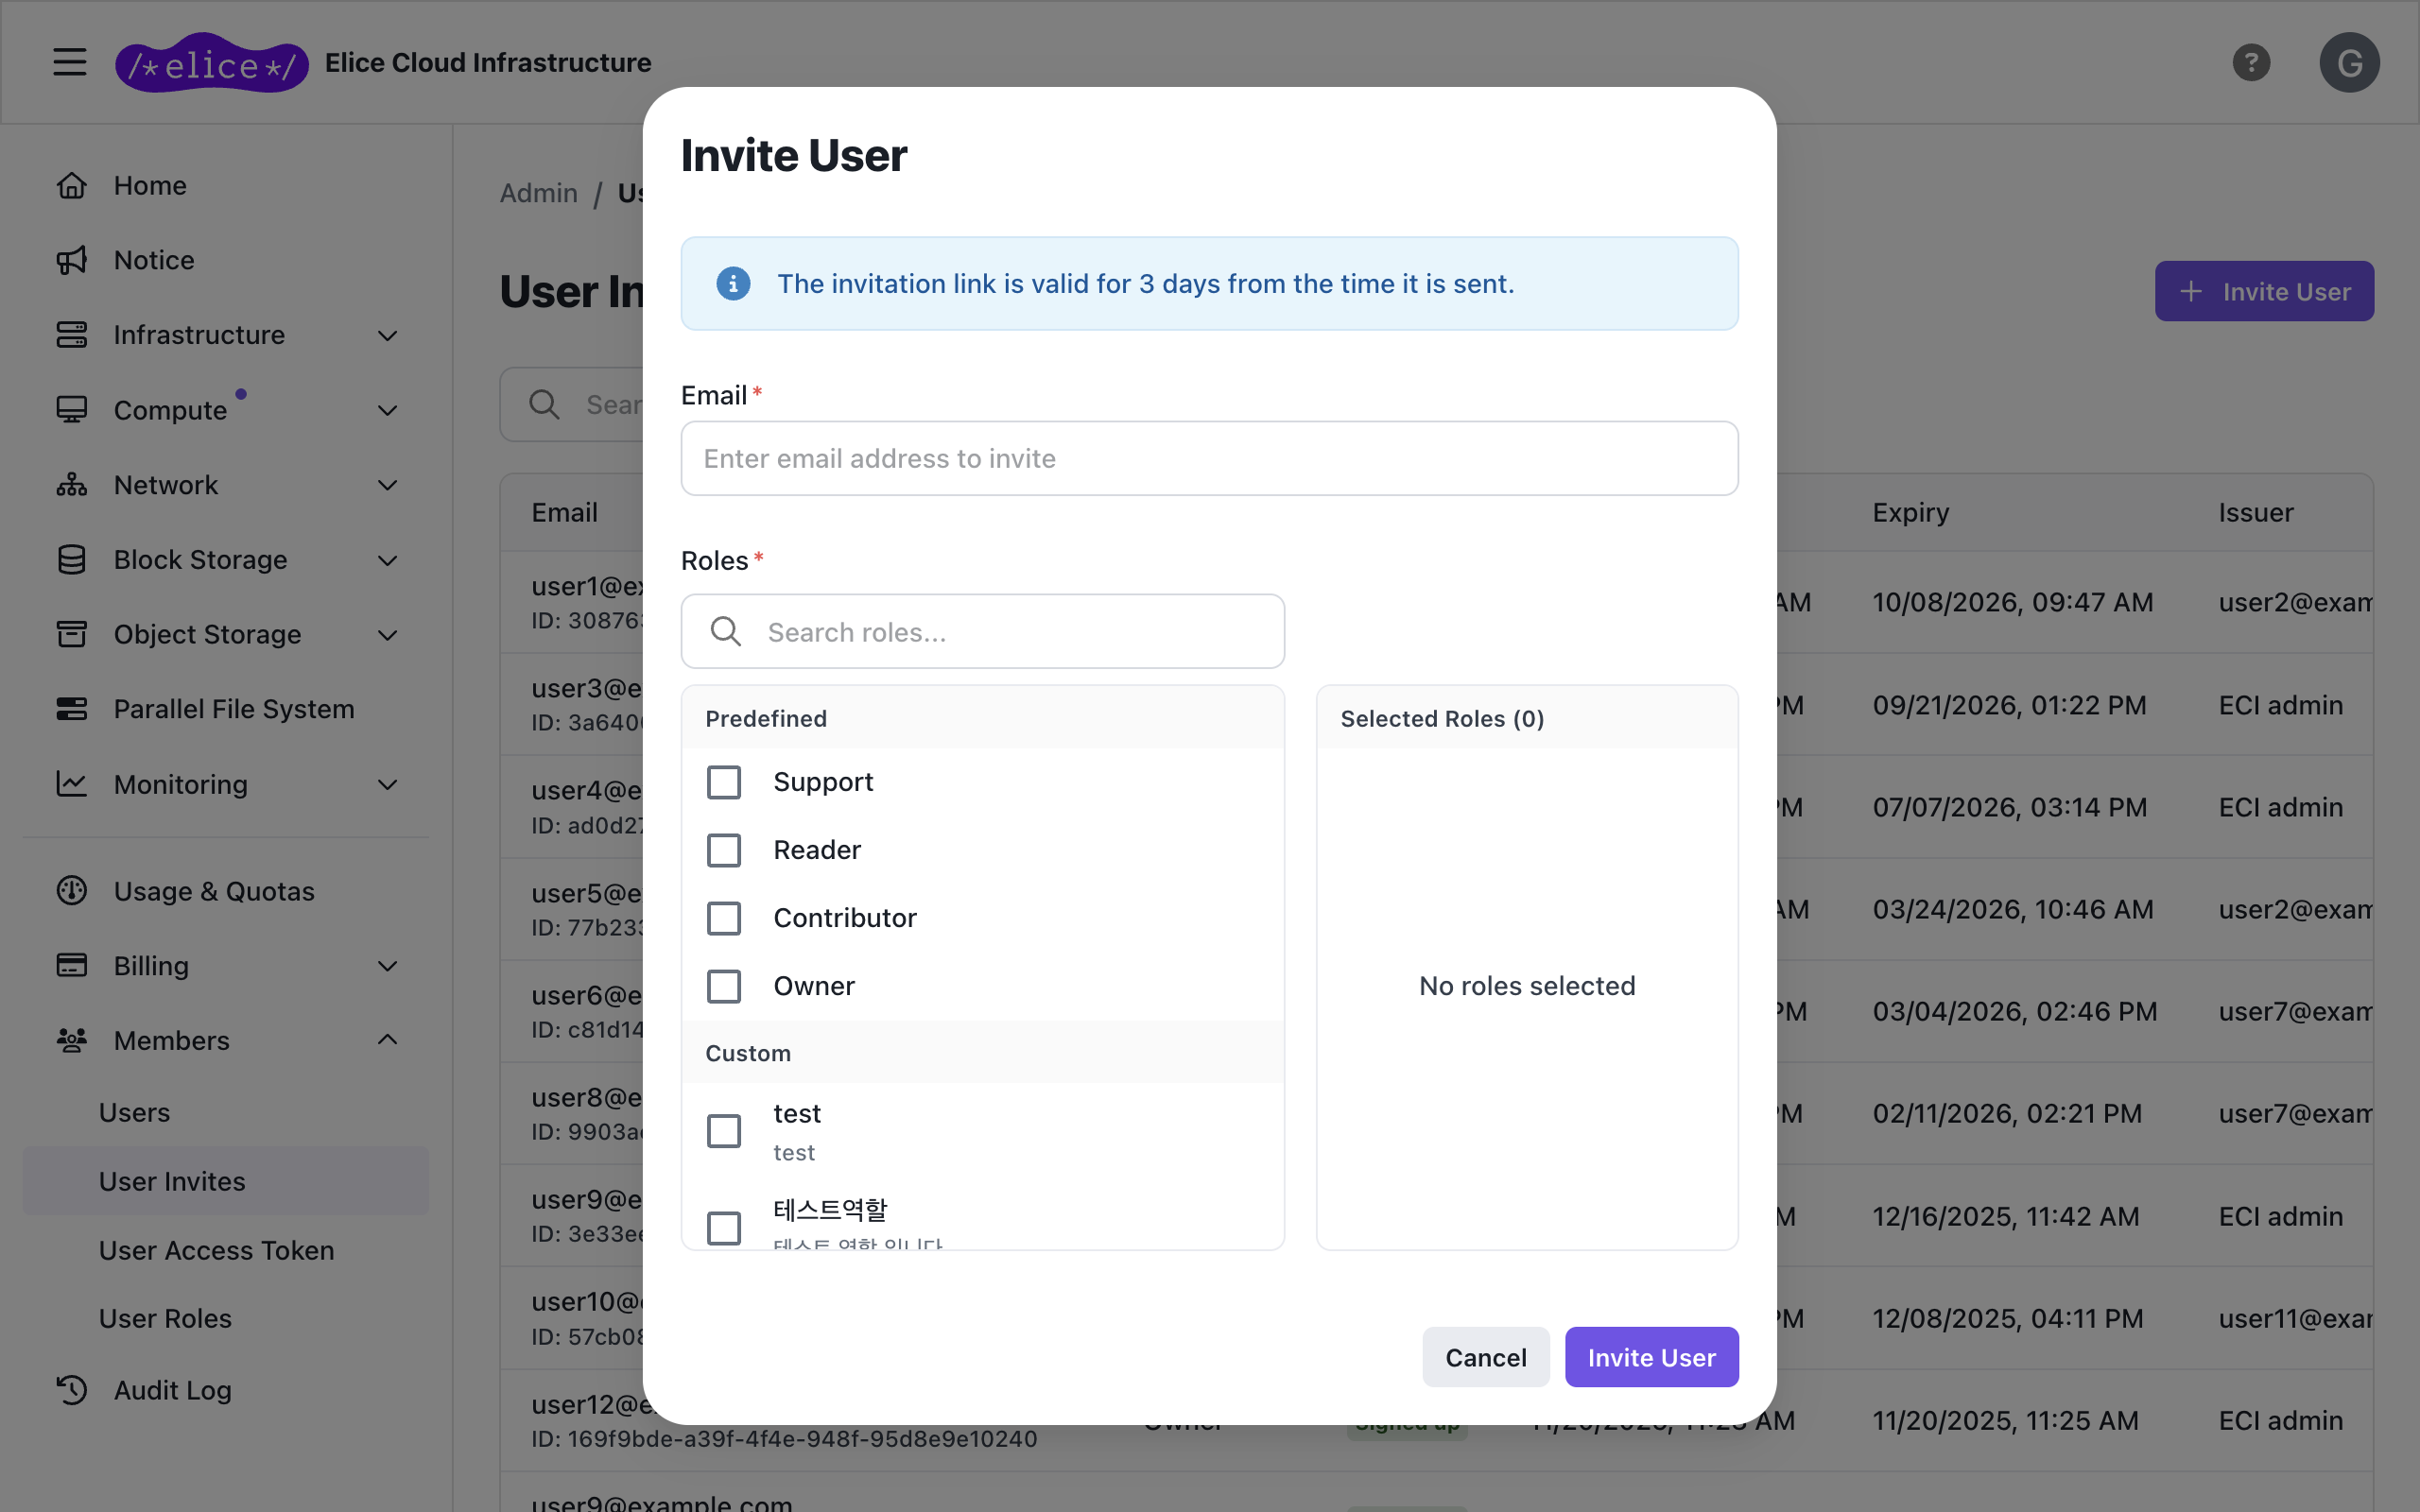
- Go to Members > User Invites.
- Click Invite User in the top right.
- Enter the email address to invite.
- Pick the Roles to assign (multiple allowed; search is supported).
- Click Invite User at the bottom of the dialog.
The invitee completes signup through the email link and is automatically added to the organization. The invitation link is valid for 3 days from the time it is sent; after that it switches to Expired and you need to invite the user again.
Elice-integrated organizations (*.elice.io) join with their Elice accounts, so the User Invites menu is not shown. The Add User button under Members > Users links to the member management screen of the Elice admin portal.
When a user has multiple roles, the permissions of all of them are combined. Composing small-grained roles tends to make administration easier.
Built-in roles
Four roles are available out of the box.
| Role | Best fit |
|---|---|
| Owner | Whoever manages the whole organization |
| Contributor | Researchers and developers who create and operate VMs, storage, and networks |
| Support | Operations staff handling troubleshooting |
| Reader | Interns, auditors, external partners — anyone who only needs read access |
To create a role tailored to your organization's workflow, see RBAC > Creating a custom role.
Invitation status
Members > User Invites shows the status of every invitation.
| Status | Meaning |
|---|---|
| Pending | Invite sent; the user hasn't accepted yet |
| Signed up | User completed signup and joined the organization |
| Expired | The invitation has aged out or was cancelled; you need to re-invite |
The list shows each invite's email, roles, status, created date, expiry date, and issuer.
You can cancel a Pending invite with Cancel invite in the menu (⋮) on the right of its row. Once cancelled, the invitation link can no longer be used and the status changes to Expired.
Editing and removing users
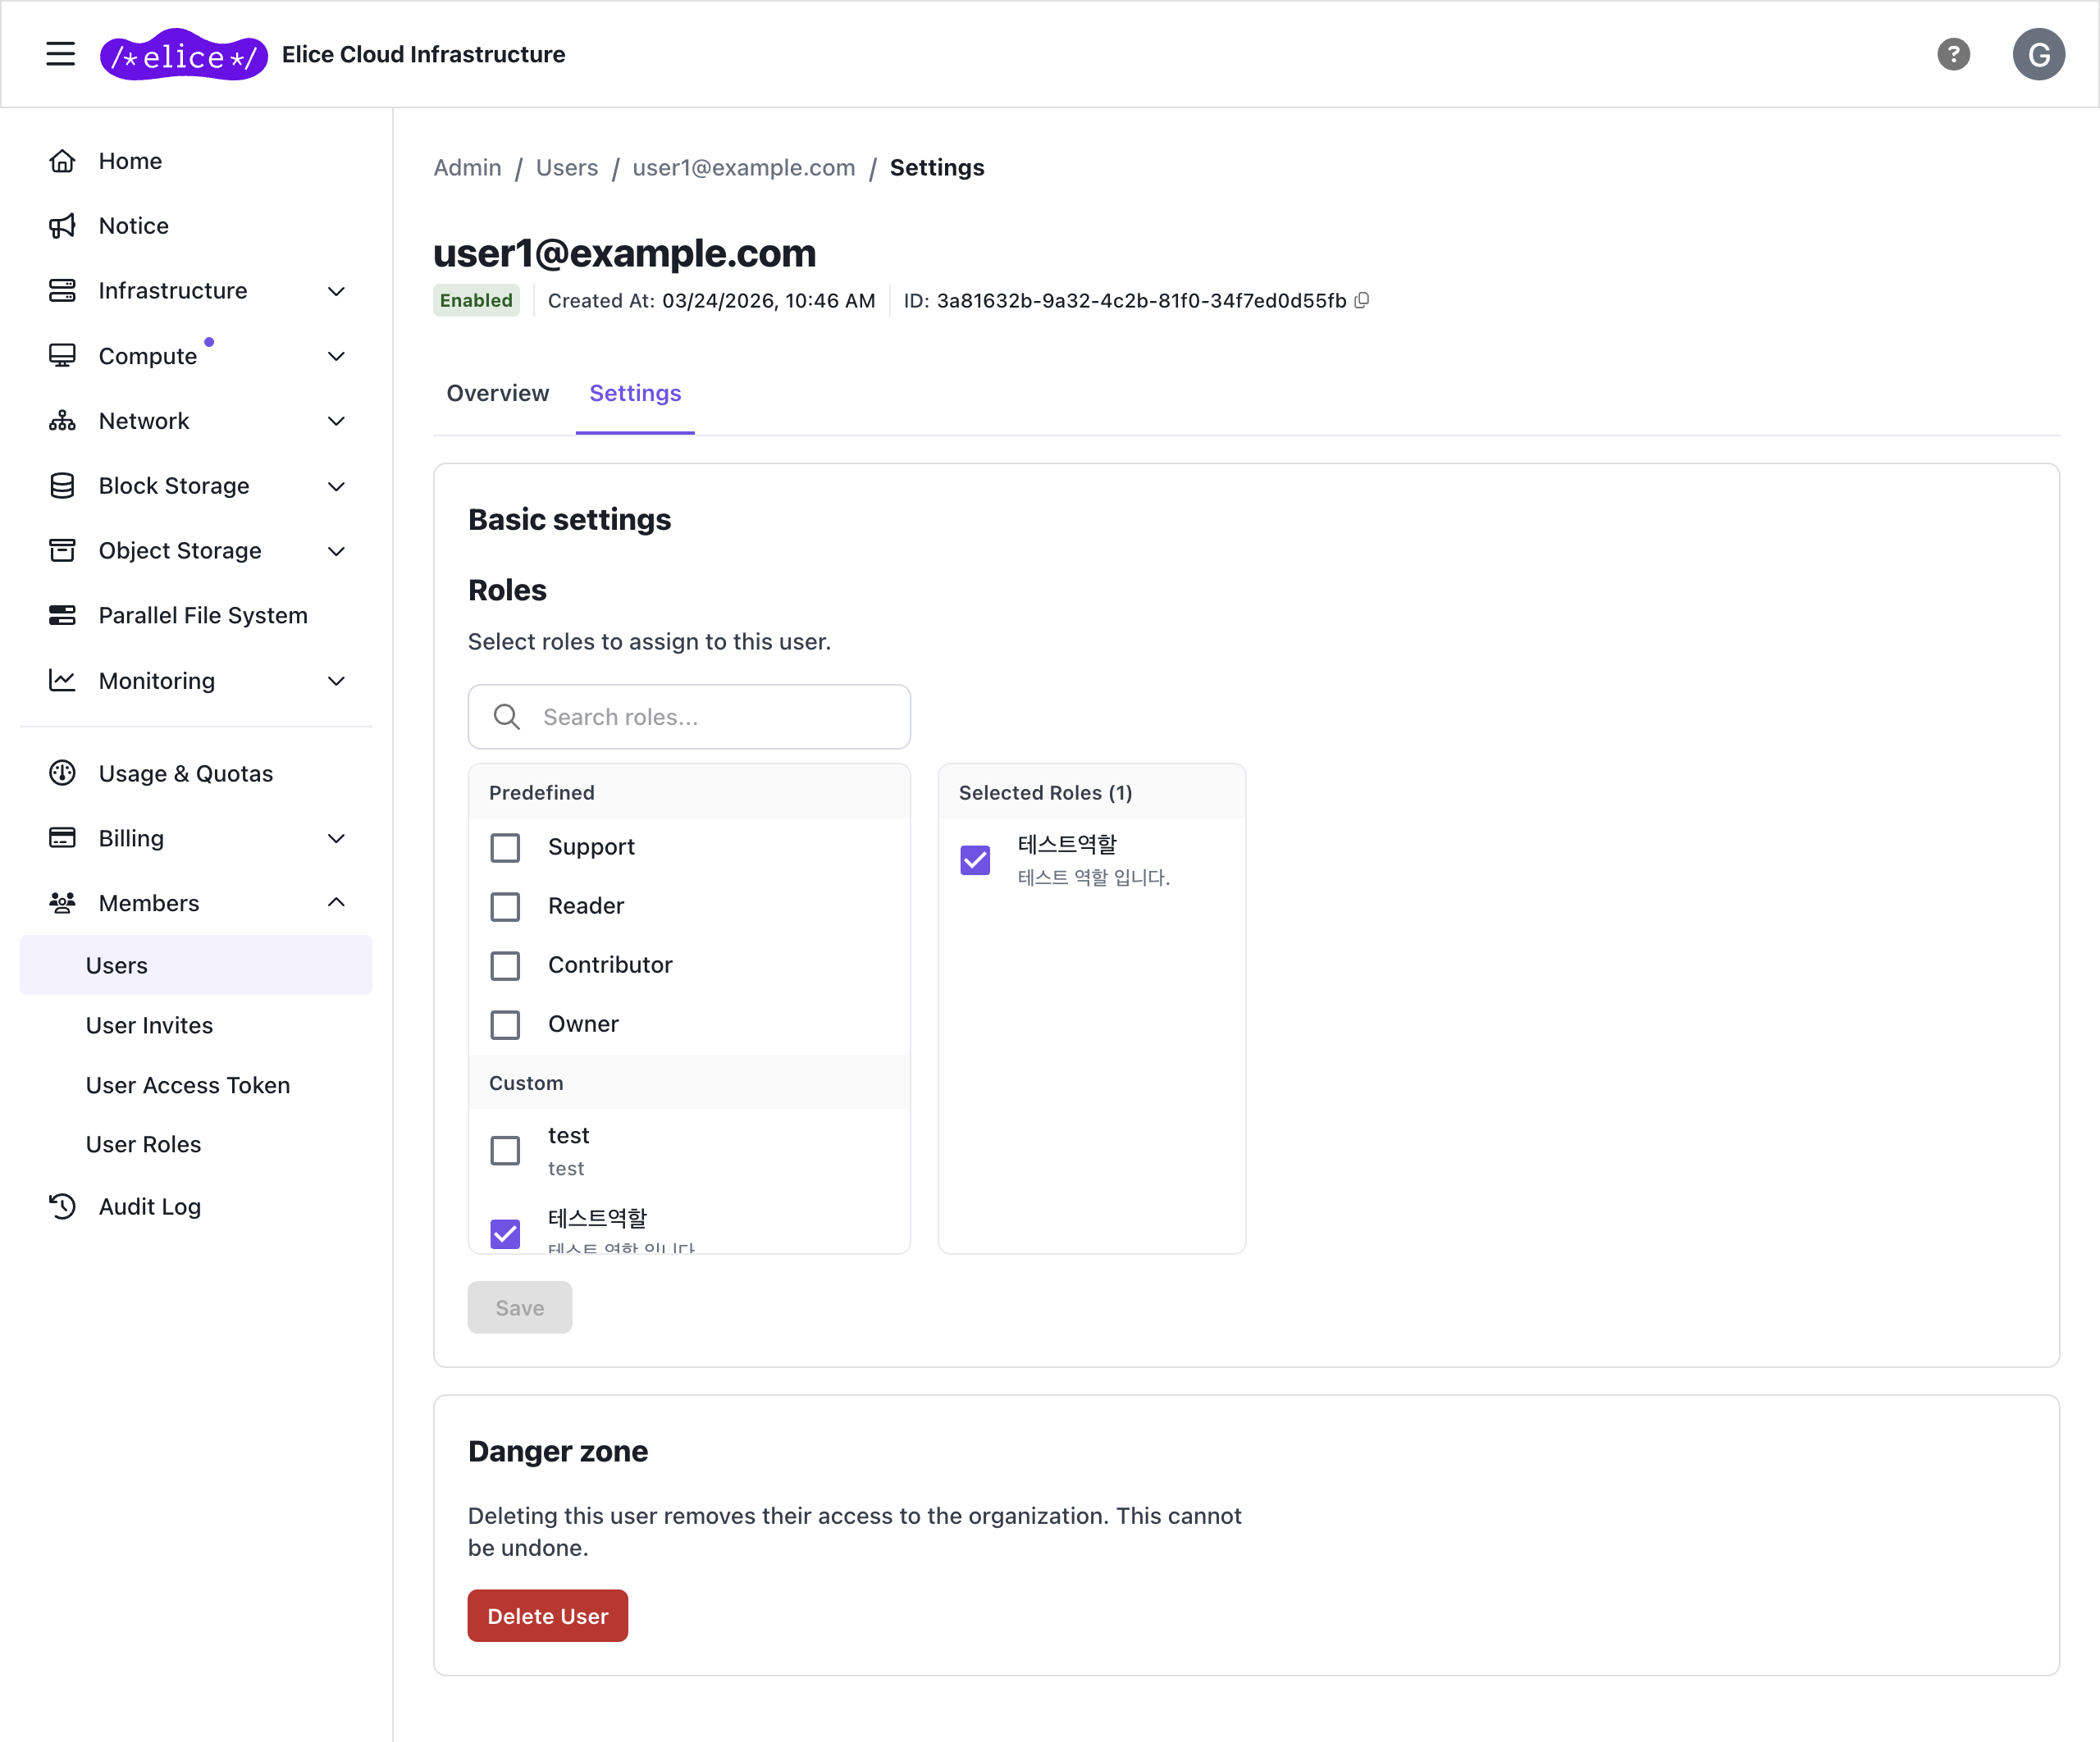
Click a user in the Members > Users list to open the detail page. The detail page has Overview and Settings tabs.
- Overview tab: see the email, roles, sign-in type, and password expiry
- Change roles: add or remove roles on the Settings tab, then Save (requires the
User.User.UPDATEpermission) - Delete: delete the user at the bottom of the Settings tab (requires the
User.User.DELETEpermission). A deleted user can no longer access the organization, and this cannot be undone.
After removal, the VMs and storage that user created remain in the organization. Hand them off to someone else before removing the user if needed.
Next steps
- Role-based access control (RBAC): per-role permissions and creating custom roles
- Access tokens: tokens for API access
- Audit log: tracking user activity