Network interface
Overview
A network interface is the virtual network card that connects a VM to a subnet. One is created automatically when you create a VM, but you can also create and manage them directly when you want to prepare one in advance or attach several to a single VM.
- A VM can have multiple network interfaces attached (and they can sit on different subnets)
- Each network interface carries one IP and one MAC
- Public IPs attach to the network interface to provide internet access
Creating a network interface
-
Under Network > Network Interface, click Create Network Interface.
-
Configure the following:
Field Description Name An identifying name (e.g. web-nic-1)Zone Must be the same zone as the VM it will attach to Subnet The subnet the interface belongs to IP Address Choose any IP inside the subnet CIDR (leave blank to auto-assign) MAC Address Auto-generated when blank; for manual entry, use 00:1B:44:11:3A:B7formatDisaster Recovery Must match the VM (disaster recovery VMs accept only network interfaces with disaster recovery enabled) IP Forwarding Allow the network interface to send/receive packets not destined to its own IP (off by default) — for NAT/router/VPN use -
Click Create.
DR VMs accept only DR-enabled network interfaces, and standard VMs accept only standard network interfaces. Mismatches are rejected at attach time.
Attaching and detaching a network interface on a VM
- Open the target VM in Compute > Virtual Machine.
- Move the VM to the Stopped state.
- On the detail page, open the Settings tab and select Network.
- Add a network interface you created earlier with Attach existing interface, or create and add a new one with Create new interface.
- Save, then restart the VM.
To detach, disconnect the network interface on the same screen. The network interface resource remains after detachment and can be reattached to a different VM.
You can do the same from the network interface side. On the Settings tab of the network interface detail page, select a VM in Attached Machine under Basic settings or click Disconnect, then Save. The VM must be stopped before you can disconnect it.
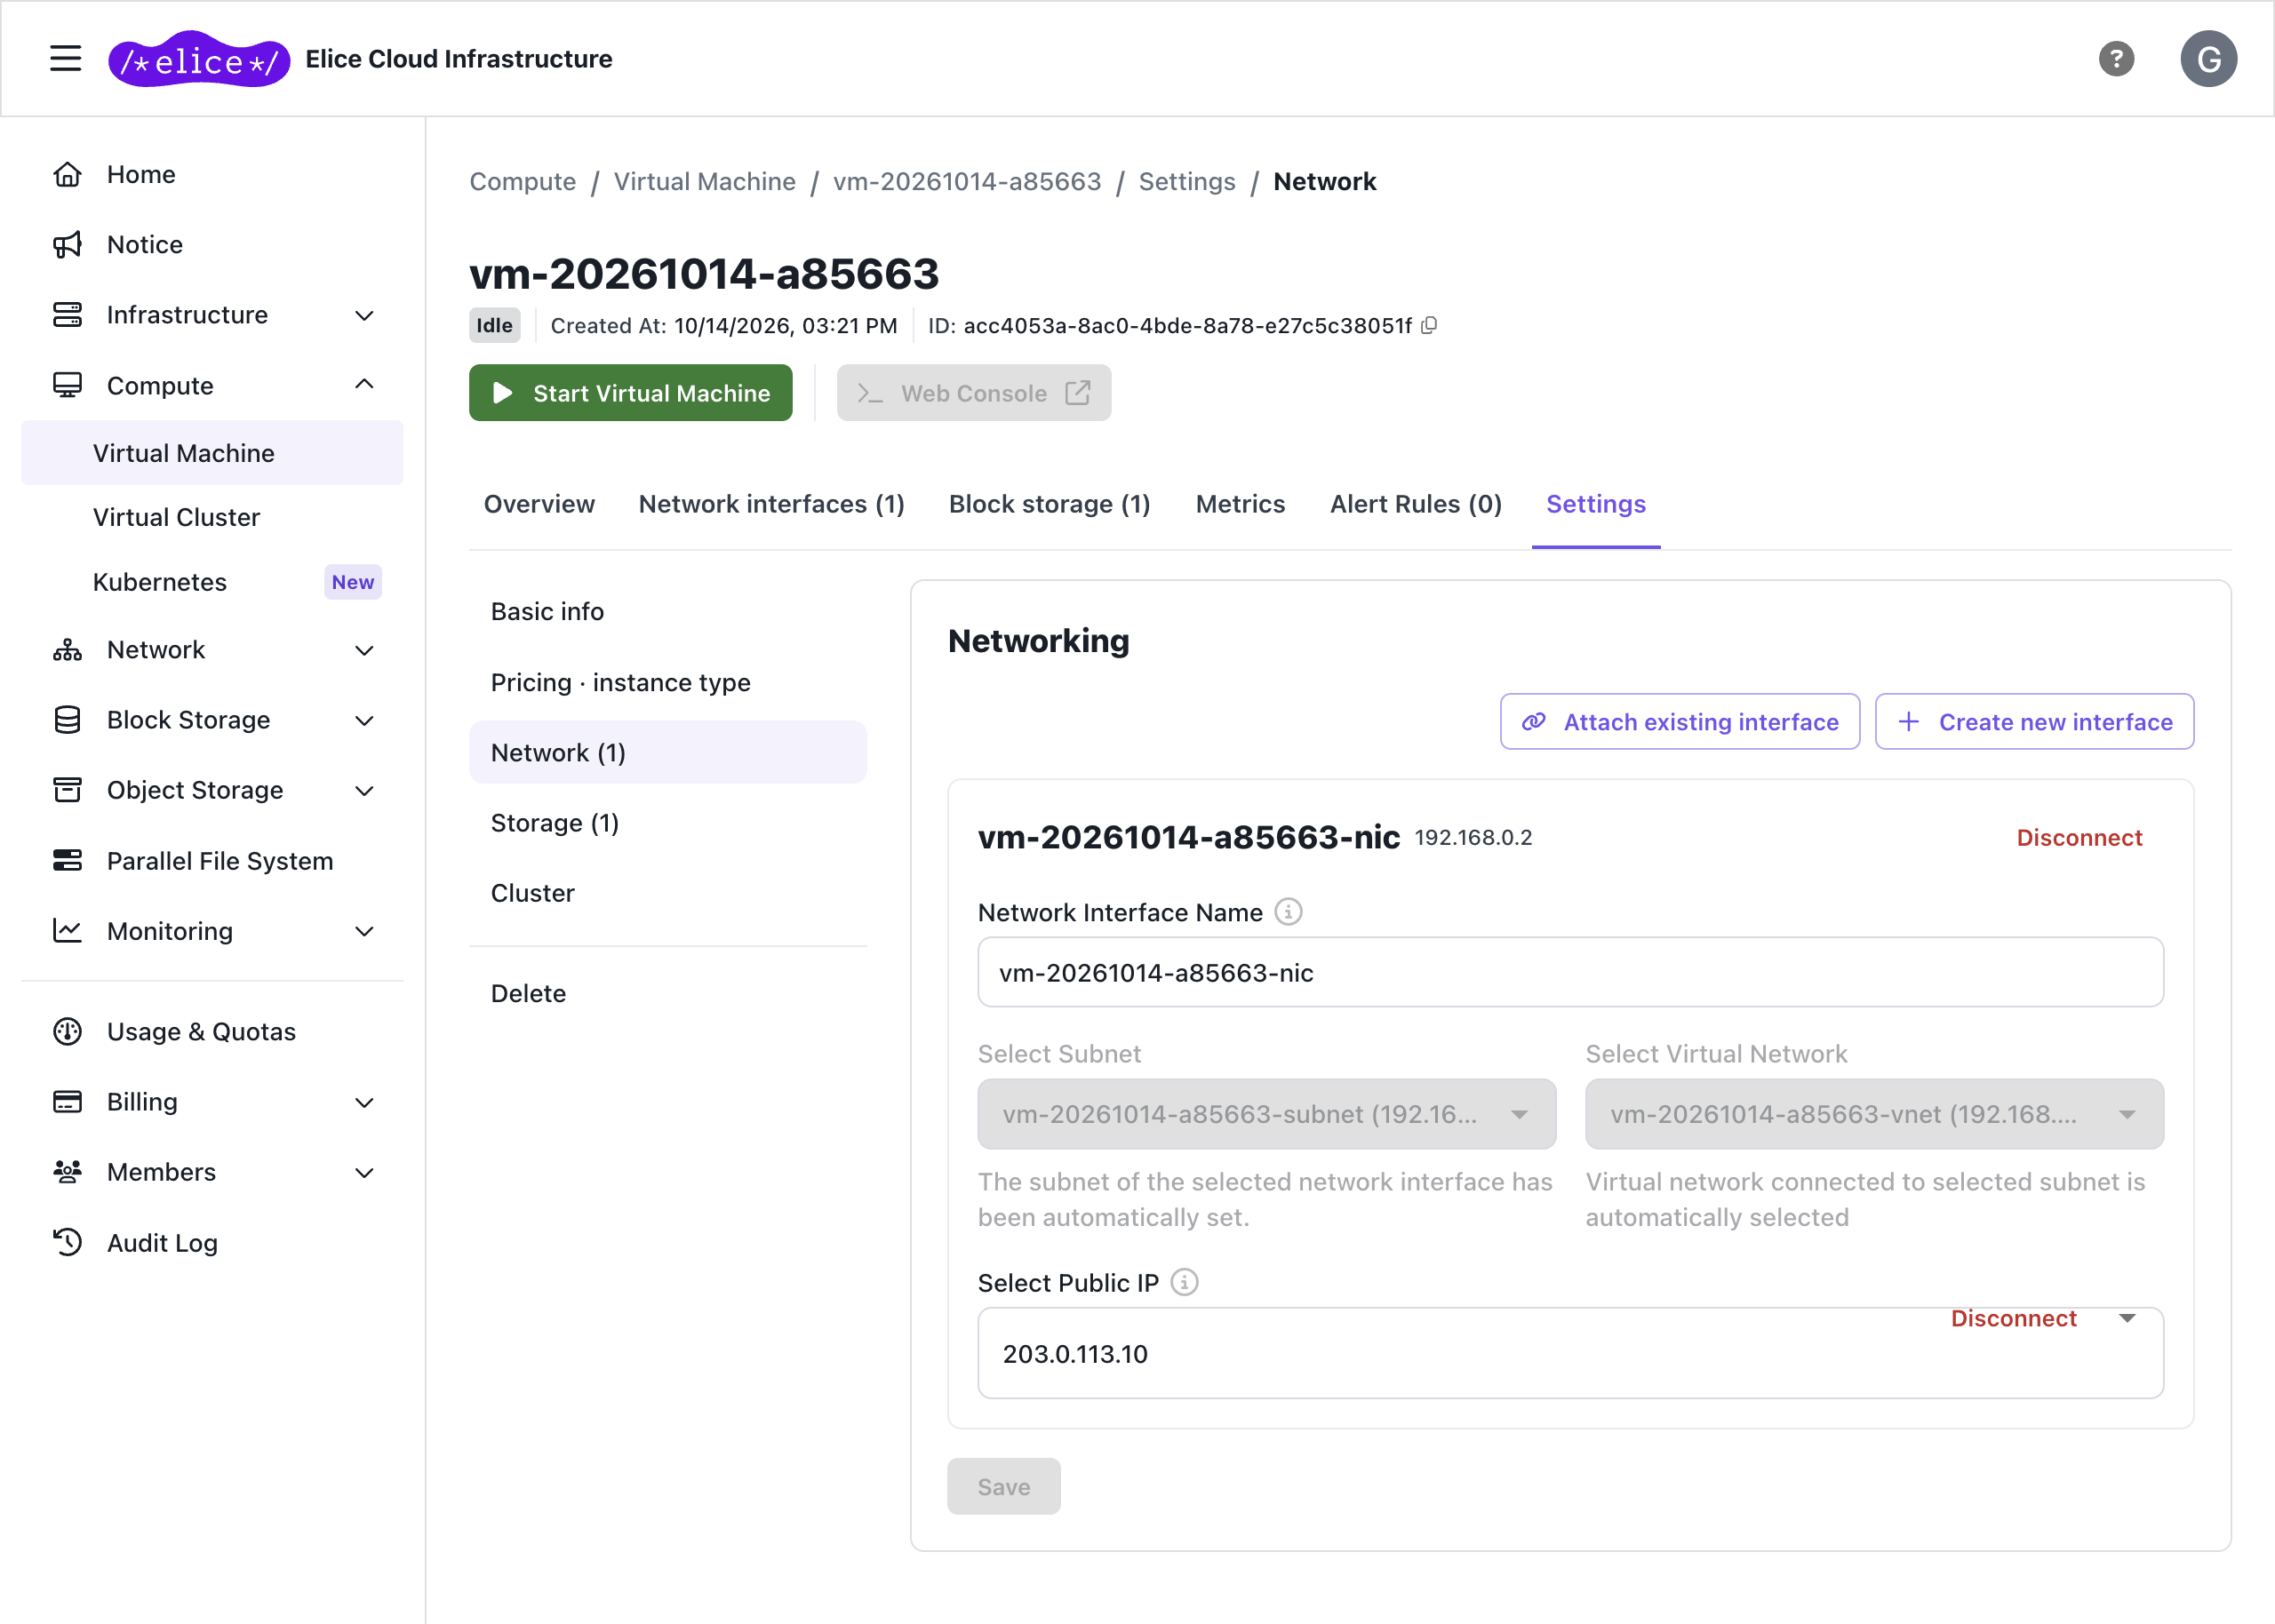
Attaching a public IP
Public IPs attach to a VM via the network interface. See Public IP for the detailed procedure.
IP forwarding
By default, a network interface drops packets whose destination IP does not match its own IP. To use a VM as a NAT gateway, software router, or VPN appliance—relaying traffic bound for other destinations—you must enable IP Forwarding.
- When enabled, the network interface can send and receive packets that are not addressed to its own IP.
- Configure it under the IP Forwarding field when creating the network interface; after creation, you can change it under Basic settings on the detail page's Settings tab.
- You must also enable kernel IP forwarding inside the VM's OS for packets to actually route (e.g.
net.ipv4.ip_forward=1on Linux).
IP forwarding lets the network interface pass traffic with arbitrary source and destination addresses. Enable it only when necessary, and restrict traffic with Firewall rules.
Managing network interfaces
The Network > Network Interface list shows:
| Column | Description |
|---|---|
| Name | Network interface identifier |
| IP / MAC | Assigned private IP and MAC |
| Attached VM | The VM it's attached to (blank if unattached) |
| Subnet | The subnet it belongs to |
| Status | Active / Deleted |
Delete a network interface at the bottom of the Settings tab on its detail page. The attached VM and public IP are detached as part of deletion, so you don't need to detach them first. However, if the attached VM is running, you must stop it before you can delete the network interface.
A network interface registered as a server in a load balancer rule cannot be deleted. The same applies when deleting a VM together with its network interfaces. Remove the server from the load balancer rule or delete the load balancer first.