Getting Started with Run Box
To start using Run Box you must create a predefined instance. This document walks you through creating and running an instance.
Creating an Instance
In Run Box, open the Instances page and click Create Instance.
Choose an Instance Type
Pick from the instance types available to your organization. The selectable types include the defaults and any types configured by your organization administrator.
Run Box offers a variety of instance types to match the nature of your workload — from high-performance AI training on GPUs to lightweight model testing and general CPU workloads.
The following are all instance types offered by Elice Cloud.
GPU
| Instance | GPU / Accelerator | vRAM | CPU (vCore) | RAM |
|---|---|---|---|---|
| G-NBTHS-1440 | 8 × B200 180GB SXM | 1440GB | 192 vCore | 1920 GiB |
| G-NBTHS-720 | 4 × B200 180GB SXM | 720GB | 96 vCore | 960 GiB |
| G-NBTHS-360 | 2 × B200 180GB SXM | 360GB | 48 vCore | 480 GiB |
| G-NBTHS-180 | 1 × B200 180GB SXM | 180GB | 24 vCore | 240 GiB |
| G-NHHS-640 | 8 × H100 80GB SXM | 640GB | 192 vCore | 1920 GiB |
| G-NHHS-320 | 4 × H100 80GB SXM | 320GB | 96 vCore | 960 GiB |
| G-NHHS-160 | 2 × H100 80GB SXM | 160GB | 48 vCore | 480 GiB |
| G-NHHS-80 | 1 × H100 80GB SXM | 80GB | 24 vCore | 240 GiB |
| G-NAHP-320 | 4 × A100 80GB PCIe | 320GB | 64 vCore | 768 GiB |
| G-NAHP-160 | 2 × A100 80GB PCIe | 160GB | 32 vCore | 384 GiB |
| G-NAHP-80 | 1 × A100 80GB PCIe | 80GB | 16 vCore | 192 GiB |
CPU (Memory Optimized)
| Instance | CPU | RAM |
|---|---|---|
| M-16 | 16 vCore | 64 GiB |
| M-8 | 8 vCore | 32 GiB |
| M-4 | 4 vCore | 16 GiB |
| M-2 | 2 vCore | 8 GiB |
CPU (Compute Optimized)
| Instance | CPU | RAM |
|---|---|---|
| C-16 | 16 vCore | 32 GiB |
| C-8 | 8 vCore | 16 GiB |
| C-4 | 4 vCore | 8 GiB |
| C-2 | 2 vCore | 4 GiB |
⚠️ Note: Only the instance types configured by your organization administrator are shown — not all types are necessarily available. If you need additional types, contact your administrator.
Choose a Runtime Environment
When creating a Run Box instance you can pick a runtime environment that matches your use case. Each environment ships with preinstalled development tools and packages so you can start developing or experimenting right away with no setup.
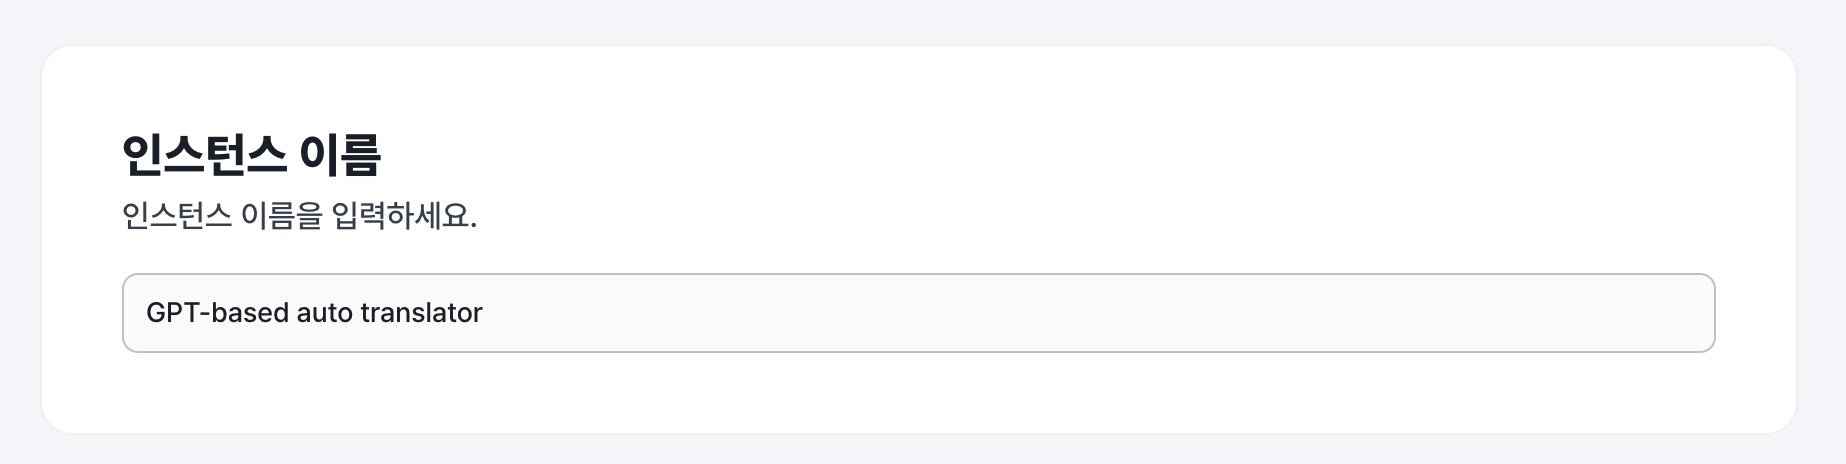
Enter a name for the instance you want to create, then pick a runtime environment that fits the selected instance type.
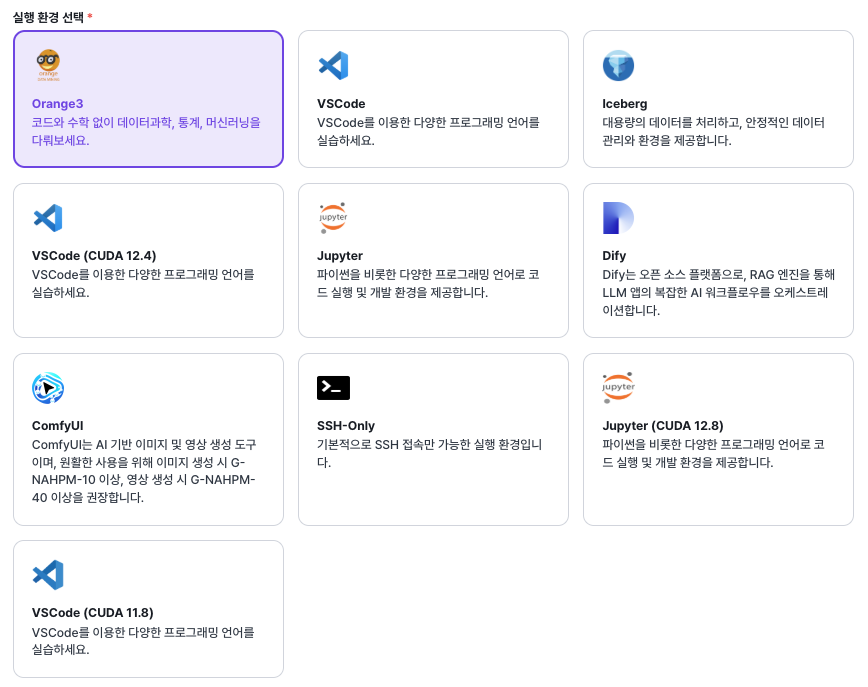
| Use case | Recommended environment |
|---|---|
| General development / projects | VS Code |
| GPU-based deep learning | VS Code (CUDA) / Jupyter (CUDA) |
| Data analysis & teaching | Jupyter |
| Large-scale data management | Iceberg |
| Generative image / video | ComfyUI |
| LLM / RAG applications | Dify |
| Operating your own server | SSH-Only |
Connect Buckets and Choose Storage Options
Run Box supports Data Hub bucket connections and storage sizing so you have ample space and easy access to external data. At this step you configure the storage capacity and data access settings you need, and the instance is ready to create.
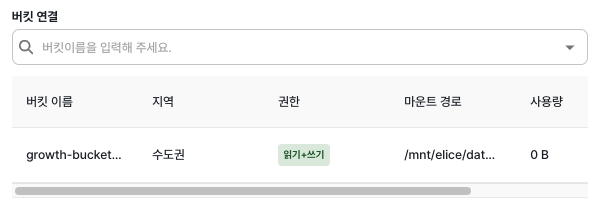
Connect a bucket created in Elice AI Cloud Data Hub to access your data easily. The selected bucket is mounted automatically into a path inside the instance.
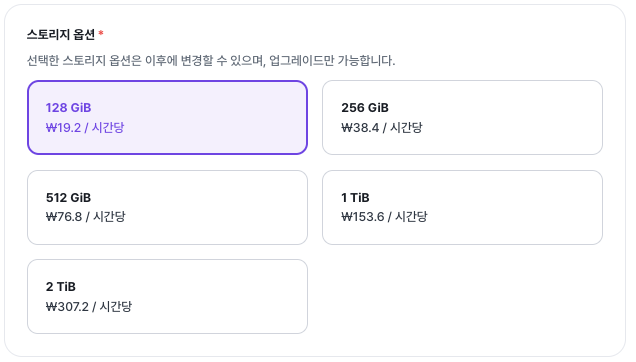
Choose the block storage capacity to use when running the Run Box. Storage is used for working data, model checkpoints, cache files, and so on. Storage is billed per hour, and the price depends on the size you choose.
⚠️ Note: The selected storage capacity can be expanded later, but once expanded it cannot be reduced.
Running an Instance
Instances created in Run Box are launched and accessed from the instance list. Follow the steps below to start an instance and then begin working through the web runtime.
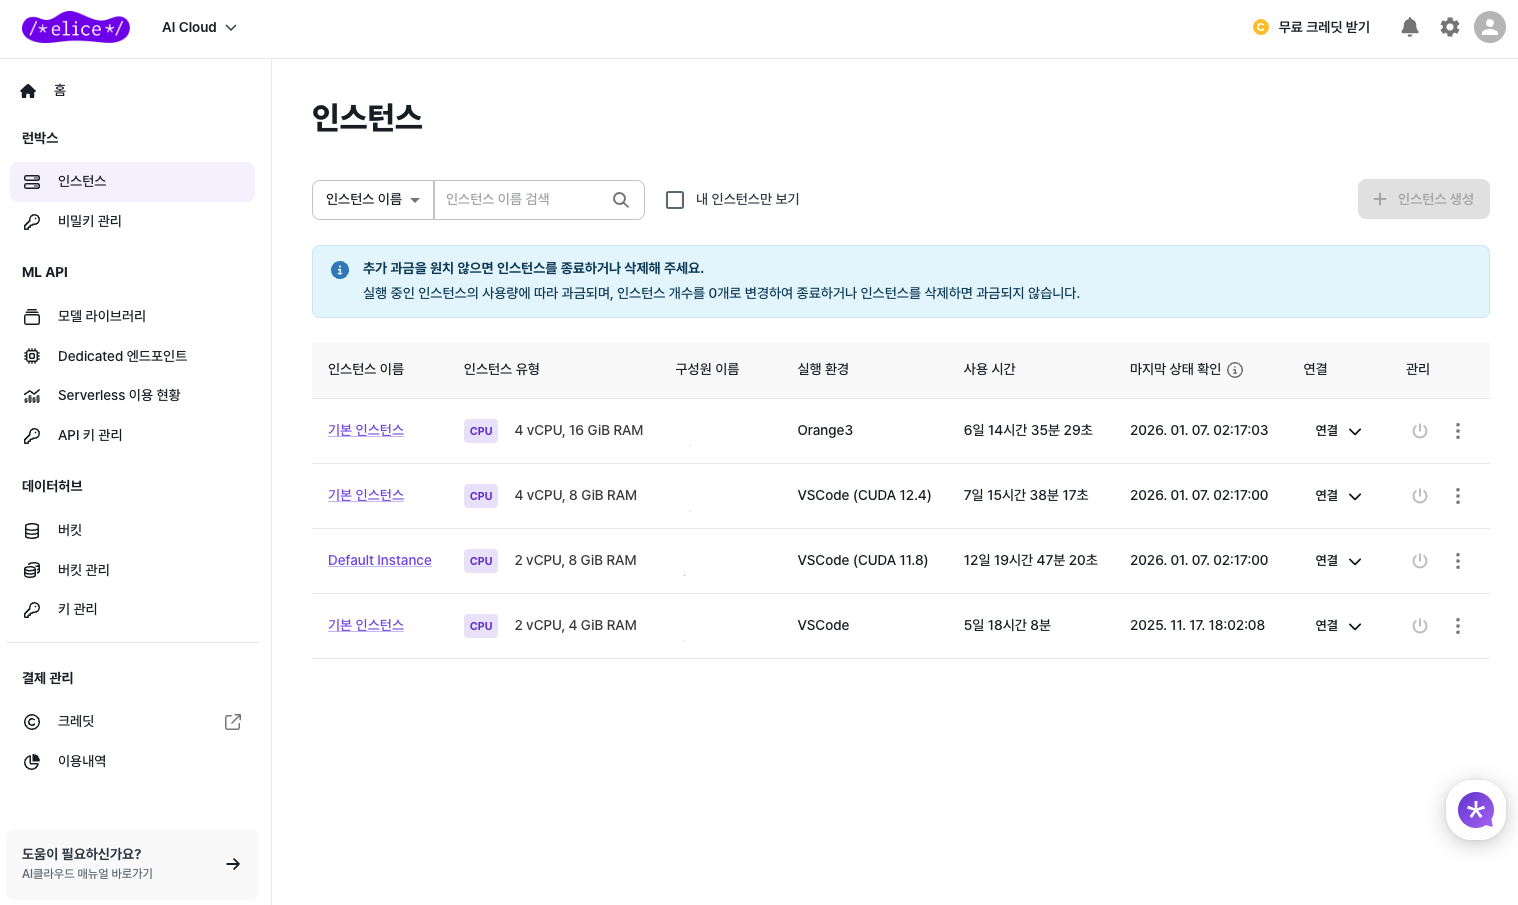
On the Instances page you can see your current instances. Pick the one you want to run.
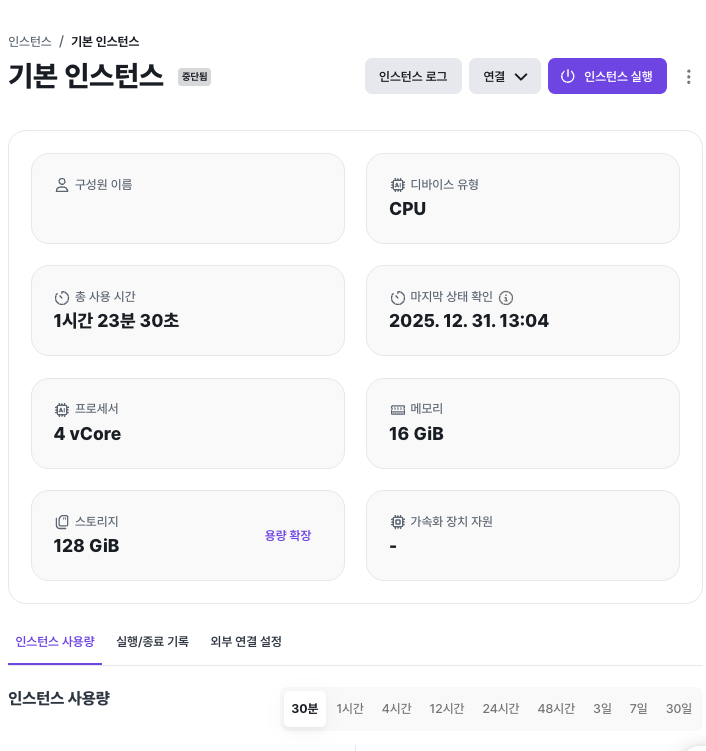
Selecting an instance opens its detail page, where you can see metadata such as device type, CPU/RAM, storage capacity, and total usage time. From here, click Run Instance to start it.
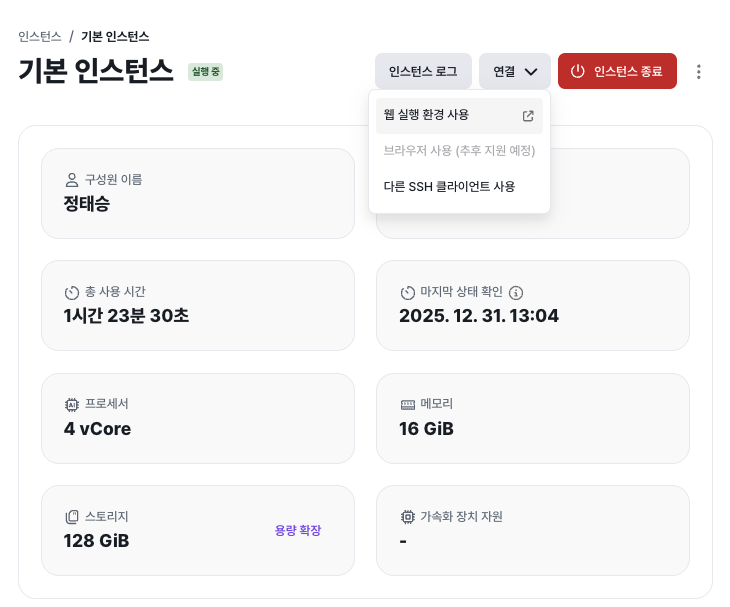
How to Connect
Once the instance is running, the status at the top changes to "Running". From the Connect menu you can choose one of the following access methods.
1. Web runtime
Connect directly to the web-based runtime environment. No extra setup is required — it runs straight in the browser, with an intuitive web UI.
You can immediately use the runtime you selected (VS Code, Jupyter, Orange3, etc.). This is suitable for general users and teaching/lab scenarios.
2. Use another SSH client
Connect to the instance directly with an external SSH client. Use this when you need terminal-based work, custom environment setup, or more advanced development workflows.
For the full SSH-Only setup, see the SSH Connection page.
Stopping an Instance
Use the menu at the top of the instance detail page to stop the instance. Running instances are billed by usage time, so we recommend stopping them when you're done to avoid unnecessary cost.
⚠️ Warning: Stopping an instance does not stop storage charges. To stop storage charges, delete the instance.
⚠️ Warning: After an instance is stopped, restarting it may not be immediately possible depending on GPU availability. With Reserved mode, immediate restart is guaranteed.
Deleting an Instance
From the more-options menu at the top of the instance detail page you can delete the instance after stopping it.
⚠️ Note: The instance must be in the stopped state before it can be deleted.
⚠️ Warning: Deleting an instance may also delete the block storage attached to it.
⚠️ Warning: Deletion is irreversible. Be sure to back up any important data before deleting.
Things to Note
- The runtime may take a moment to load.
- The data you can access depends on your permissions and which buckets are connected.