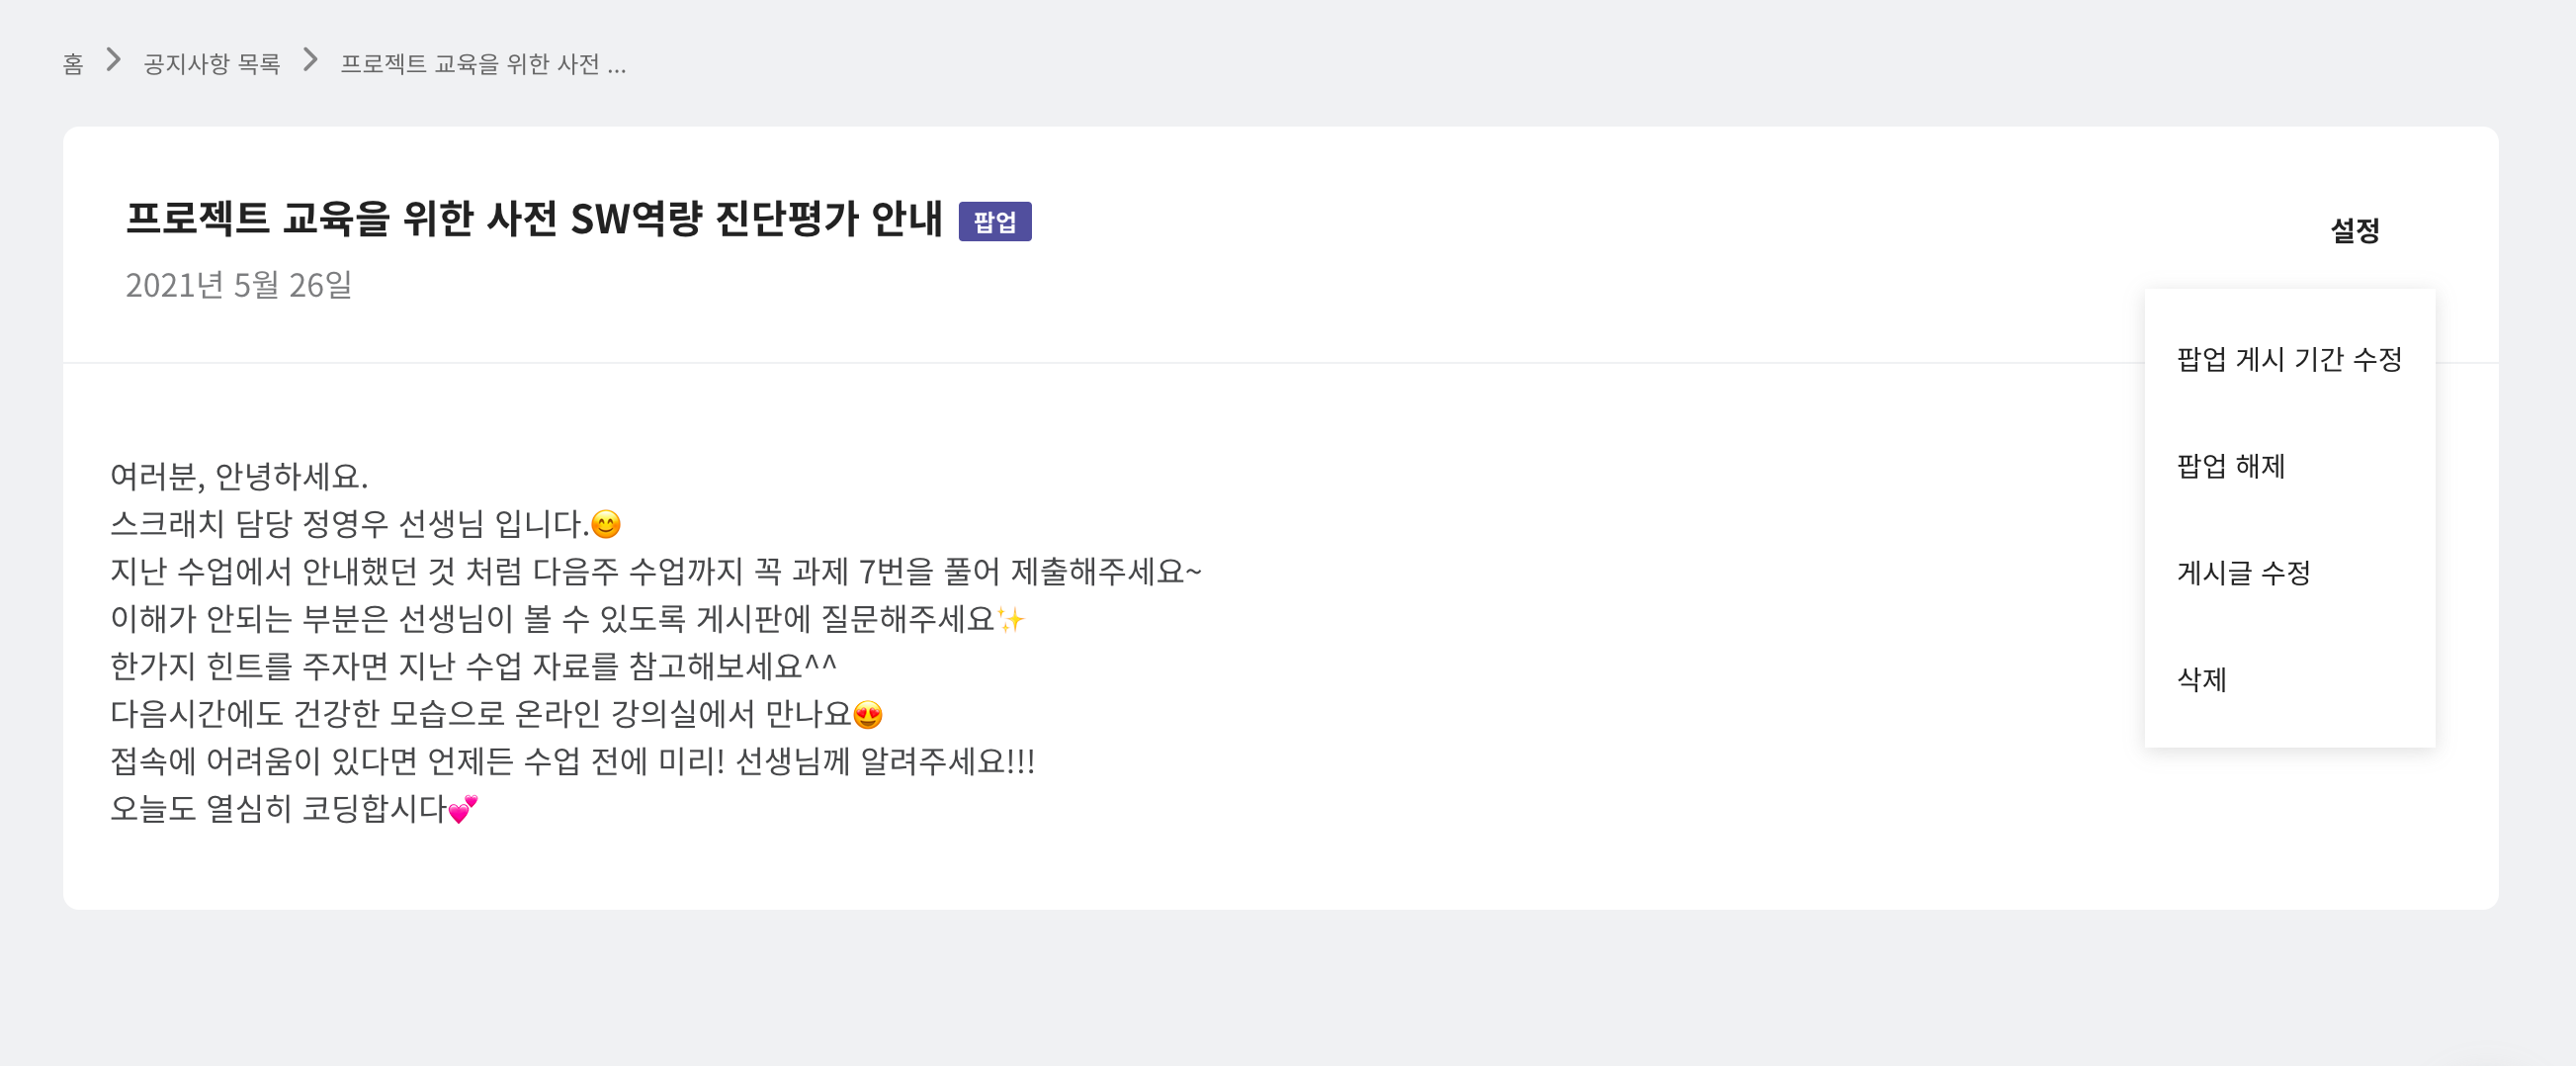
Notice Management
You can post announcements or display them as pop-ups to notify students. The posted announcements will appear at the top of the home page.
Adding a Notice
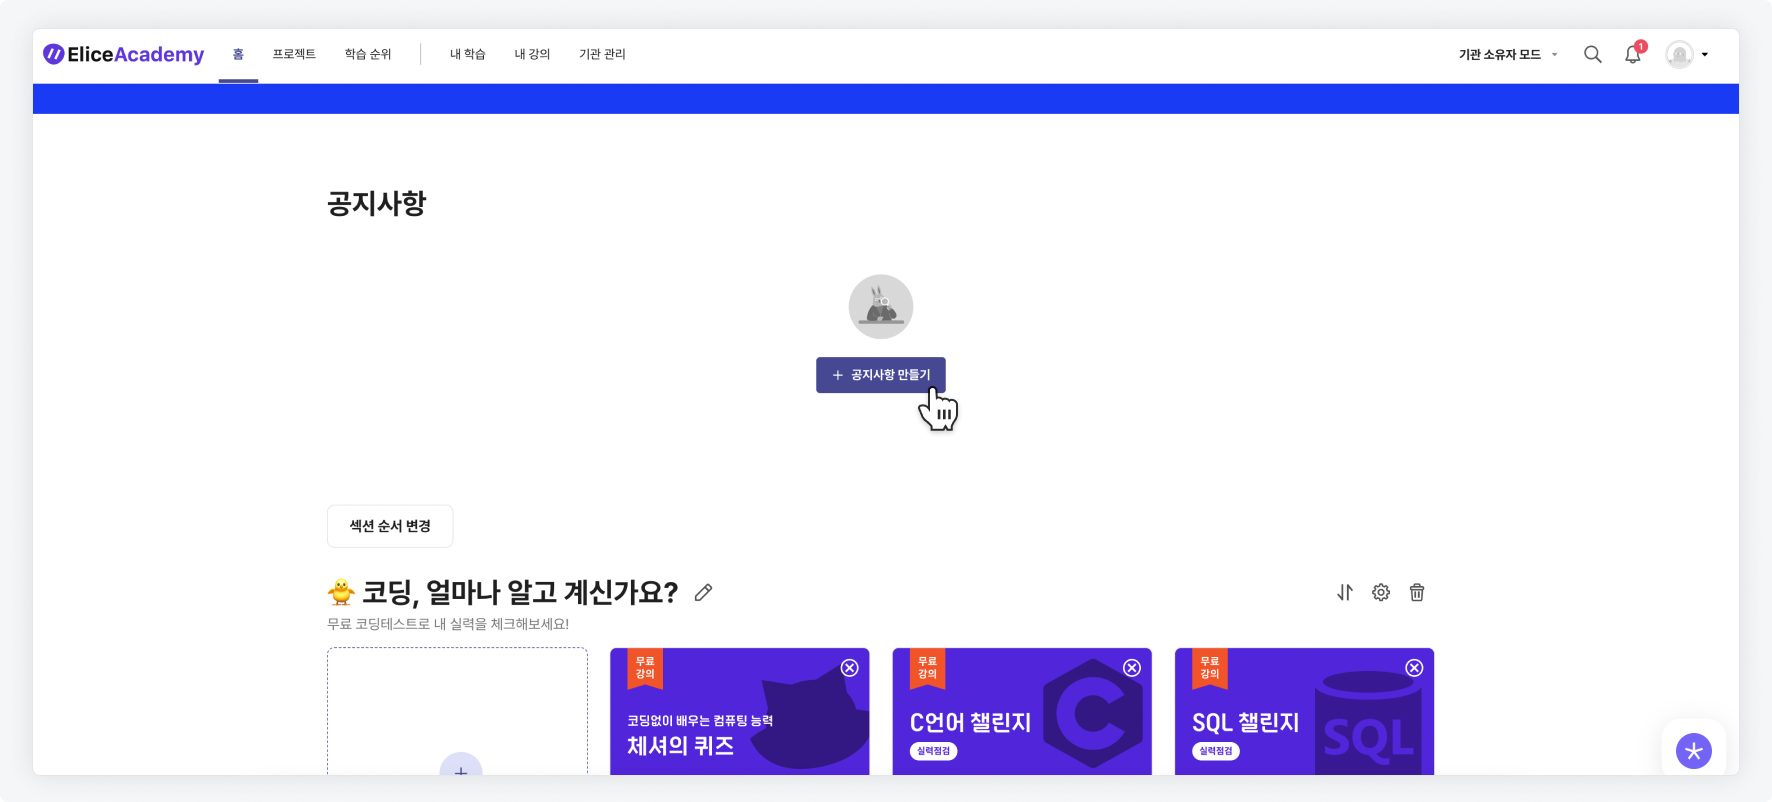
- If there are no notices created, click the 'Create Notice' button in the home announcements section.
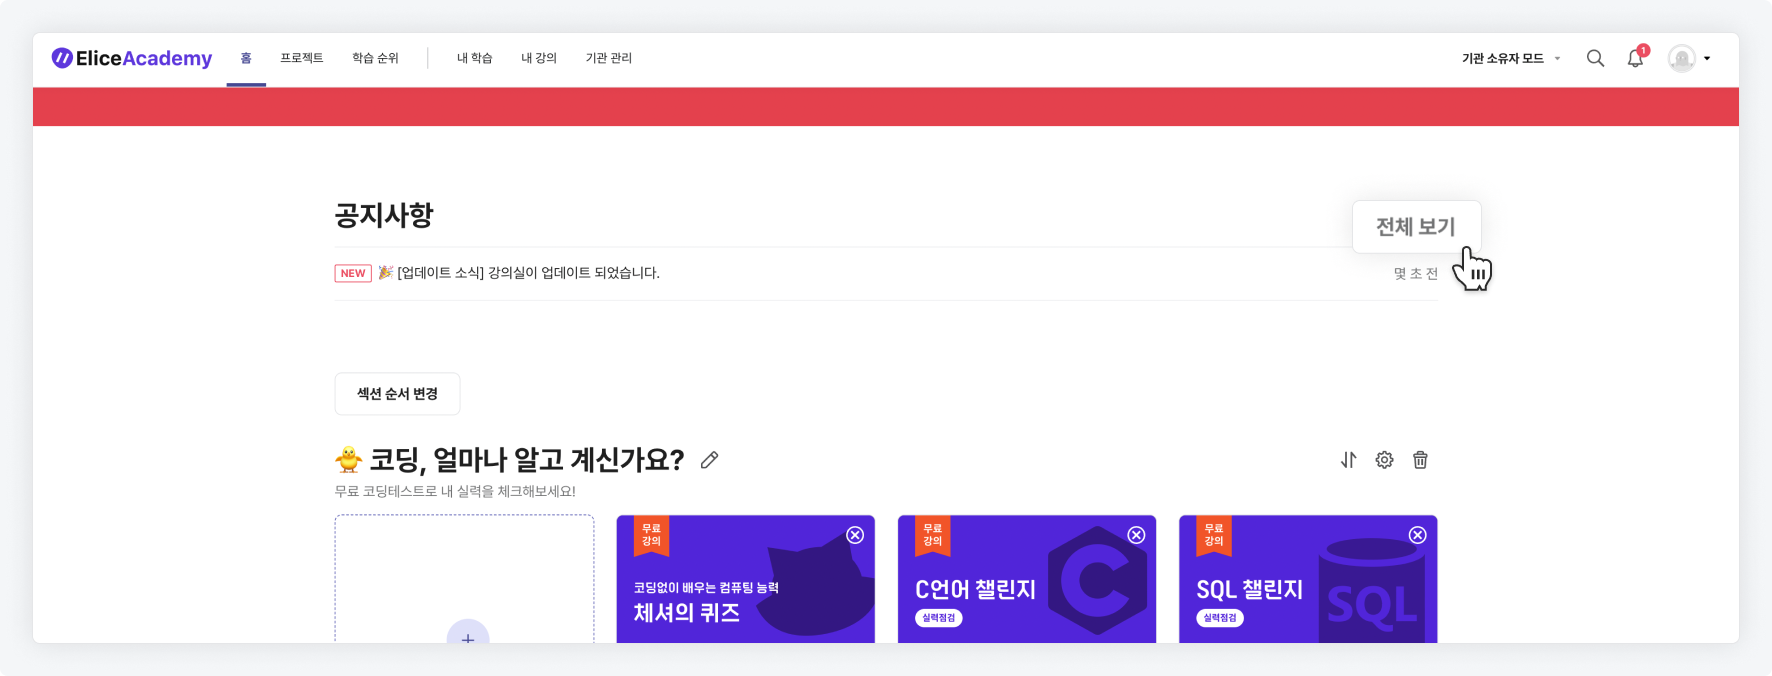
- If there are existing notices, click the 'View All' button located at the top right of the home announcements section to navigate to the announcements list page.
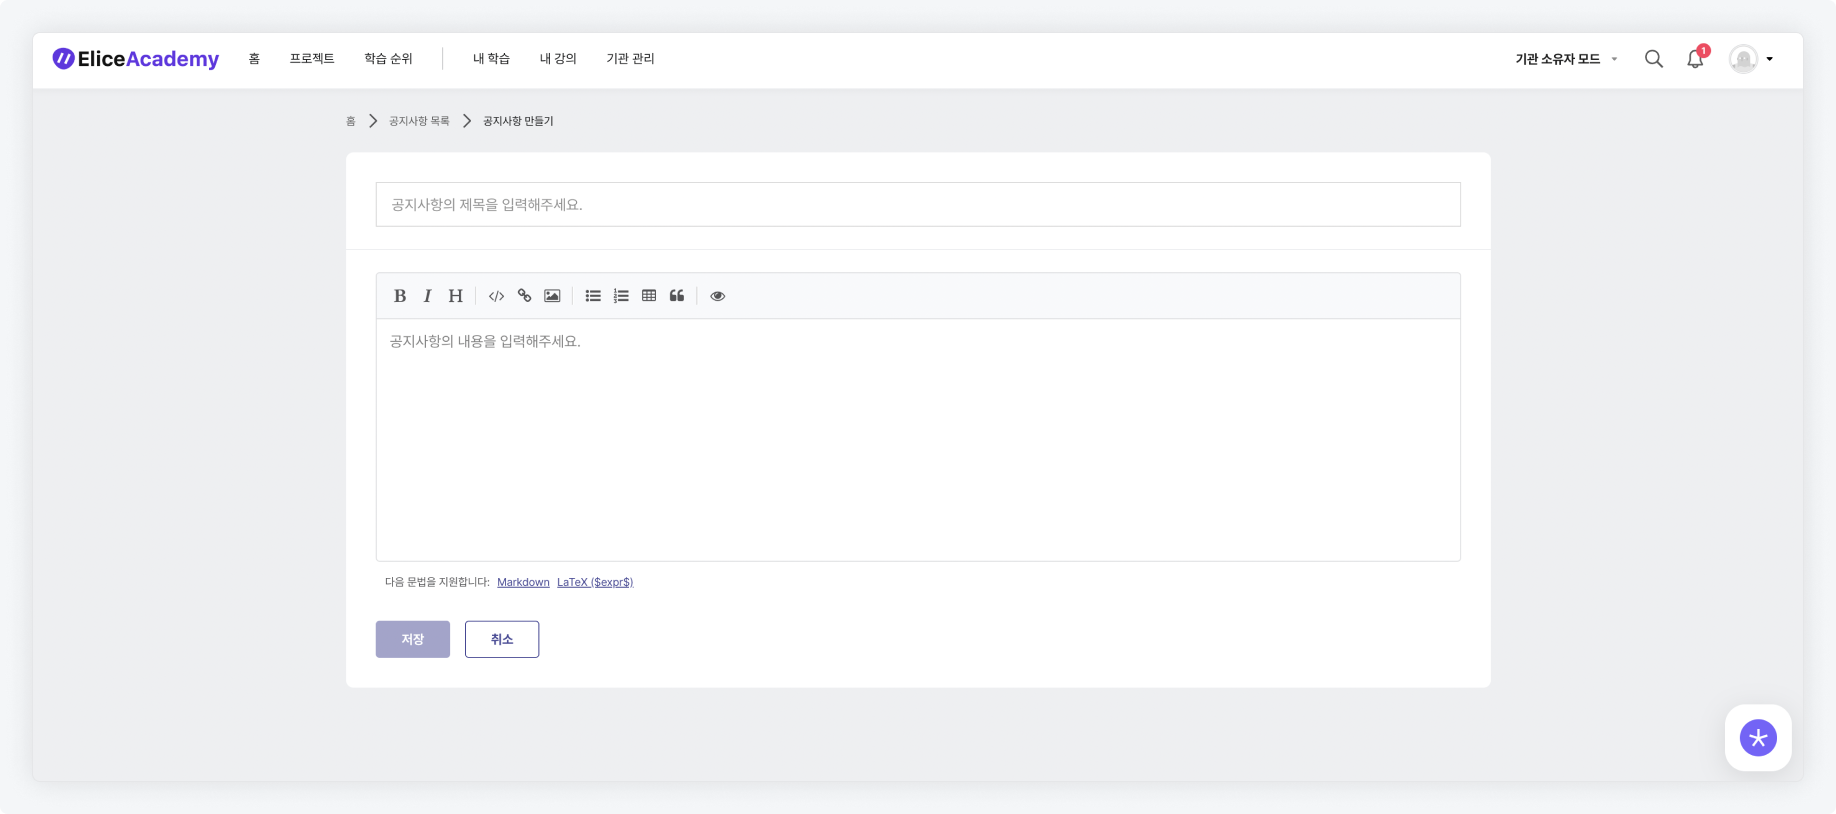
- Click the 'Create Notice' button at the top right of the announcements list.

- After following either step 1 or 2, enter the title and content in the notice creation screen and click the 'Save' button.
※ A maximum of 3 recently updated posts will appear in the home announcements section.
※ Recently updated notices will have a 'NEW' badge for 3 days.
※ If no notices are registered, the announcements section will not be visible to students.

Managing Popup Notices
- If you set a popup notice, it will appear as a pop-up when accessing the homepage.
- Popup notices can be created after registering the announcement, by setting the registered announcement as a popup.
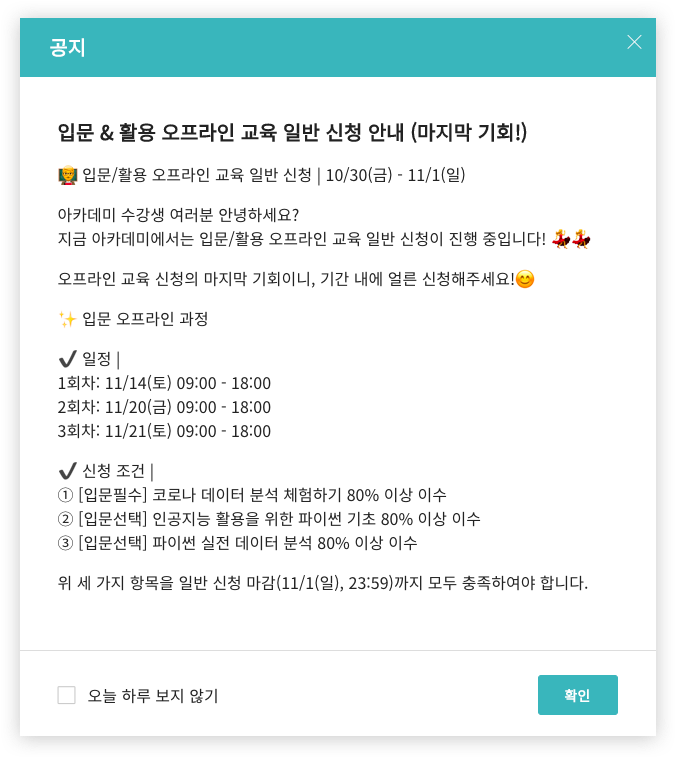
Adding a Popup Notice
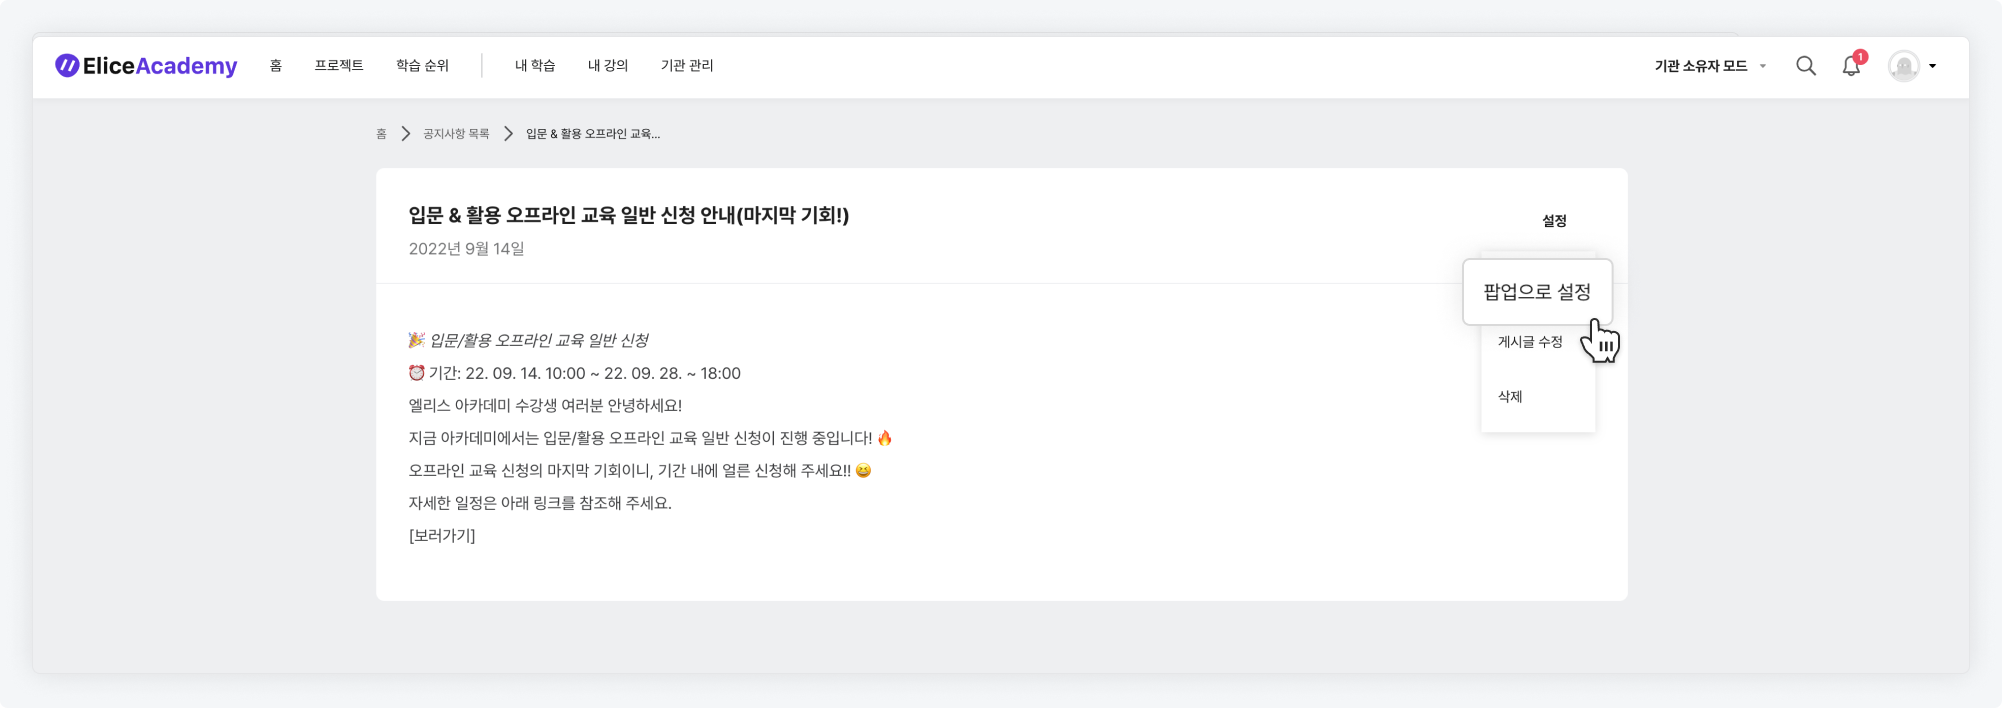
- Click on the notice you want to set as a popup to enter the detailed page.

- Click the 'Settings' button to the right of the title, and then click 'Set as Popup'.
- Set the start and end dates for the post, then click 'Save' to save the settings.
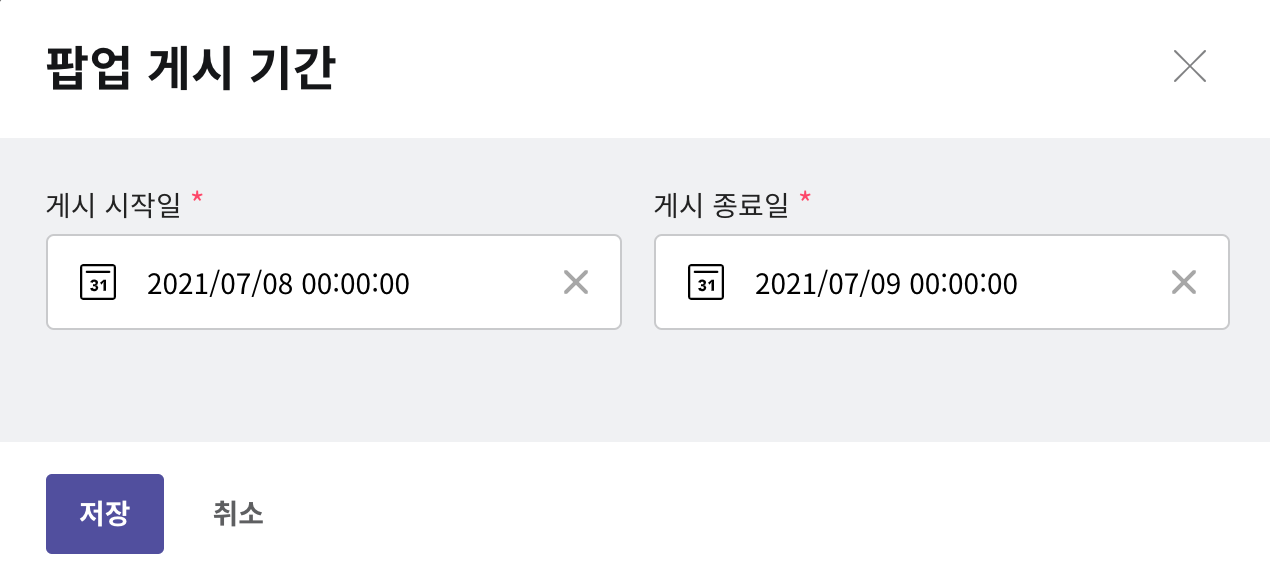
※ Only one popup can be set at a time, and you cannot set a popup with overlapping dates with an already set popup.
Managing Popup Notices
- Click on the post that is set as a popup.
- Click the 'Settings' button to the right of the title to modify the posting period or to disable the popup.
