Home Screen Settings
This document explains how to configure various options on the home screen.
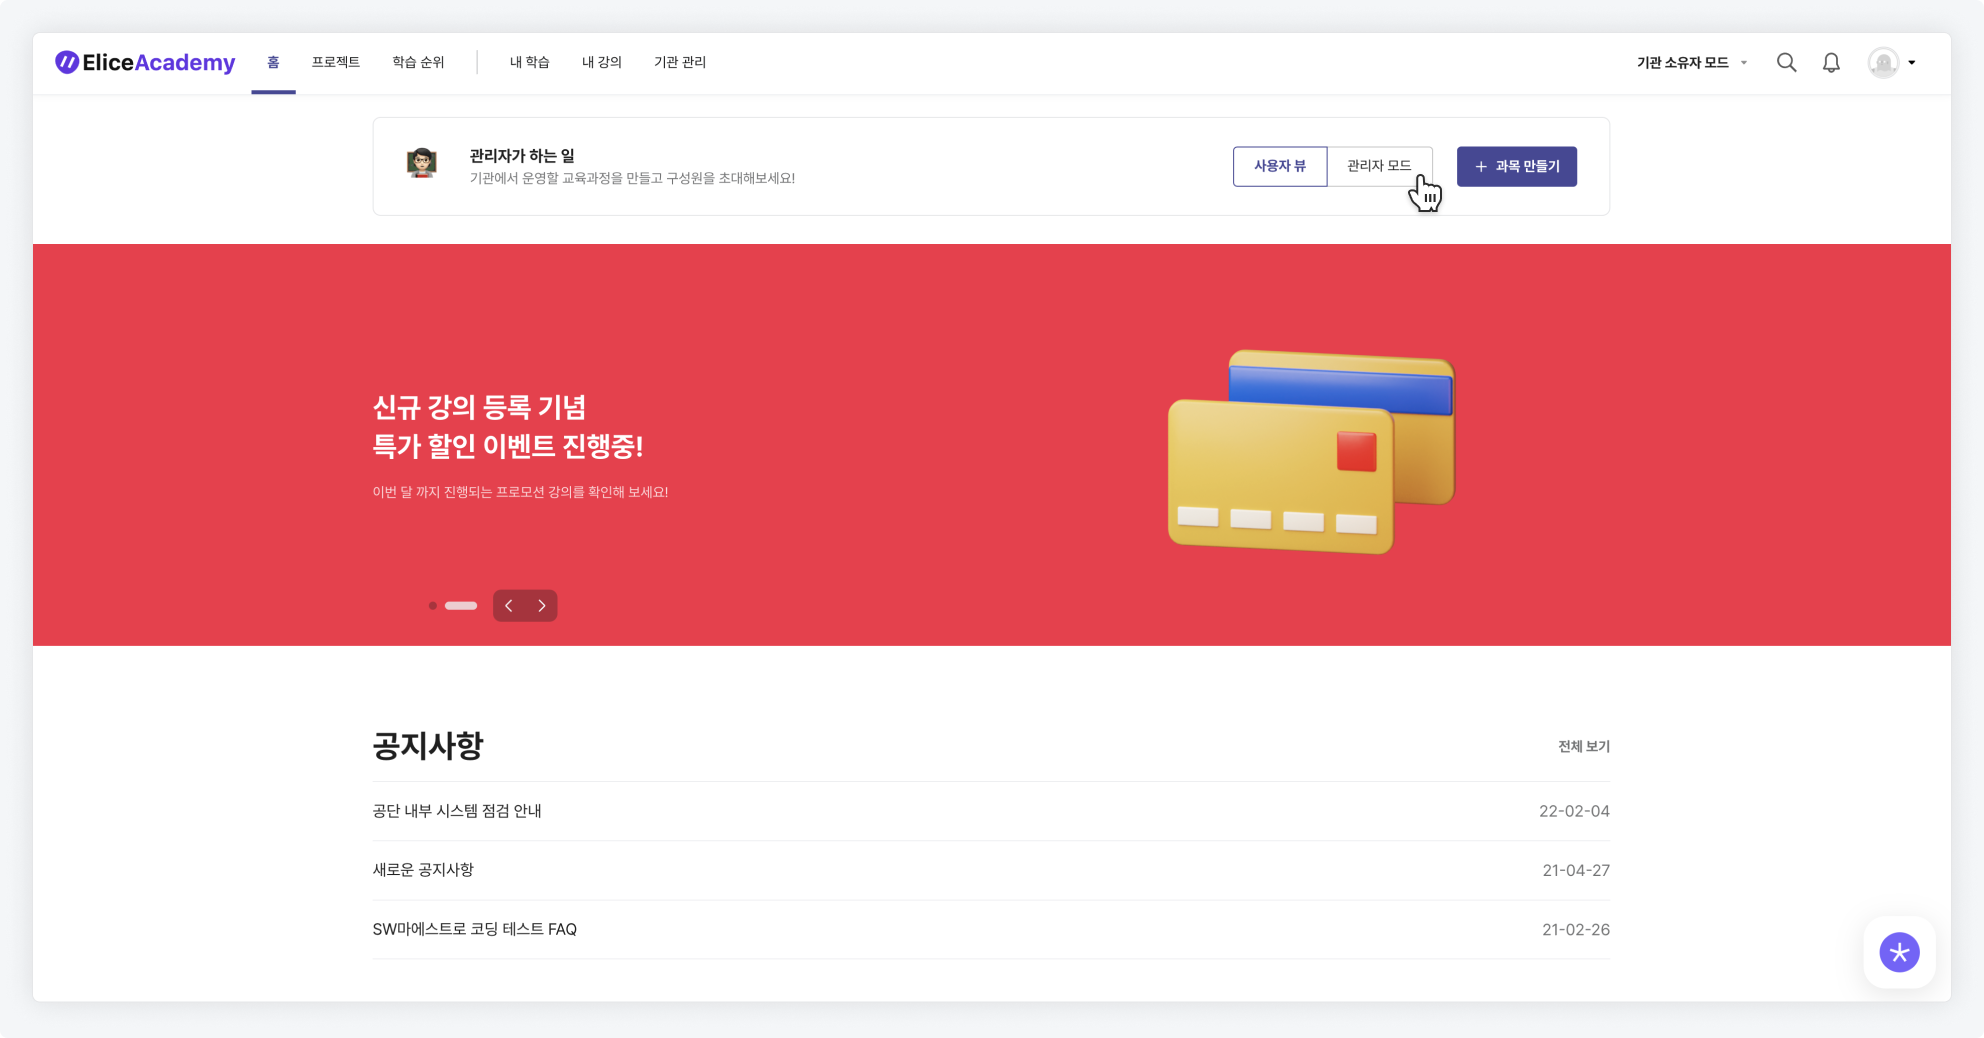
- Start the home settings through the 'Admin Master Section' located at the top of the home screen.
- Select 'Admin Mode' to configure various options for the home.
- Select 'User View' to immediately check the screen as seen by general users, not administrators.
Setting Up the Main Banner
In Admin Mode, various buttons will appear above the main banner where you can decorate it.
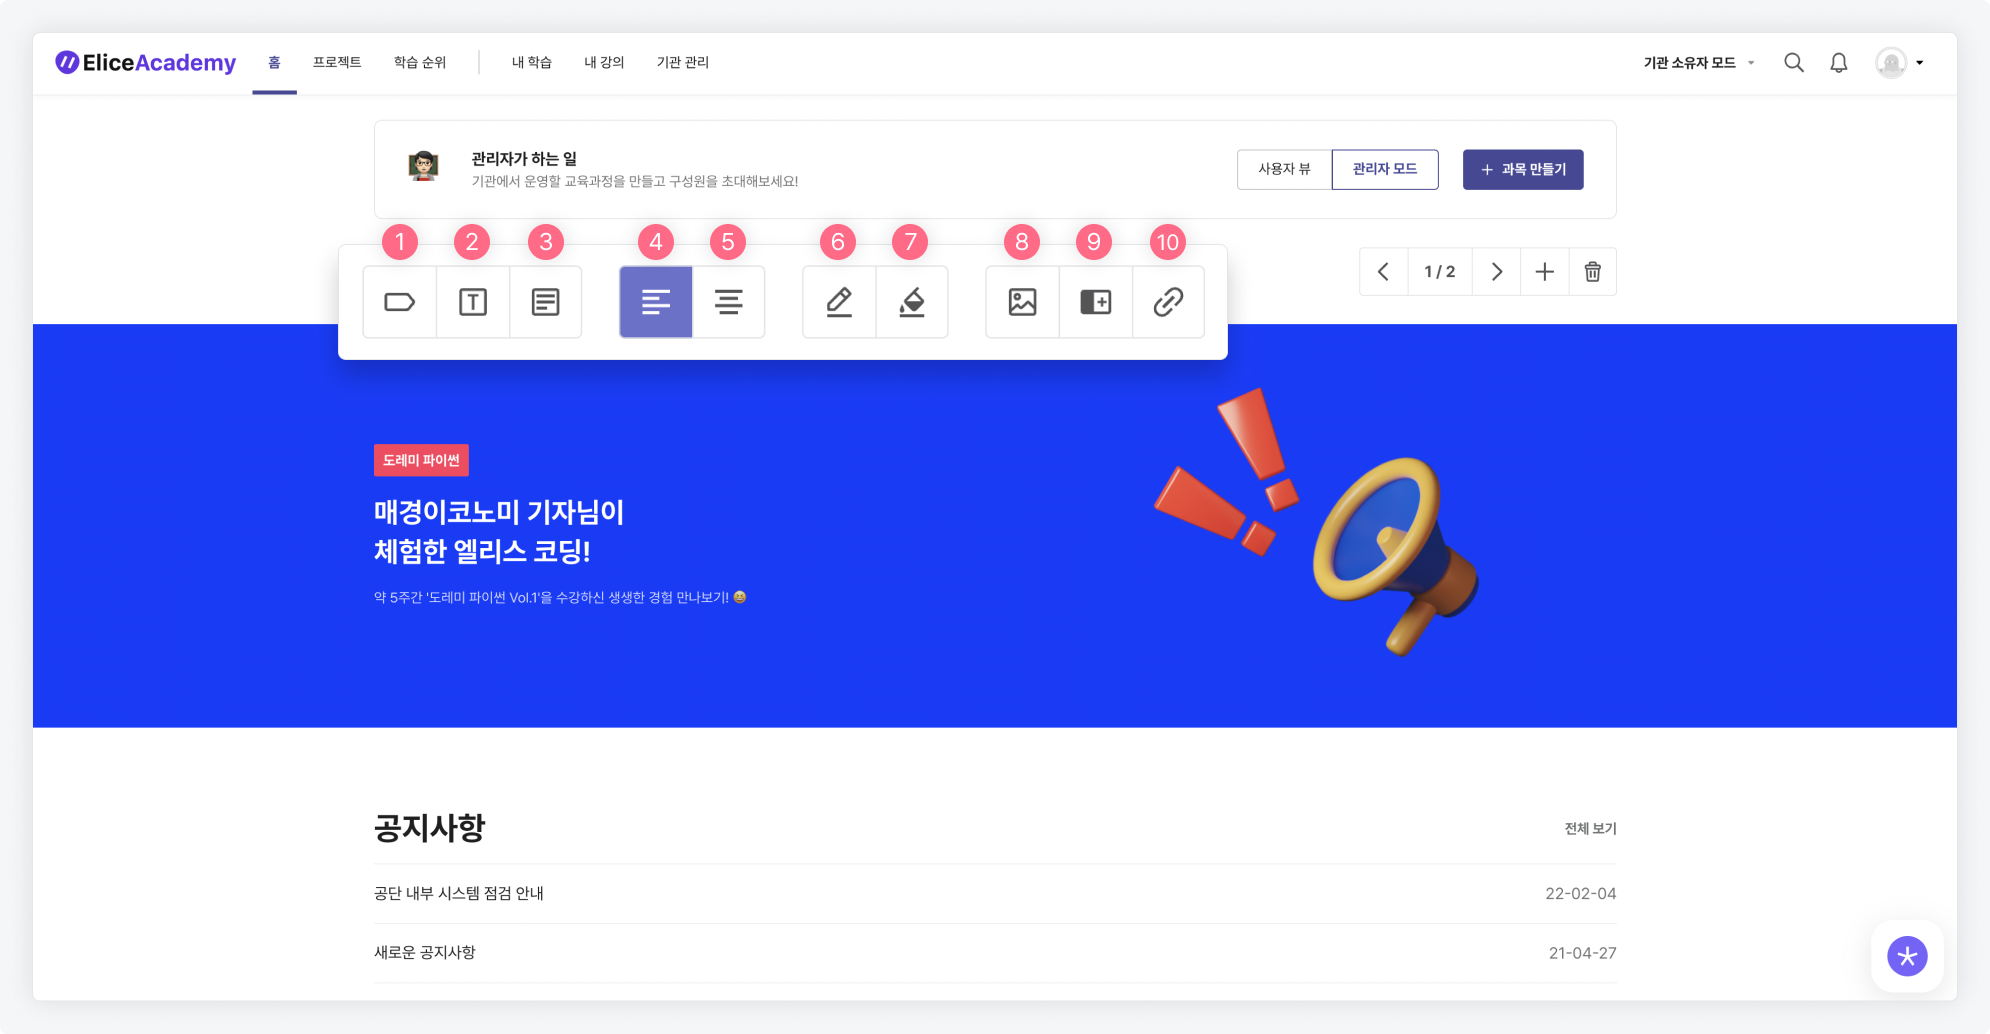
- You can set the content of the badge that appears above the title.
- You can set the title.
- You can set the content.
- You can set the text alignment. (Left alignment)
- You can set the text alignment. (Center alignment)
- You can set the text color. Text color can be set to either black or white.
- You can set the background color of the banner.
- You can set a 'background image' that fills the entire banner area.
- You can set a 'promotional image' that appears to the right of the text.
- You can set a link that will be opened when the banner is clicked. Clicking the banner will navigate to the linked page.
Adding/Removing Main Banners
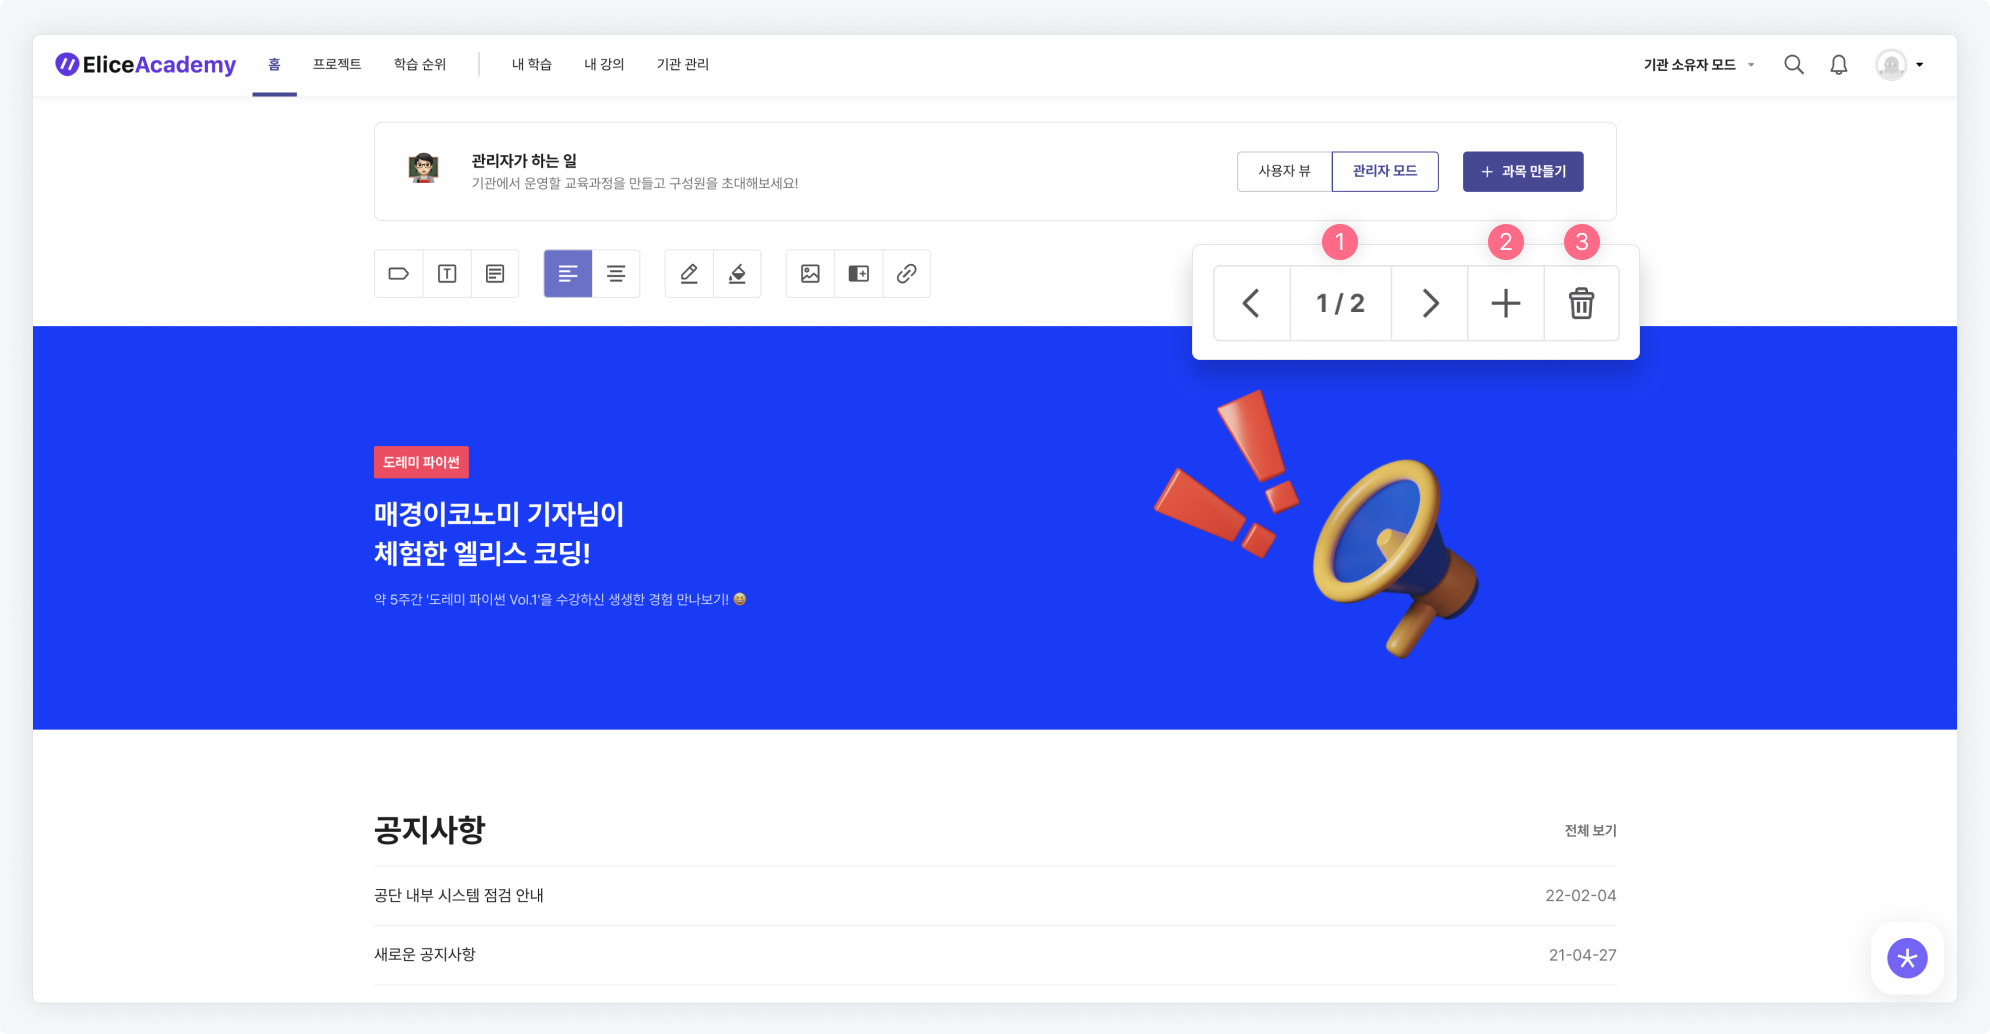
- You can change the order of the banners.
- You can add a banner. The maximum number of banners that can be added is 10.
- You can delete the currently selected banner.
Managing Sections
Adding a Section
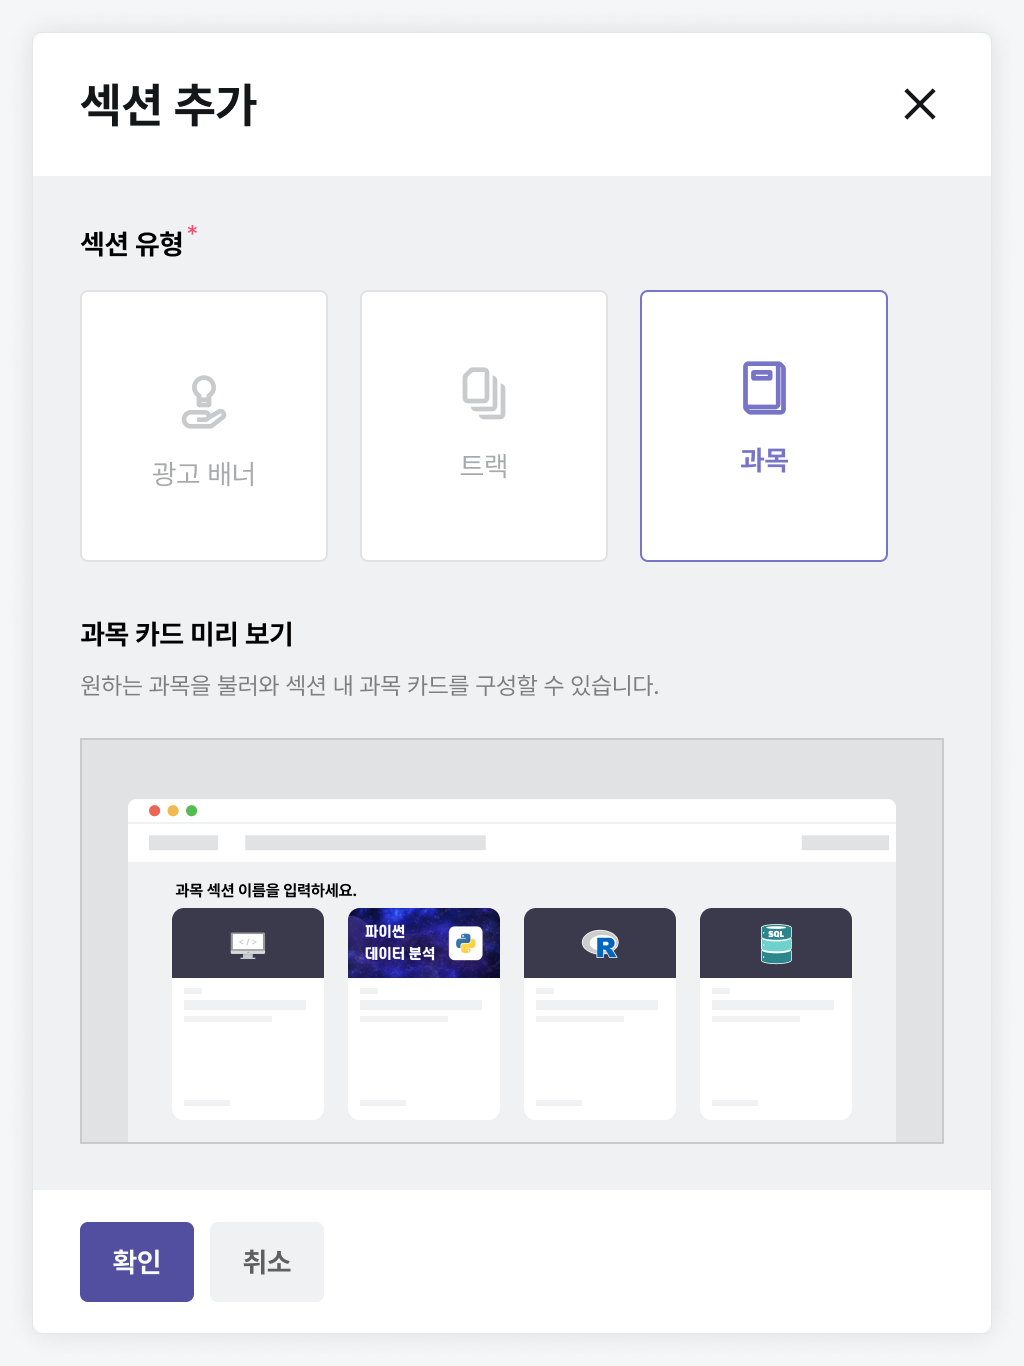
Clicking on 'Add Section' on the home screen will create a new area for configuring the home. Various elements like passes, subjects, and advertising banners can be placed in the added area.
- Click the 'Add Section' button at the bottom of the screen.

-
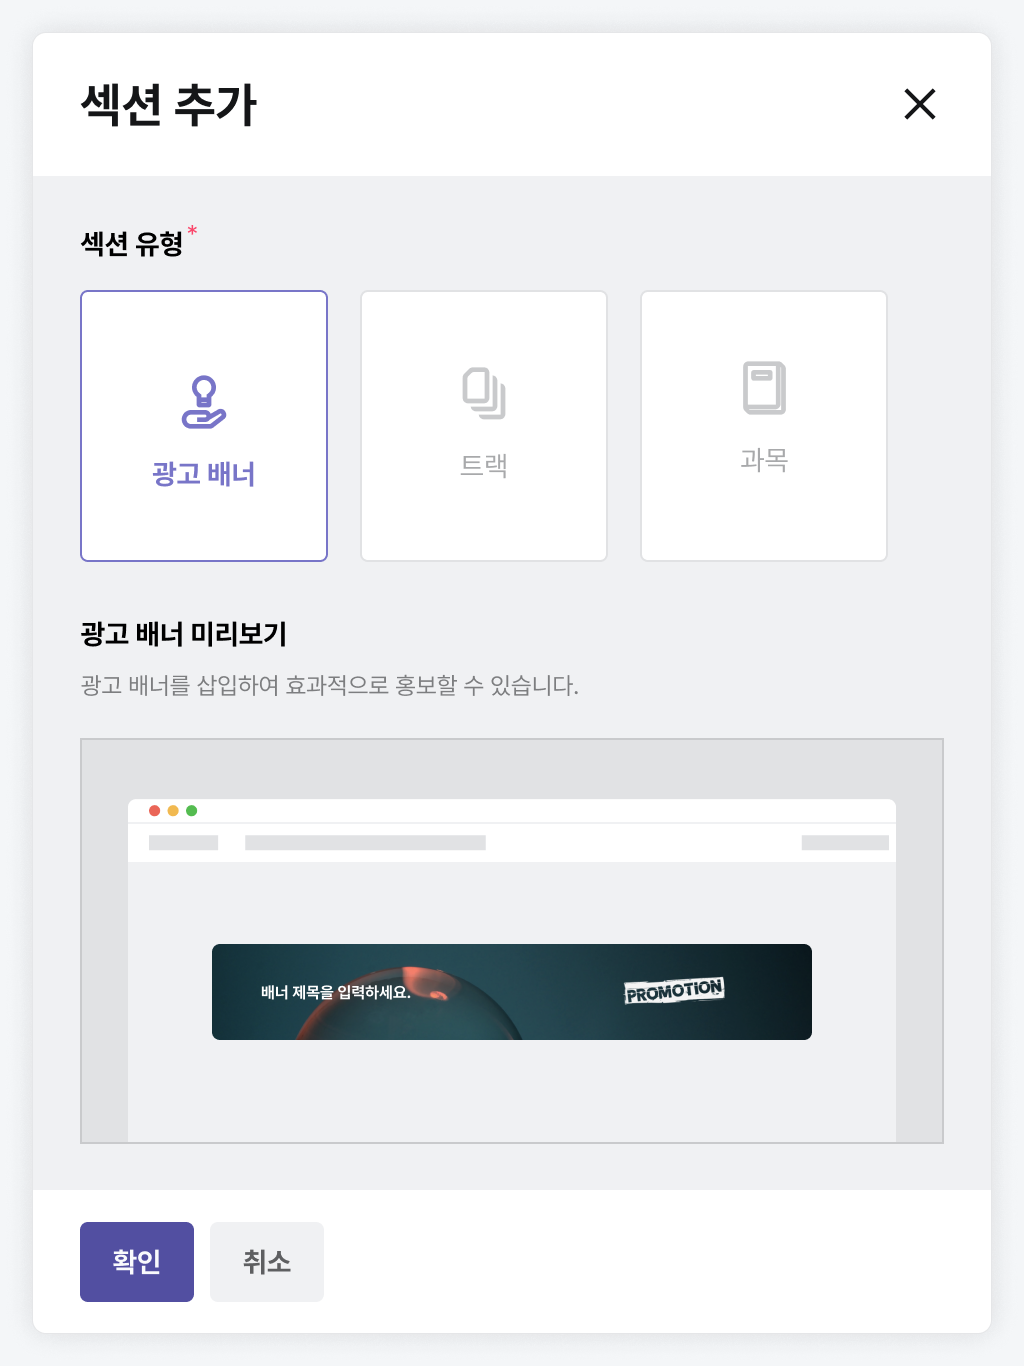
Select the desired section from 'Advertising Banner', 'Pass', or 'Subject'. (A preview will be displayed for each selected section.)
-
Click 'Confirm' to add the selected section.

Deleting a Section
- Click the trash can icon in the upper right corner of the section you want to delete.
- A confirmation window will appear; click the 'Confirm' button.

Modifying Section Name and Description
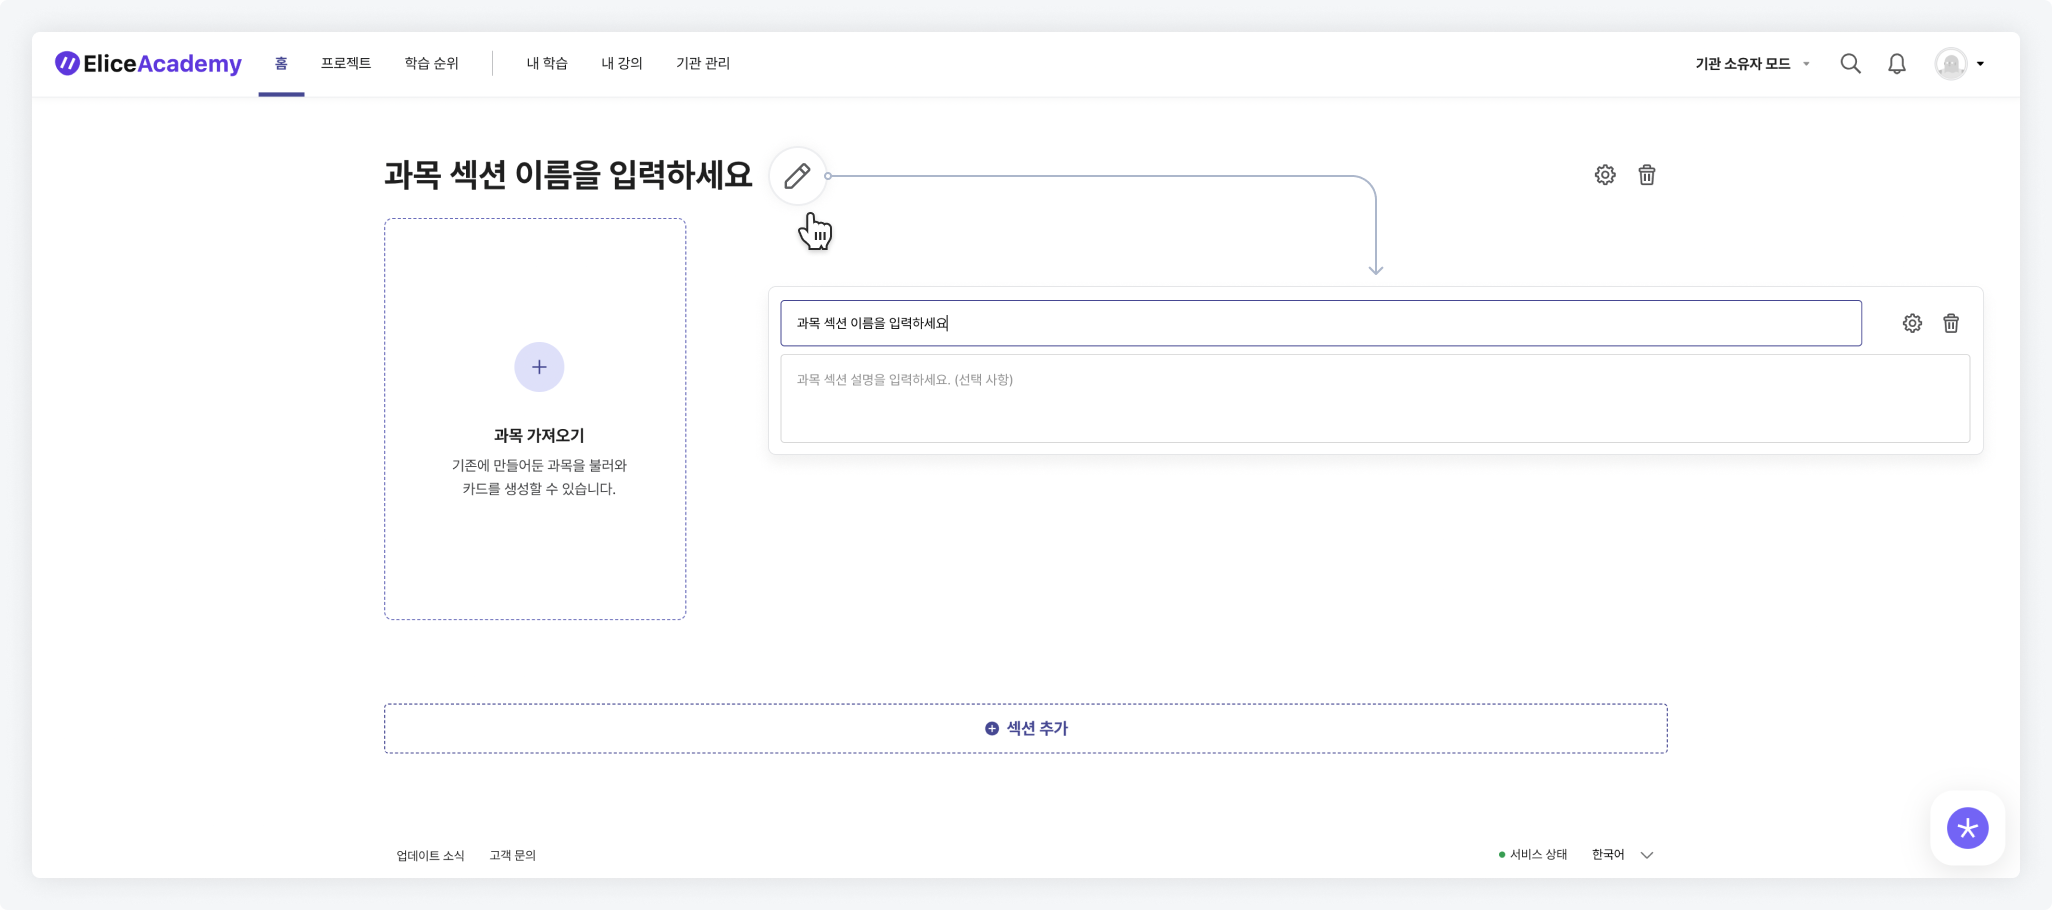
You can modify the section name and description by clicking the edit icon next to the section name.
- The section name is a required field, while the section description is optional.
Changing Section Order
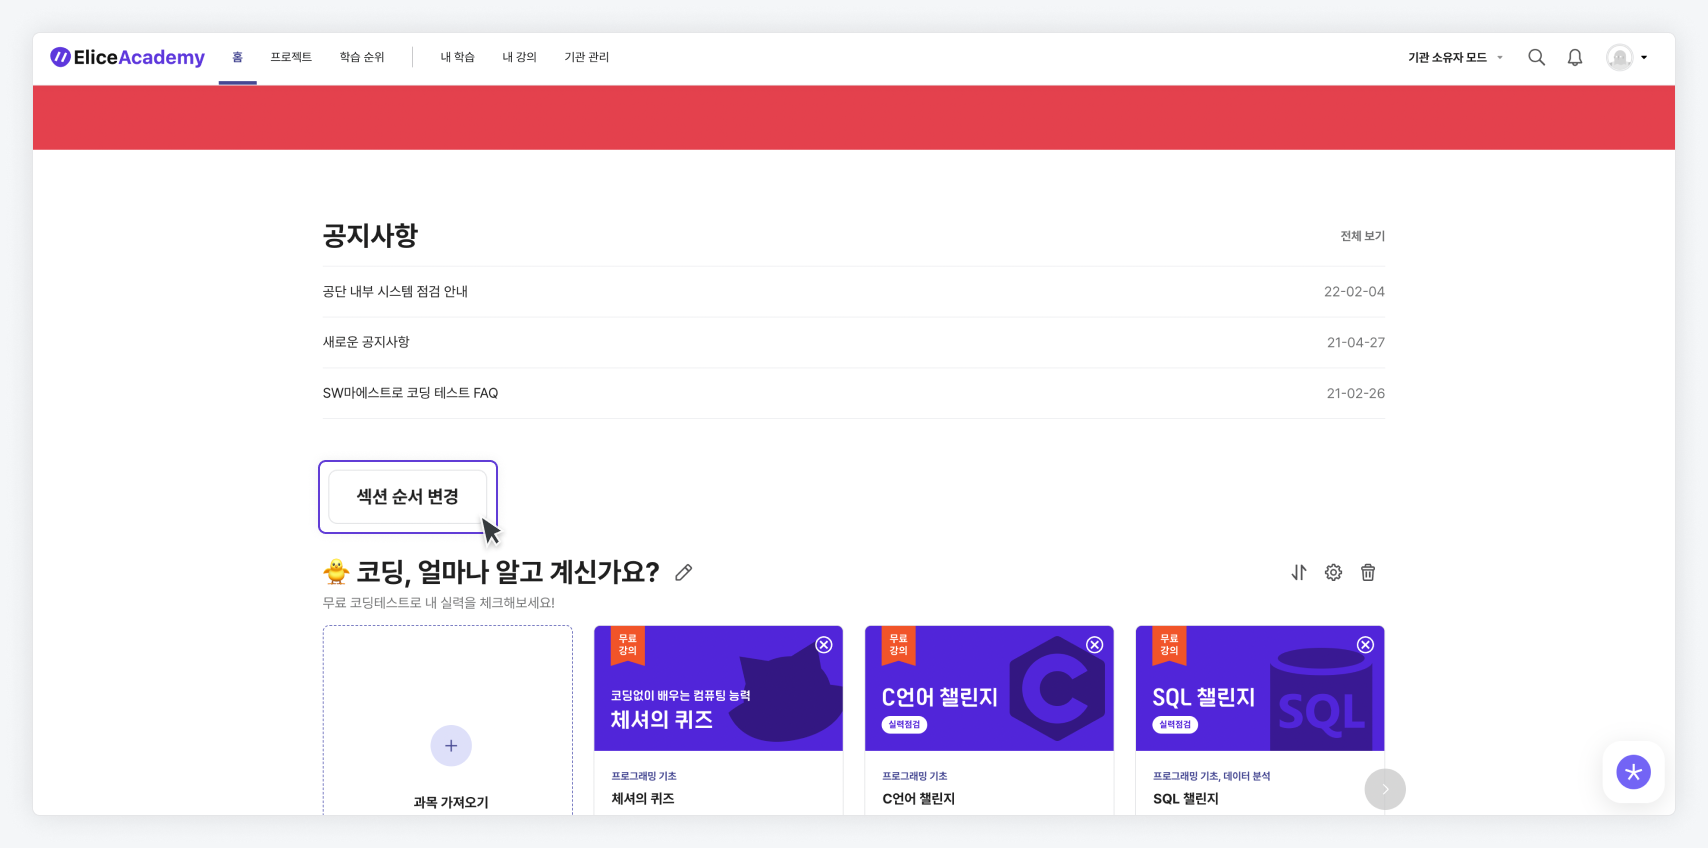
- Click the 'Change Section Order' button at the bottom of the announcements.
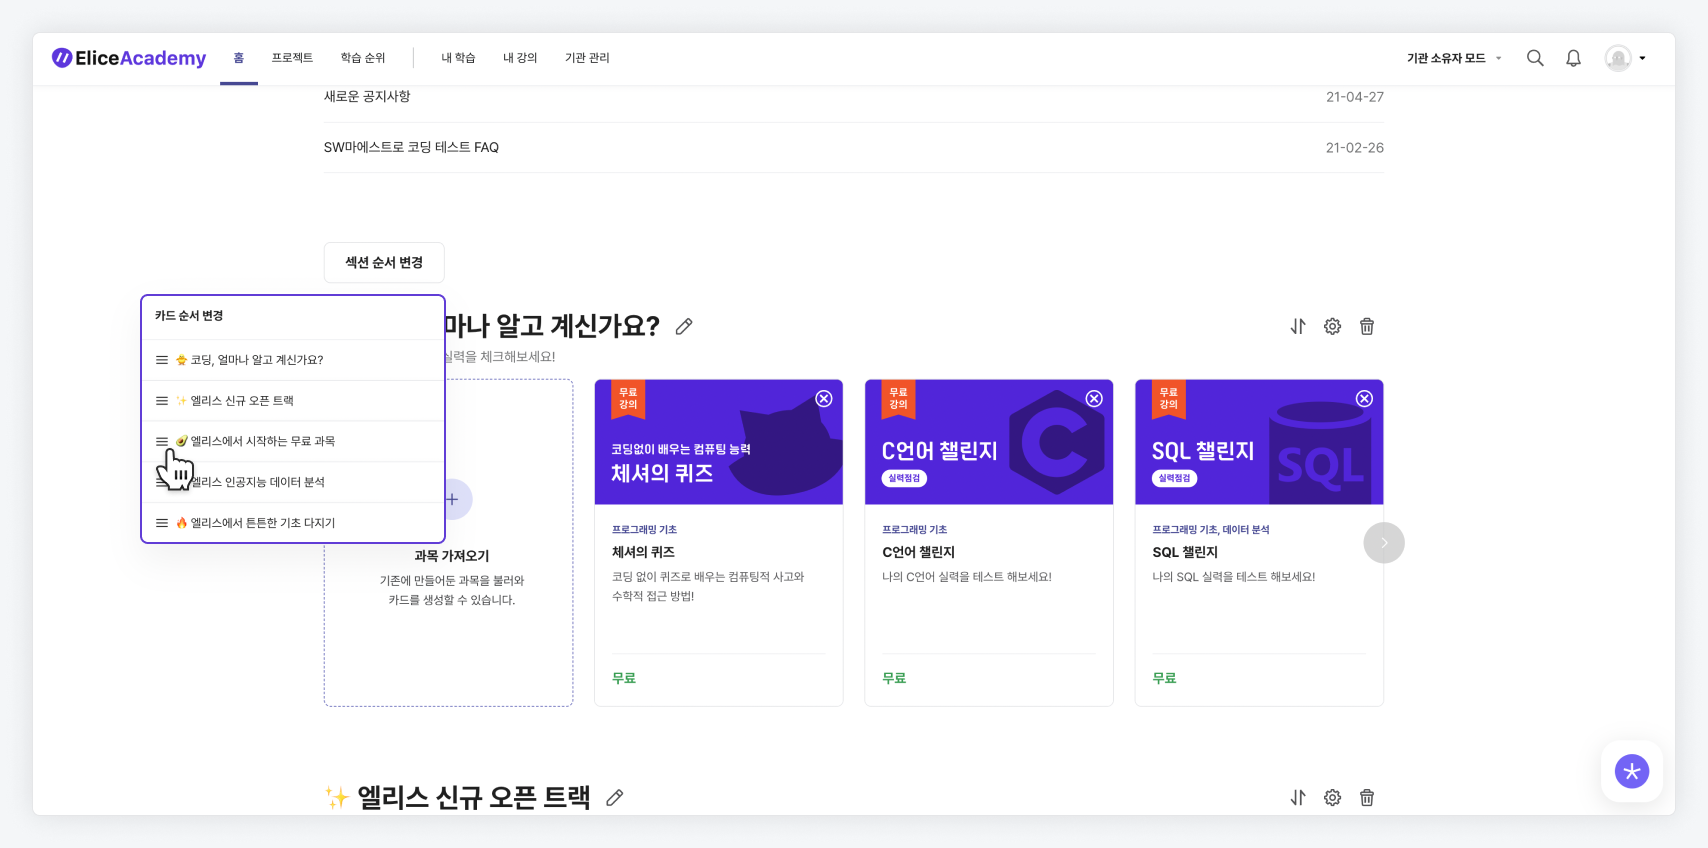
- You can change the order of sections using drag-and-drop.
Managing Pass/Subject Cards
Once you have created a section, you can set up the pass/subject cards that will go inside the section.
Adding Pass/Subject Cards
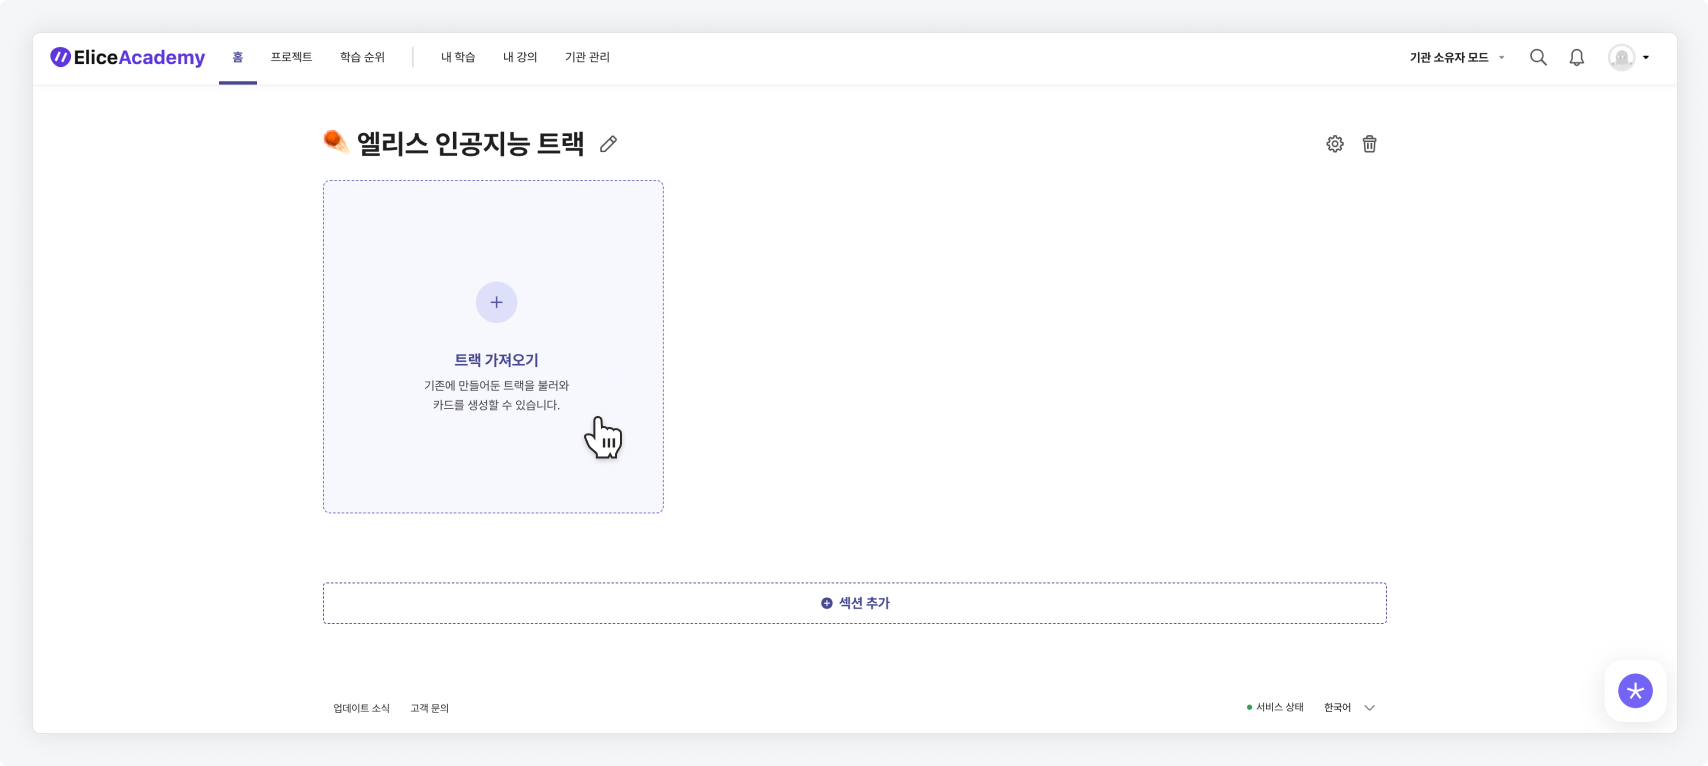
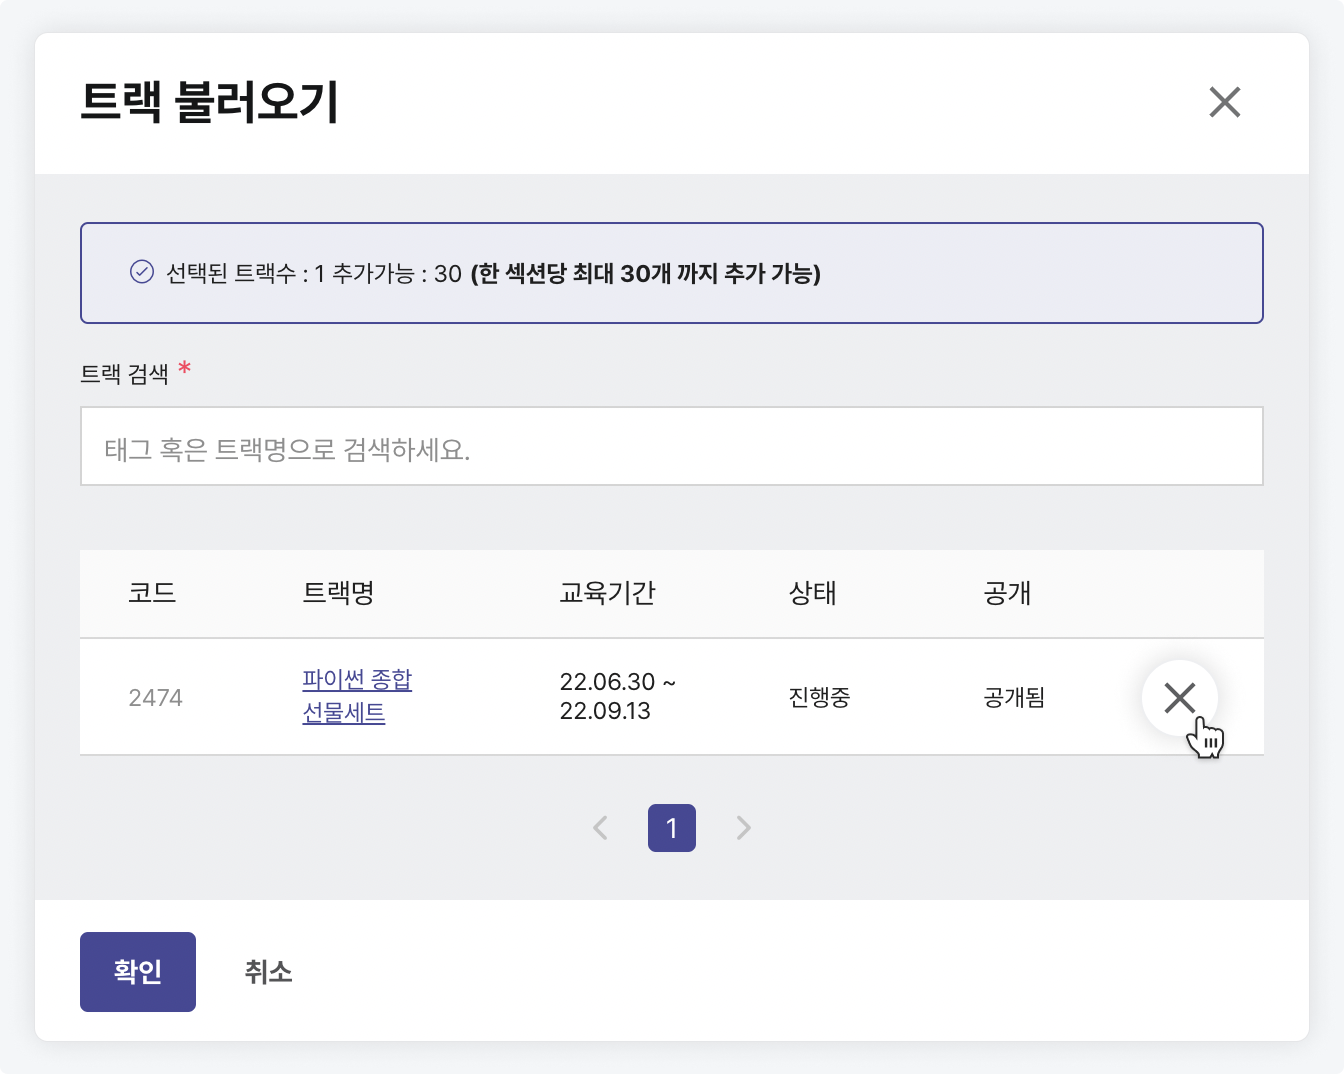
- Click the button to import Pass/Subject.
-
Search for the pass/subject you want to add using tags or pass names.
-
Delete any unnecessary pass/subject by clicking the X icon, and then press the 'Confirm' button to finalize the addition.
※ Private pass/subjects cannot be added. If you want to import a pass/subject, please click the 'Make Public' button. (After clicking, it will change to 'Public' status as shown in the image below.)
※ The maximum number of pass/subject cards that can be added to one section is 30.
Changing Pass/Subject Card Order
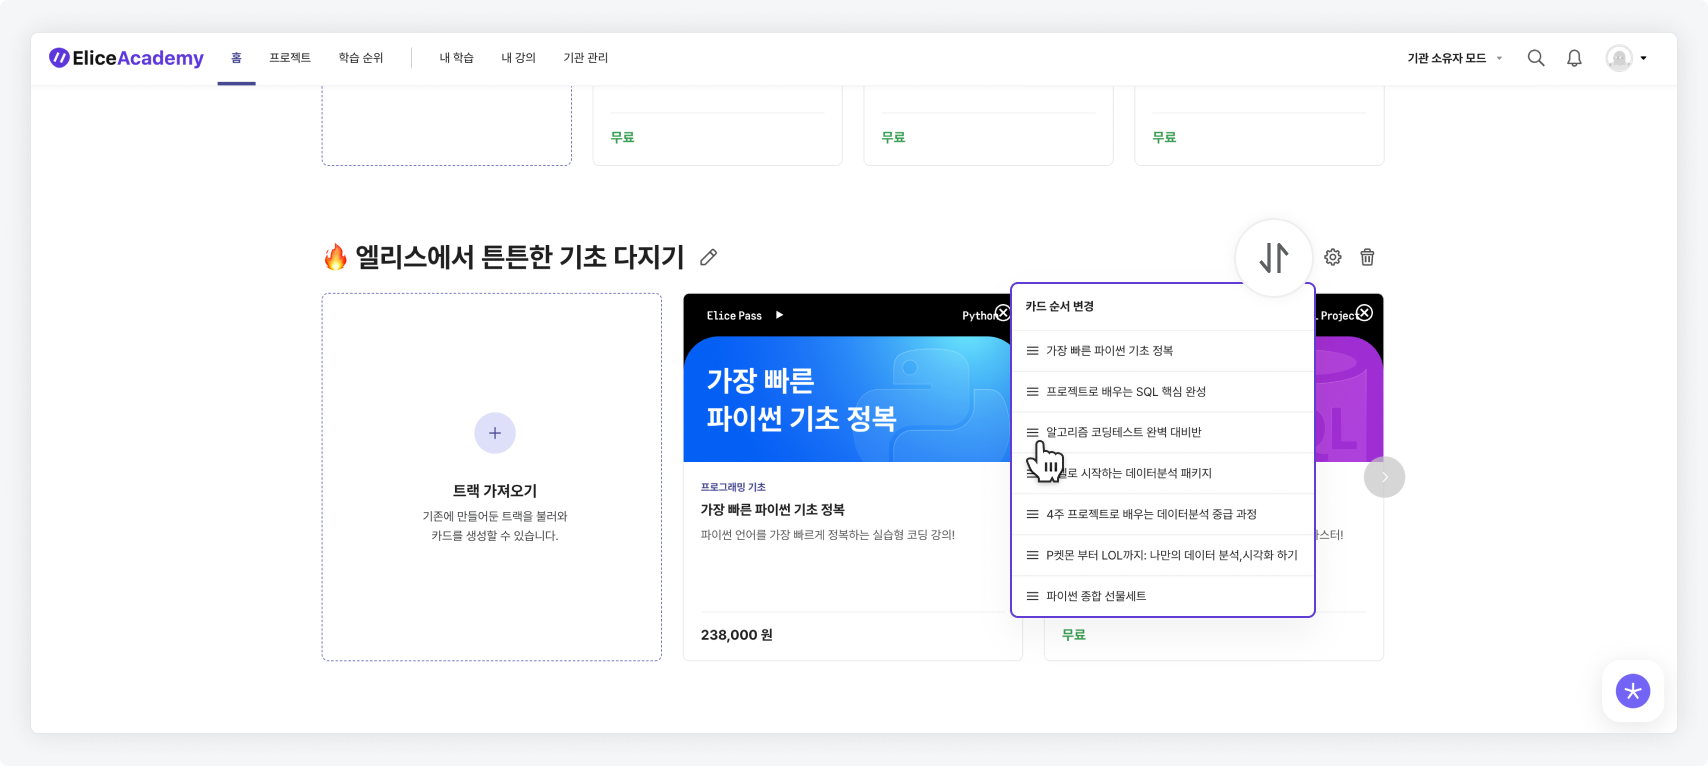
- If you want to change the order of the pass/subject cards, click the order change icon in the upper right corner of the section.
- Change the order of the pass/subject cards using drag-and-drop.
Changing Pass/Subject Card Information Layout
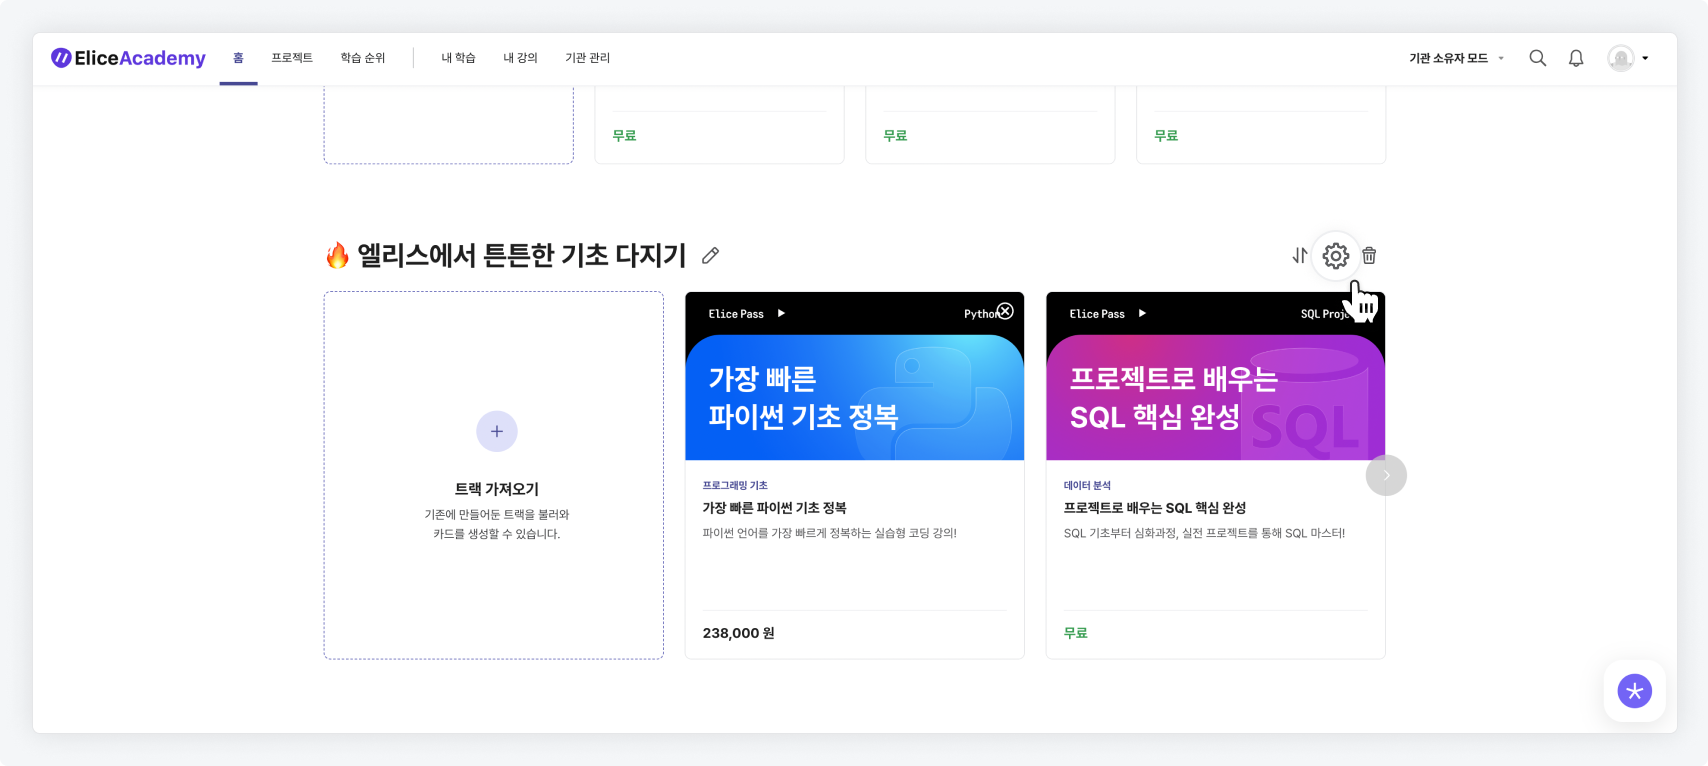
- The layout for the pass/subject card information can be changed on a section basis.
- Click the edit icon in the upper right corner of the card for the section where you want to change the pass/subject card information layout.
- You can check the information you want to display from the pass/subject cards in that section.
-
The information layout items are divided into 'Pass/Subject Information' and 'Detailed Information'.
-
Up to 3 items can be selected for 'Detailed Information', while there is no selection limit for 'Pass/Subject Information'.
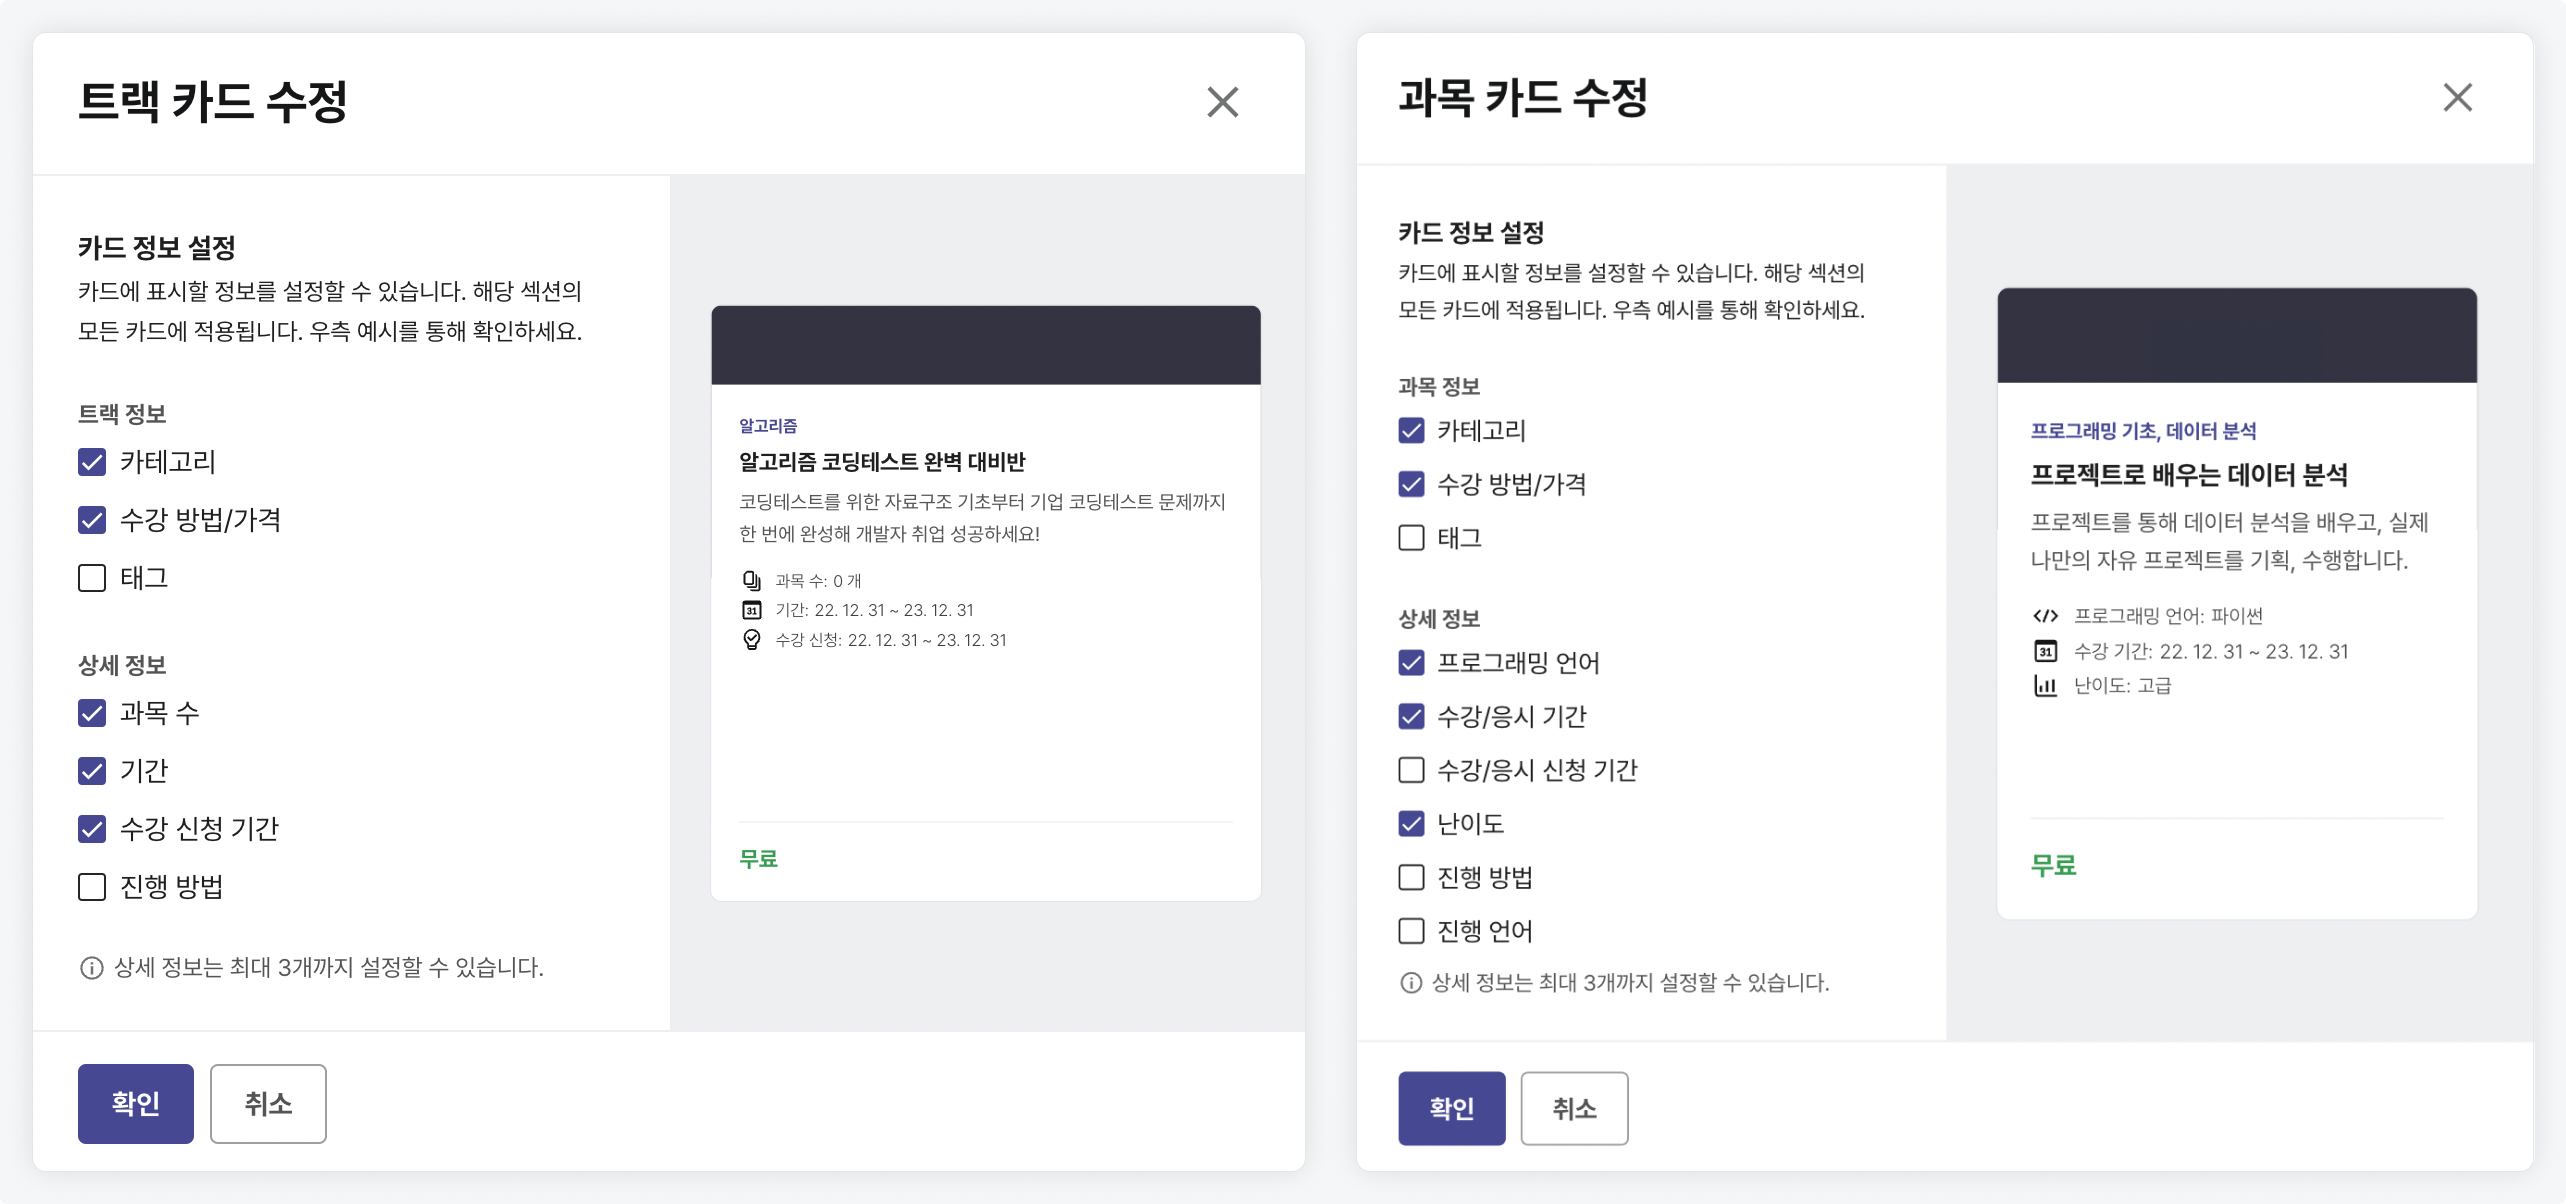
- After clicking the confirm button, hovering over the pass/subject card will display the configured information.
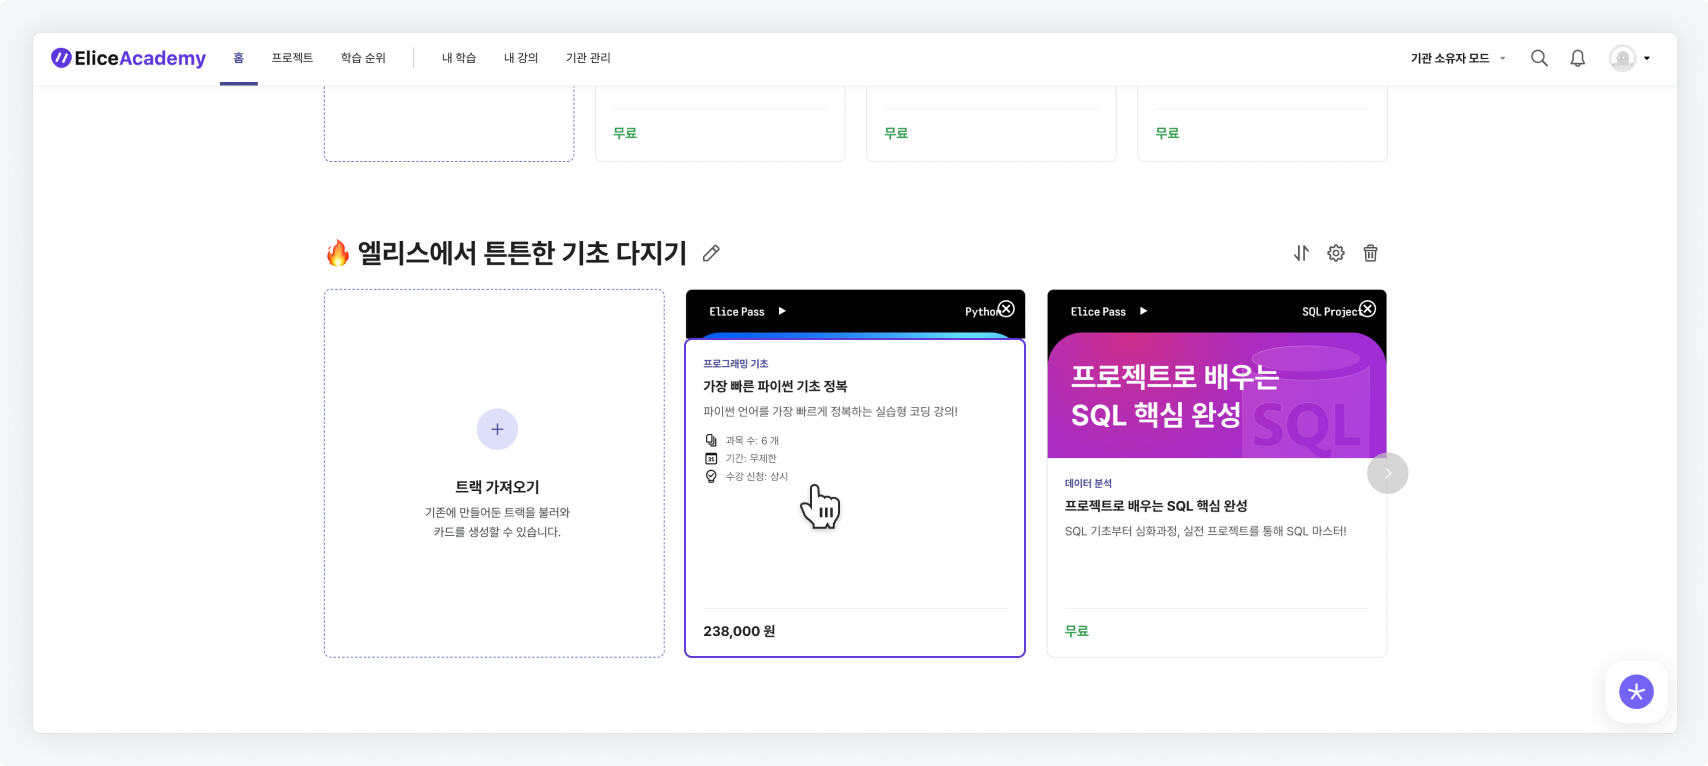
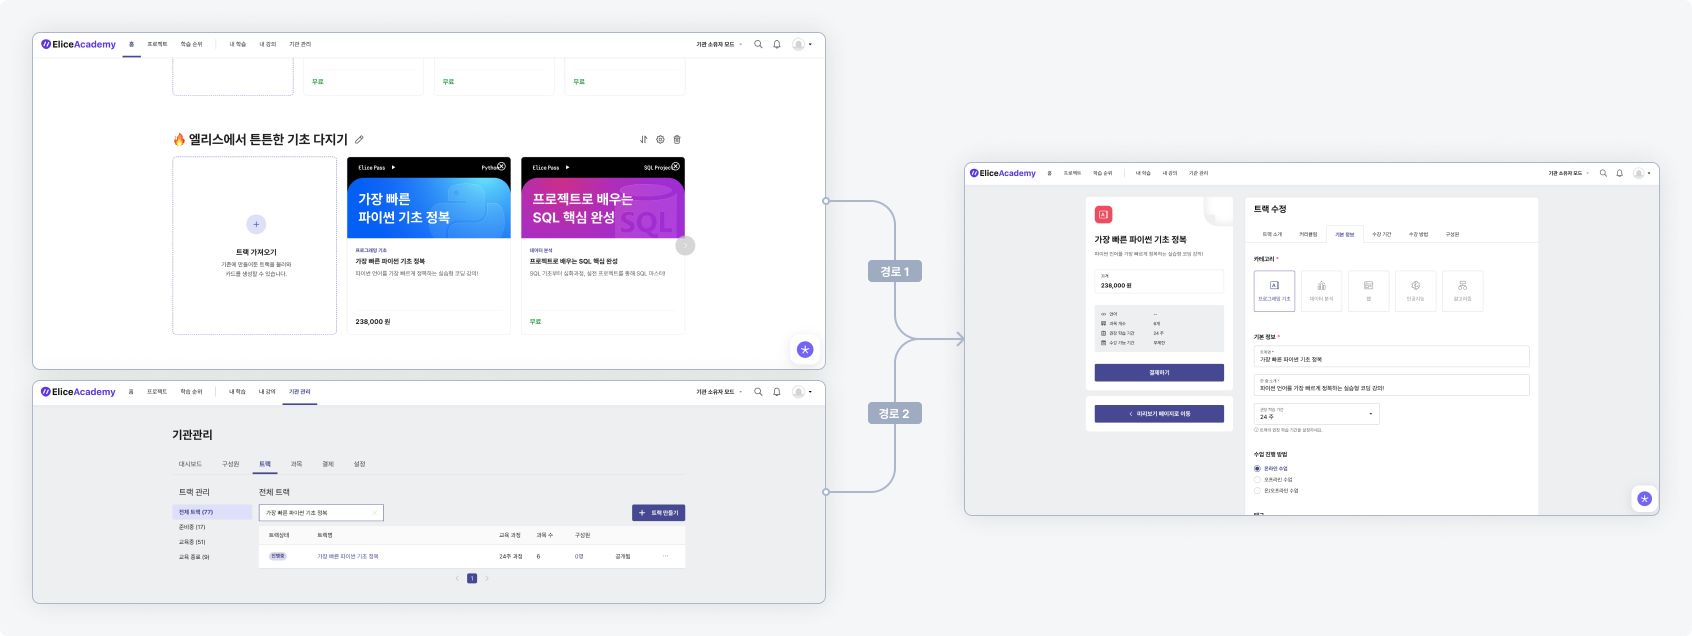
- Detailed settings for the pass/subject card information can be performed through the following paths.
- Pass
- Path 1: Click the pass card in the home screen > Edit Pass
- Path 2: Institution Management > Click the pass name > Edit Pass
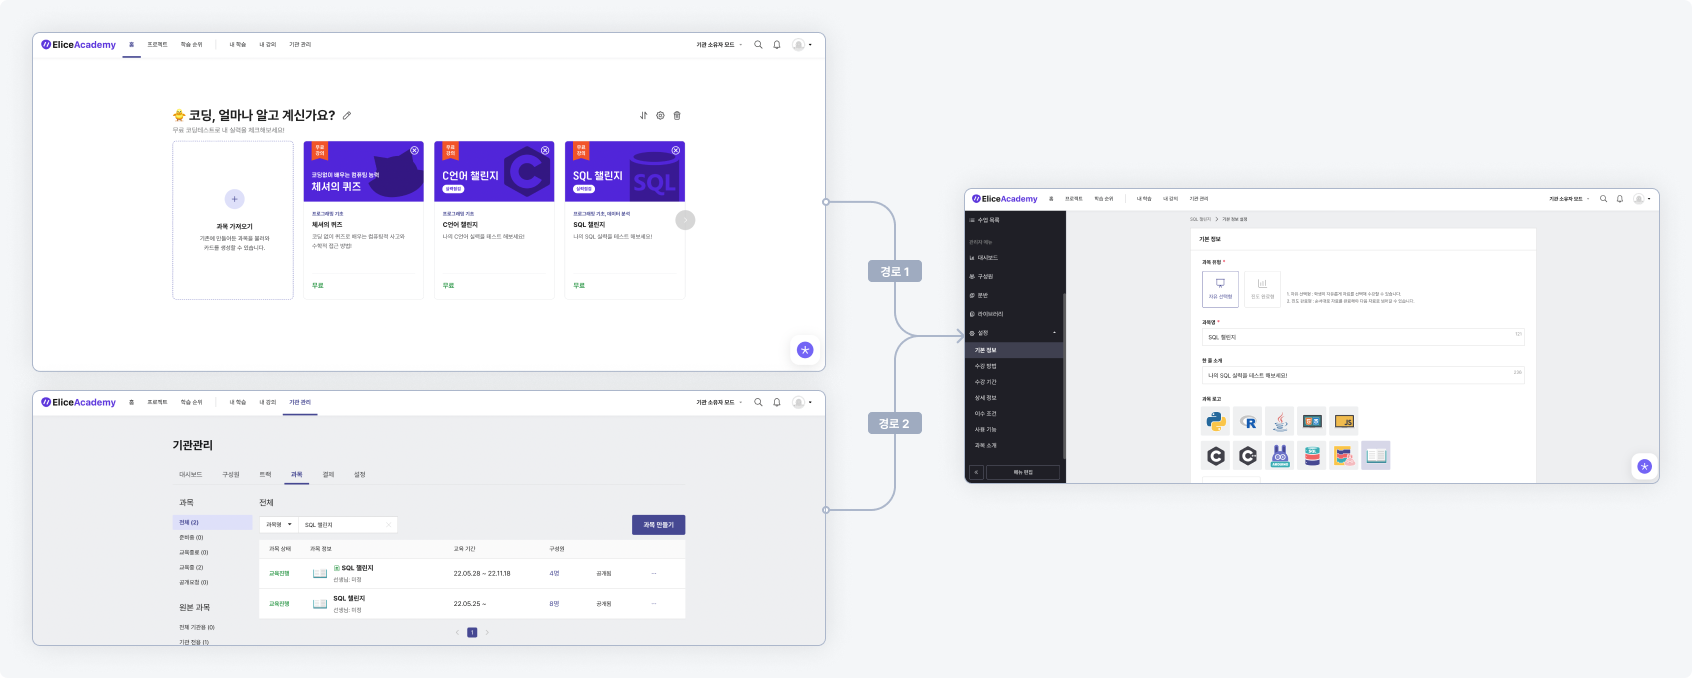
- Subject
- Path 1: Click the subject card in the home screen > Settings
- Path 2: Institution Management > Click the subject name > Settings
Managing Advertising Banners
Adding Advertising Banners
- Click the 'Add Section' button at the bottom of the screen.
- Select 'Advertising Banner' and click the 'Confirm' button to add it.

Setting Up Advertising Banners
In Admin Mode, various buttons will appear above the advertising banner to decorate it.

- Enter the content that will go into the advertising banner.
- Choose the color of the text. The text color can only be either black or white.
- Choose the background color.
- You can set a 'background image' that fills the entire banner area.
- You can set a 'promotional image' that appears to the right of the text.
- You can set a link that will be opened when the banner is clicked. Clicking the banner will navigate to the linked page.
Deleting Advertising Banners
- Click the trash can icon in the upper right corner of the advertising banner you want to delete.
- A confirmation window will appear; click the 'Confirm' button to delete it.
