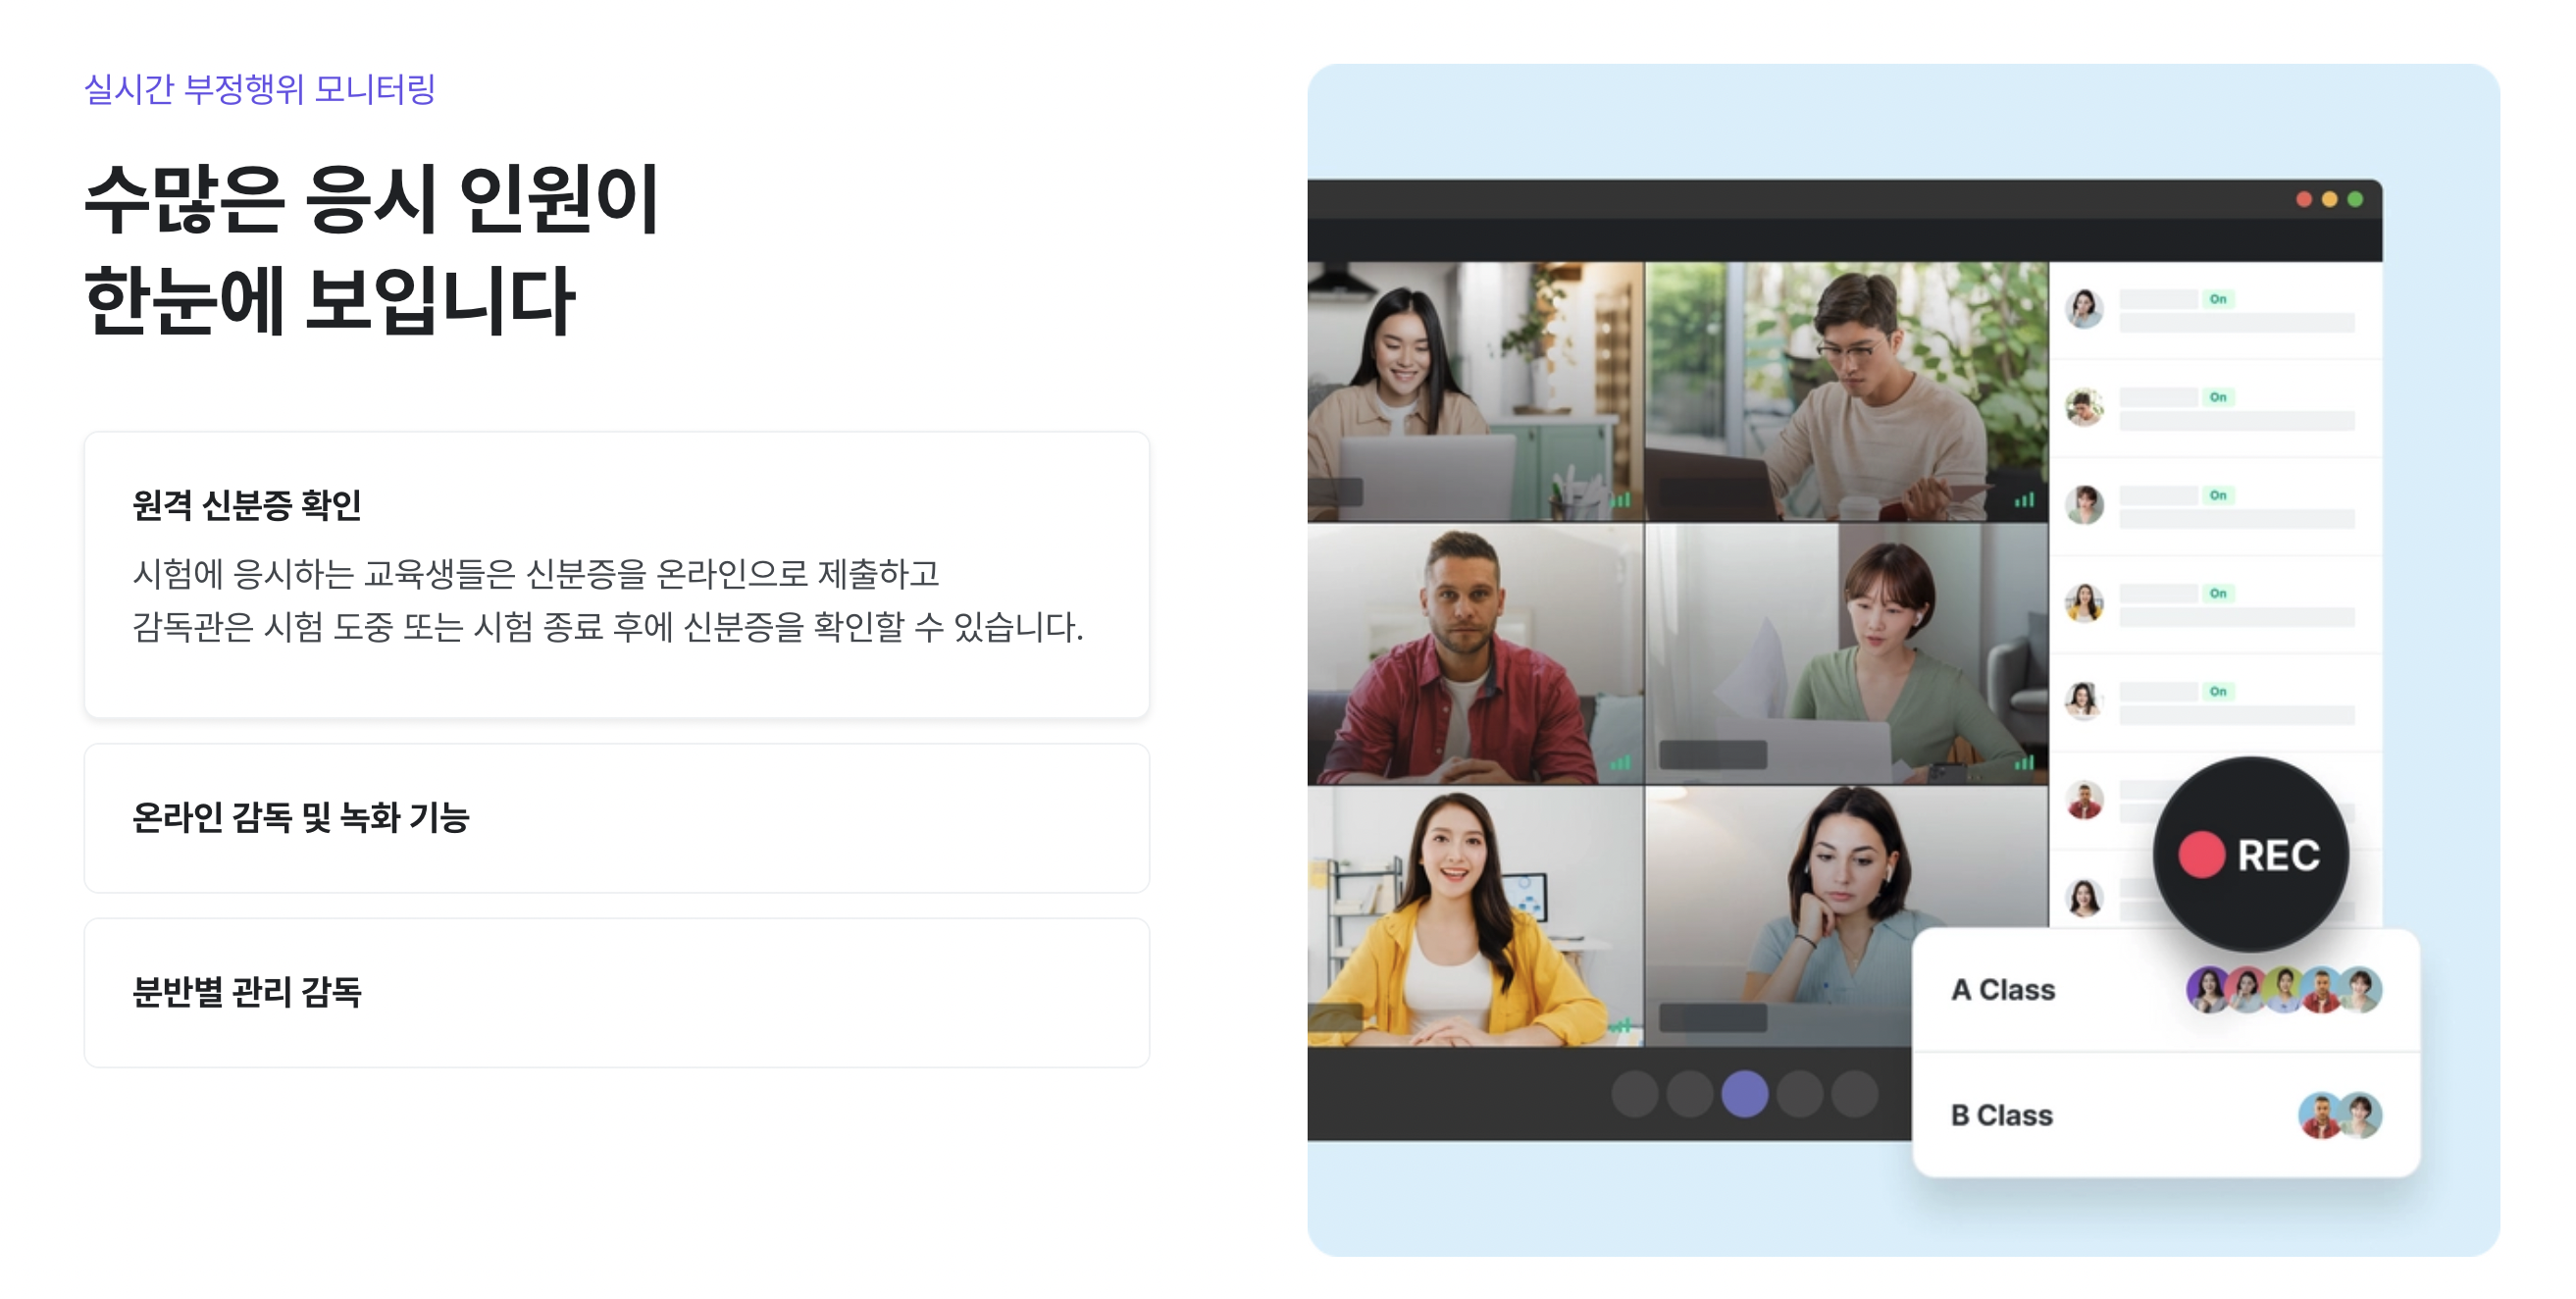
Responding to Tests
This section guides administrators on how to monitor and manage tests.
Monitoring
By entering the exam room from the monitoring menu, administrators can monitor the webcam and screen of the test takers. You can zoom in on the test taker's screen or send warning messages to supervise the exam. This section provides detailed explanations of monitoring features.
How to Use Monitoring Features
- To use the monitoring features, you need to access the test details page and activate the features.
- Click the 'Edit Menu' button at the bottom of the left menu on the test details page.
- Check the monitoring feature and click save.
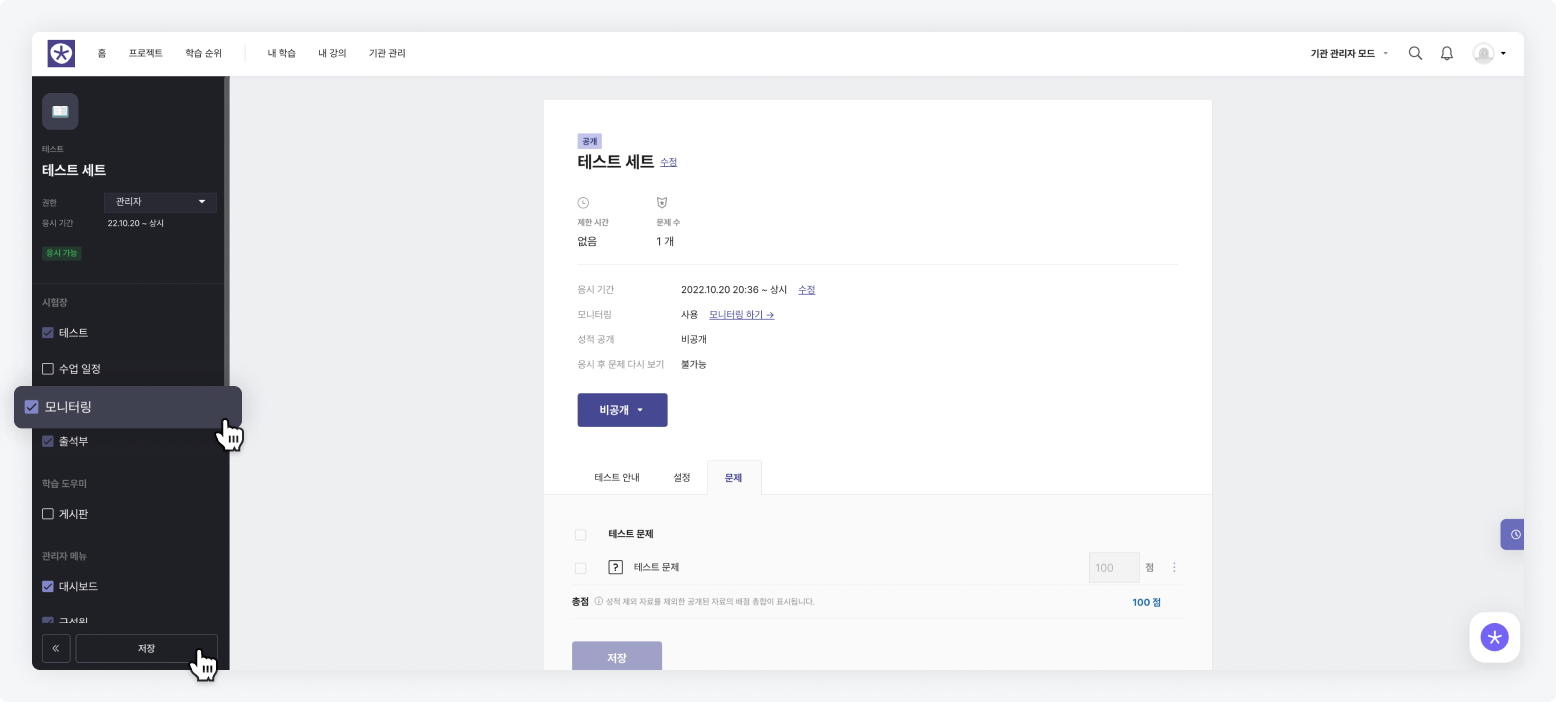
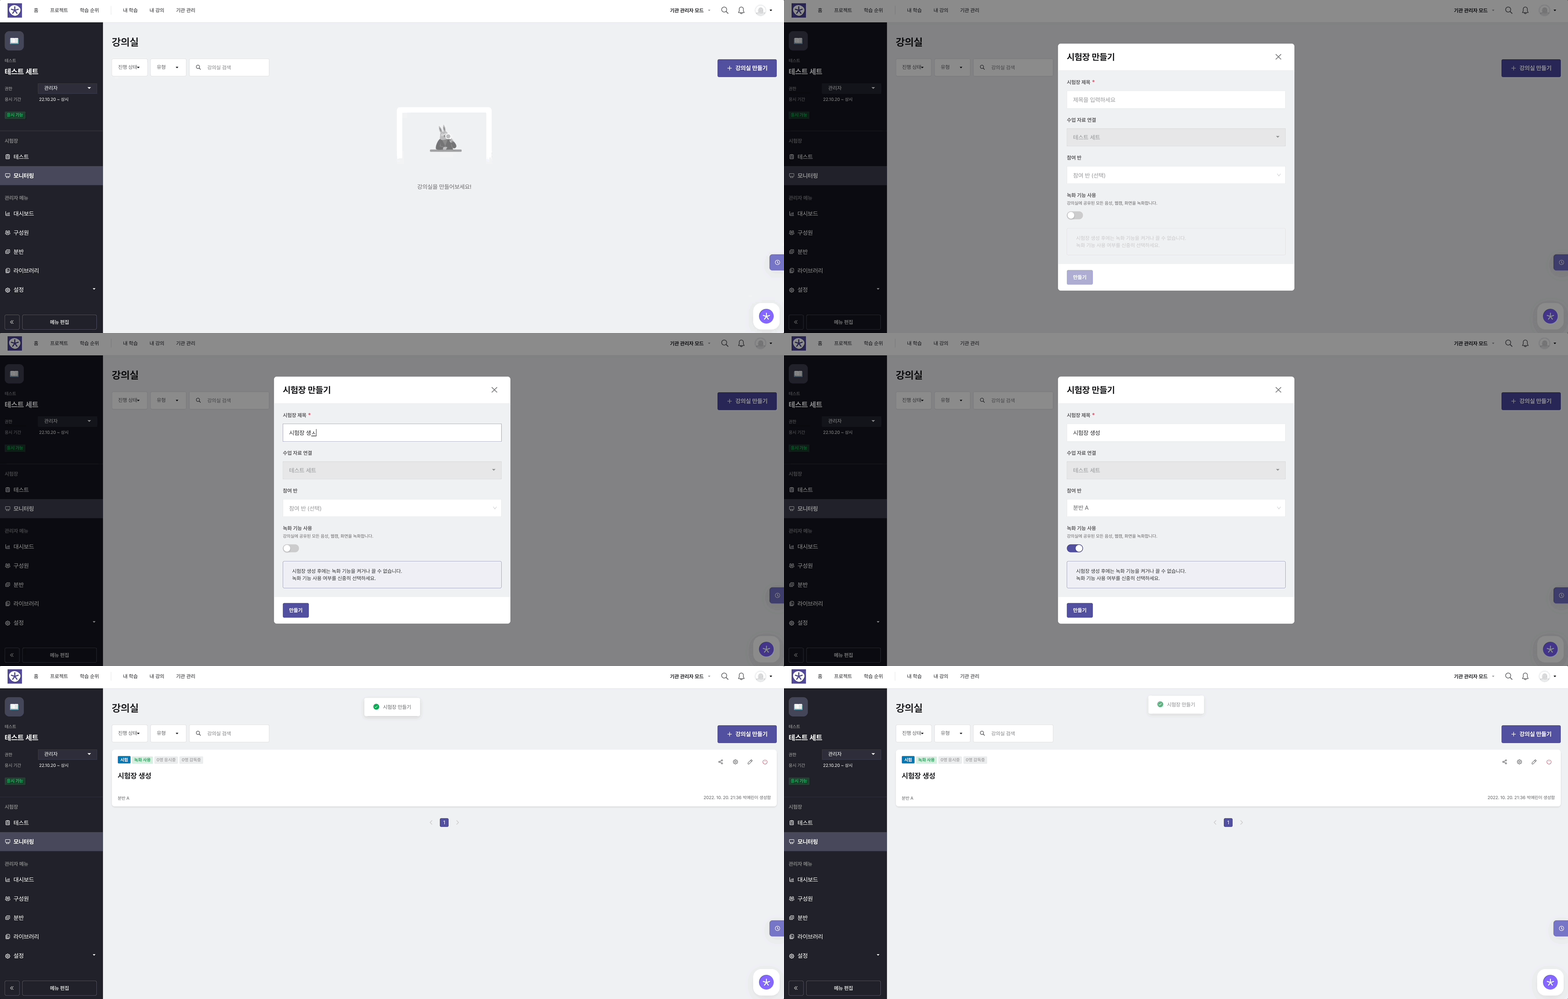
Creating a Monitoring Room
- Click the monitoring menu and then the 'Create Classroom' button.
- Enter the information required to create the exam room.
- Exam Room Title: Enter the title of the exam room that will appear to the test takers.
- Link Study Materials: The monitoring materials for the test will be automatically linked.
- Participating Section: You can select the participating section.
- Recording Feature: You can record all audio, webcam, and screen shared in the classroom. (The recording function cannot be turned on or off after the exam room is created.)
- The exam room creation is complete.
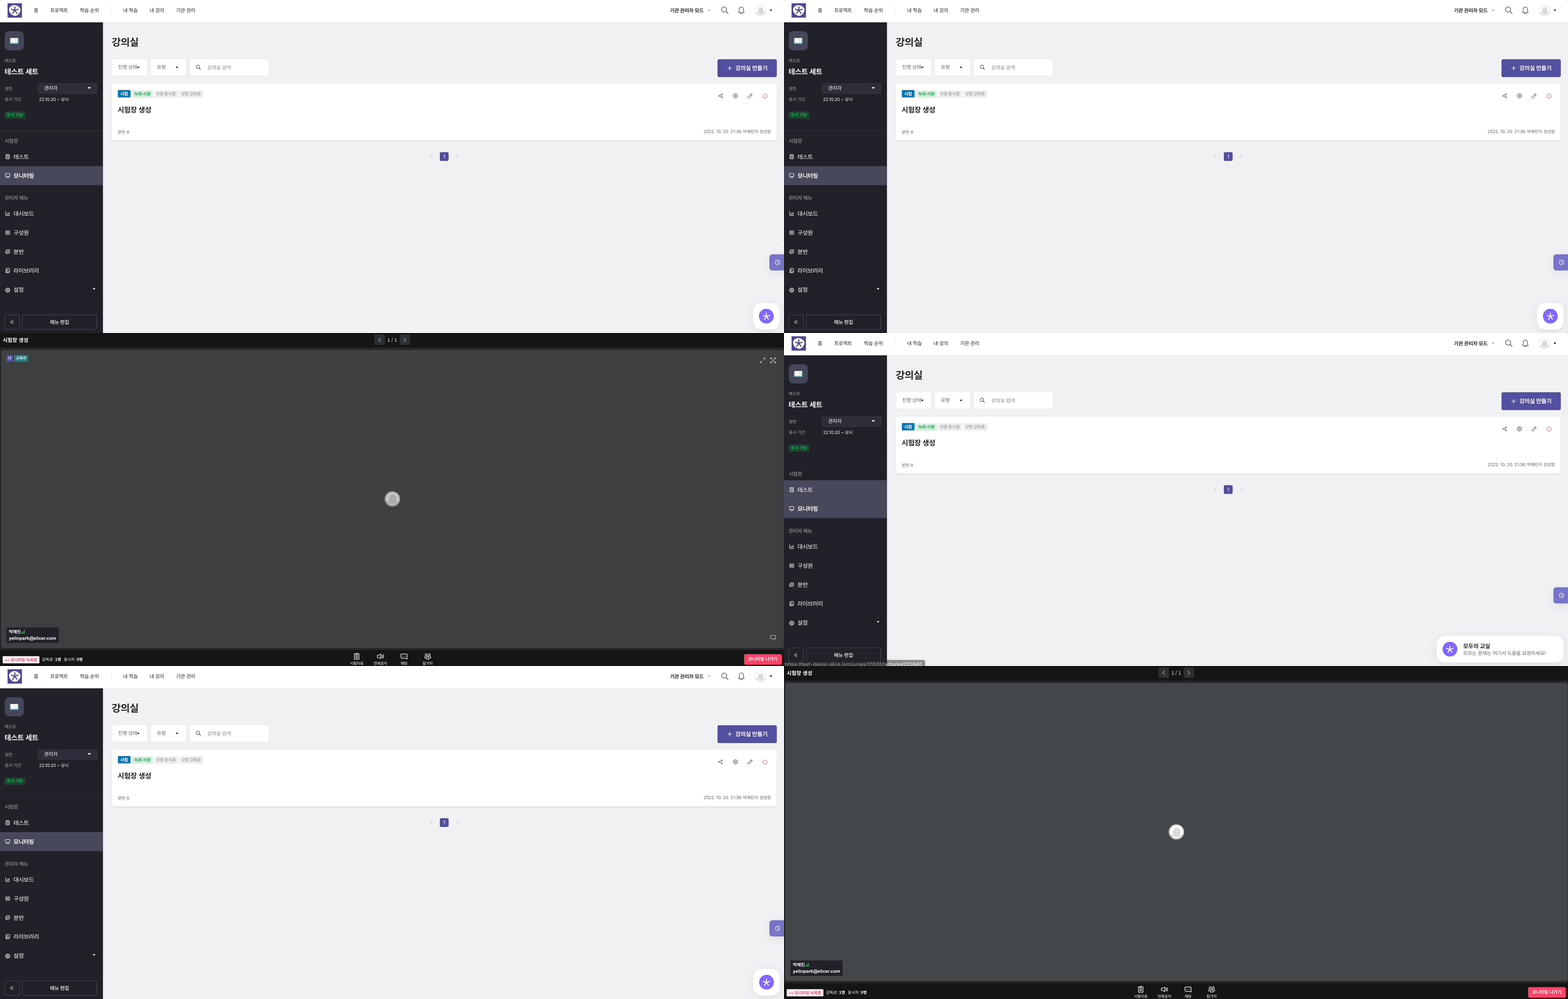
Entering the Monitoring Room
- Click the monitoring menu and then click on the list of exam rooms.
- Click the 'Enter' button for the monitoring room.
(or)
- Click the 'Tests' tab on the test details page.
- Click the 'Monitoring' button.
- Click the 'Enter' button for the monitoring room.
Sharing the Monitoring Room Link
- You can copy the monitoring room link and provide it to supervisors and test takers.

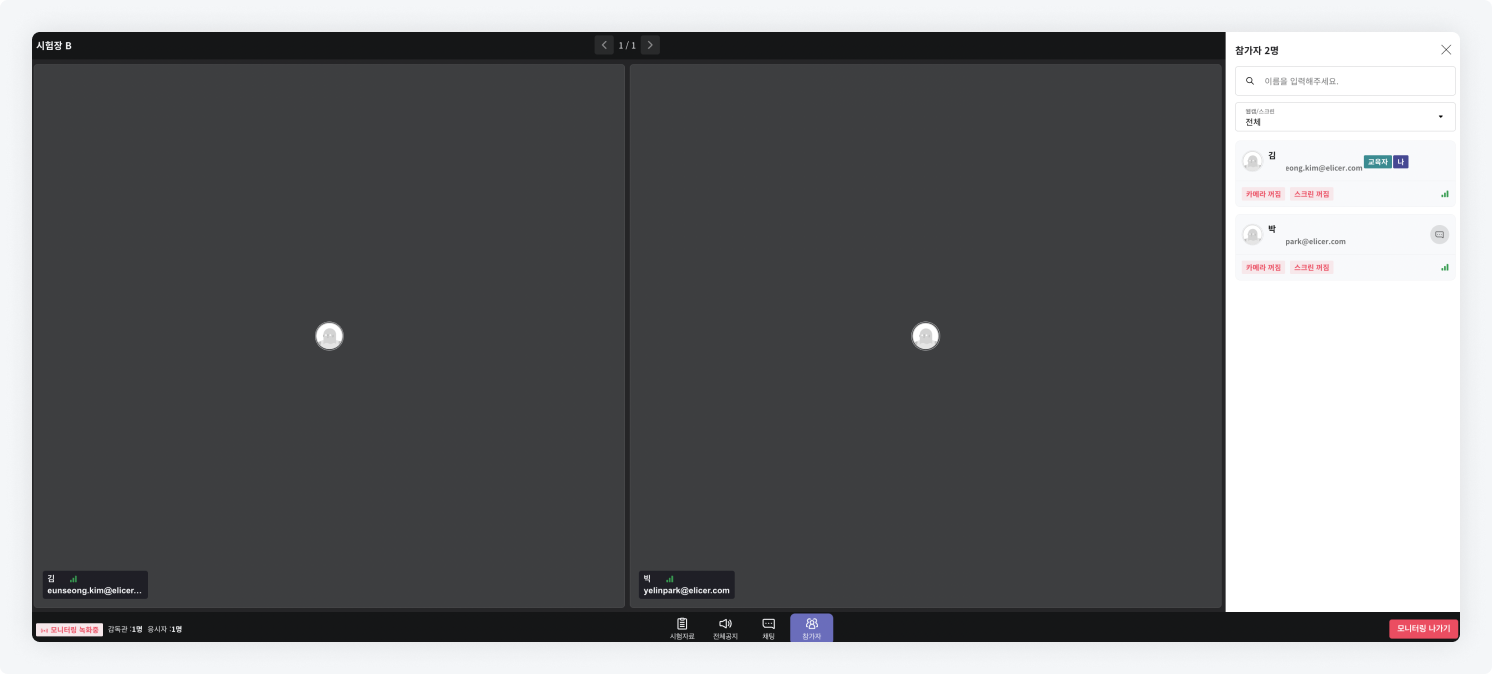
Checking the Participant List
- You can check the list of participants who have entered the monitoring room.
Changing the Layout
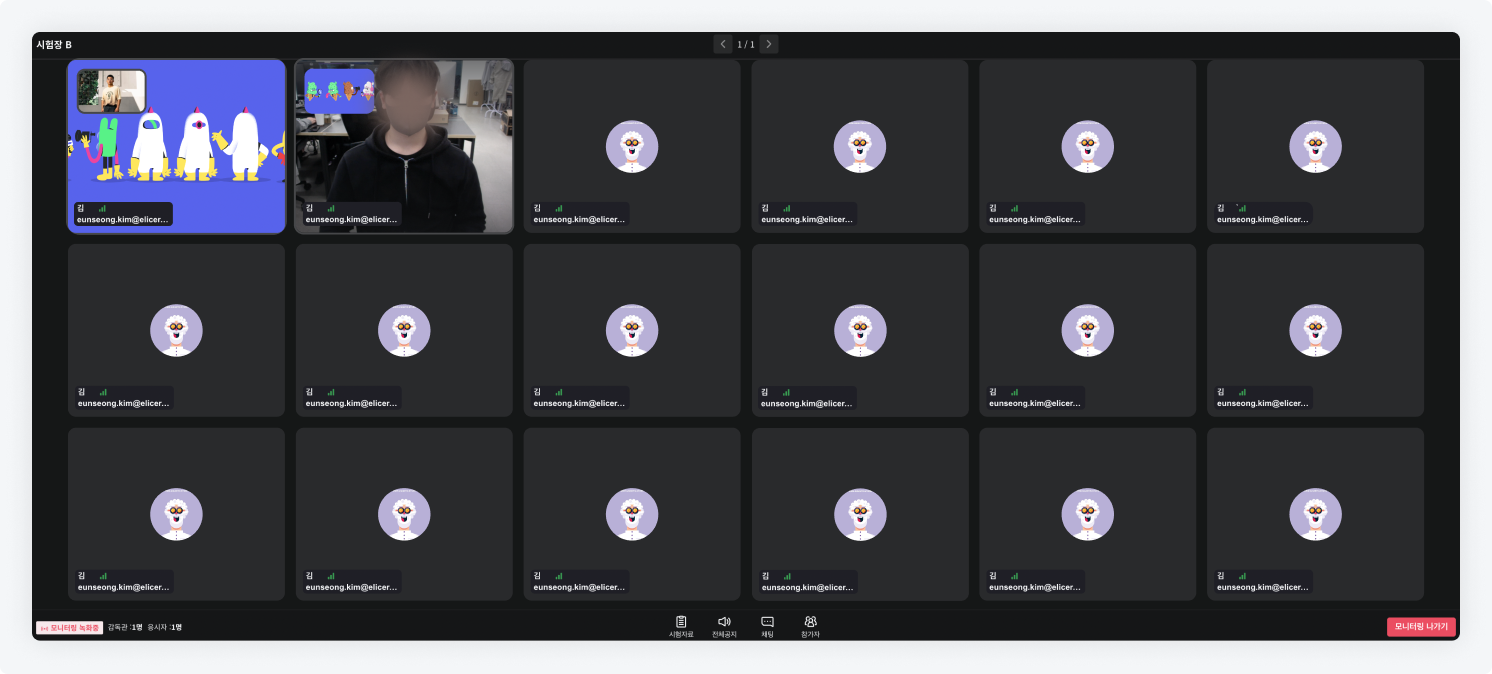
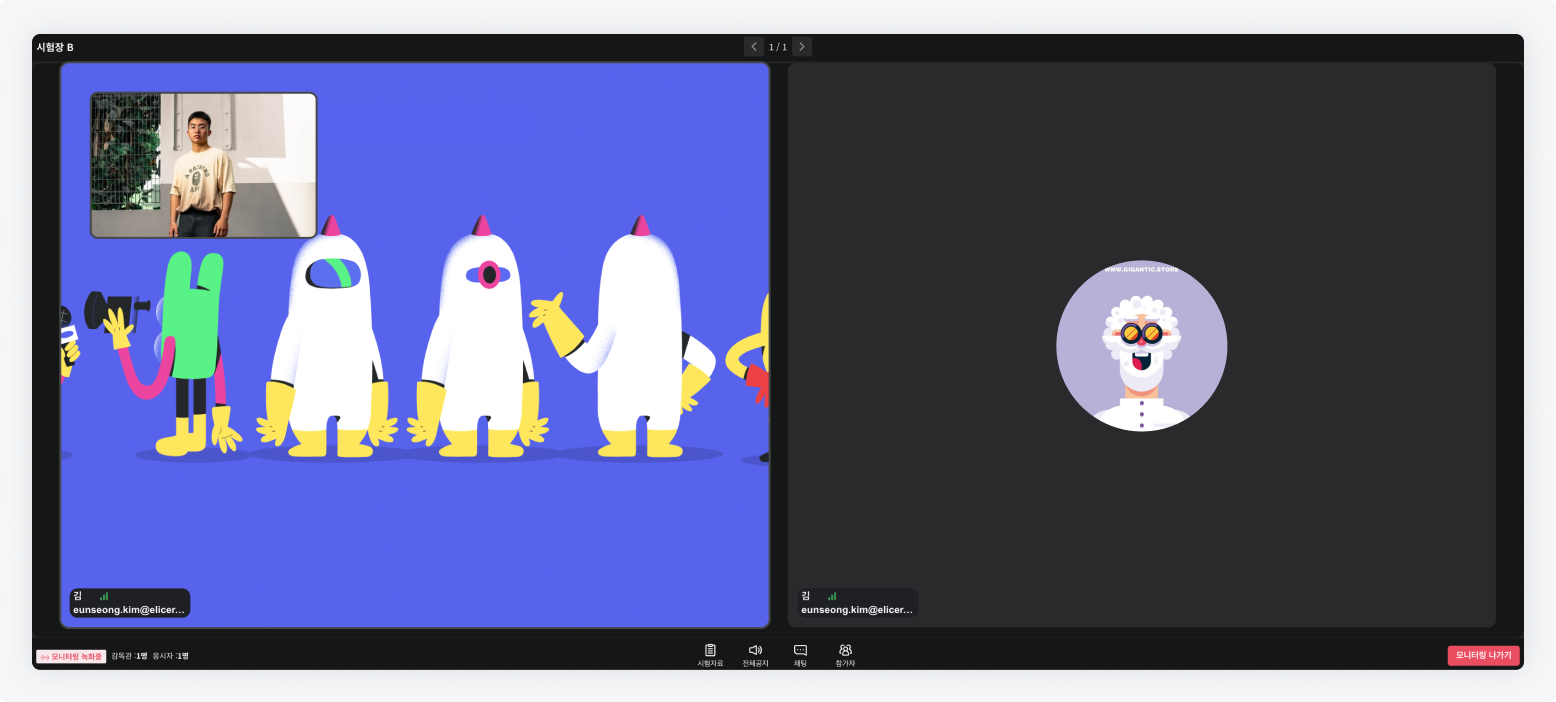
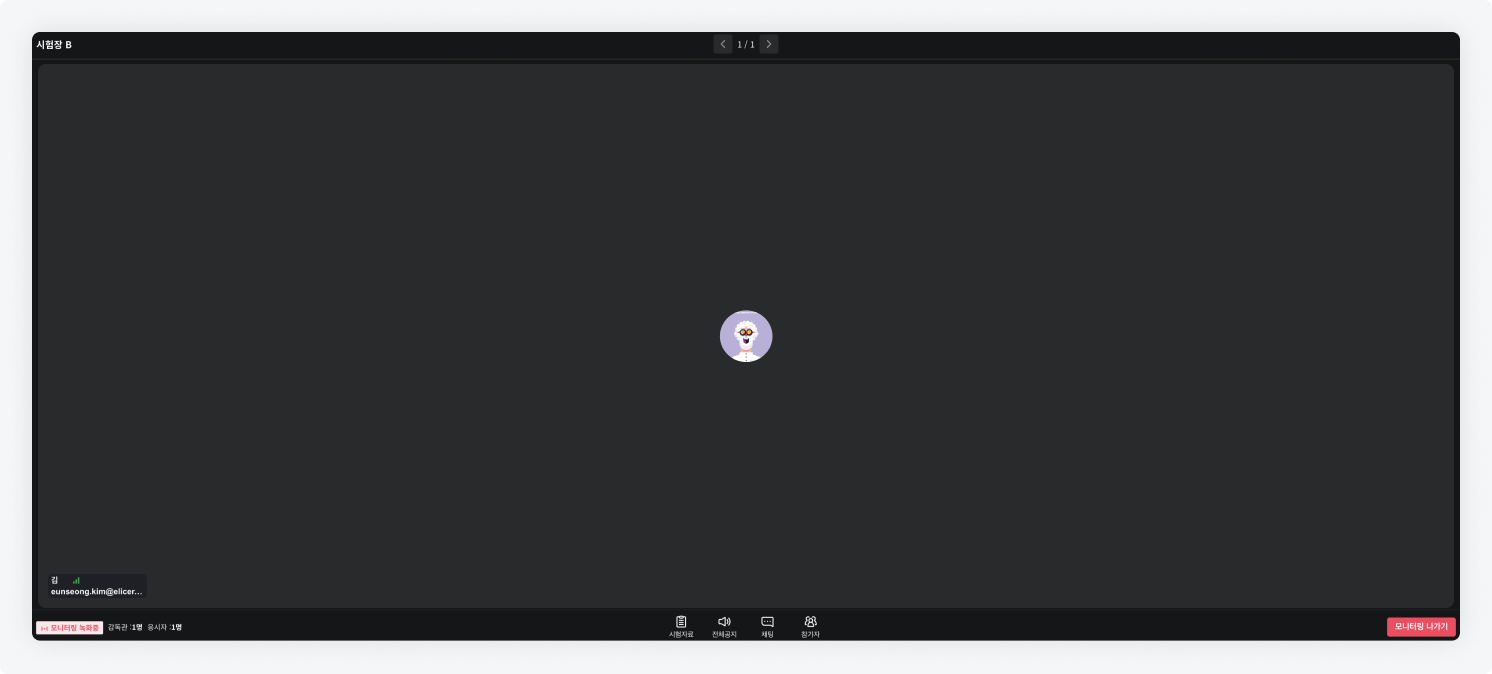
- You can change the layout of the monitoring room screen.
- You can focus on the screen of one test taker or supervisor.
- You can check the screens of all test takers.
Checking Test Materials
- You can check the test materials connected to the monitoring room.
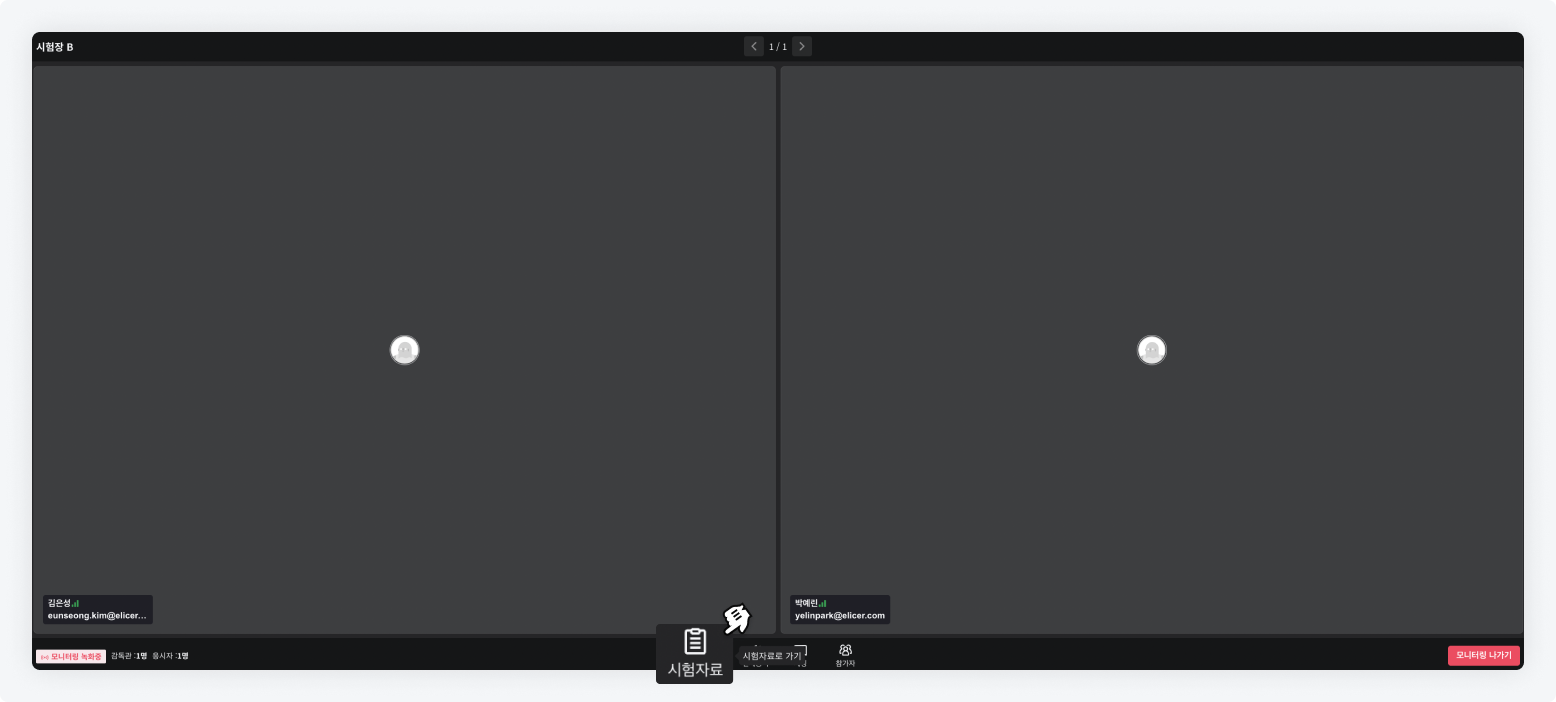
Chatting and General Announcements
- Supervisors and test takers who have entered the monitoring room can chat.
- If a test taker types in the chat window, a chat room visible to the supervisor will be created.
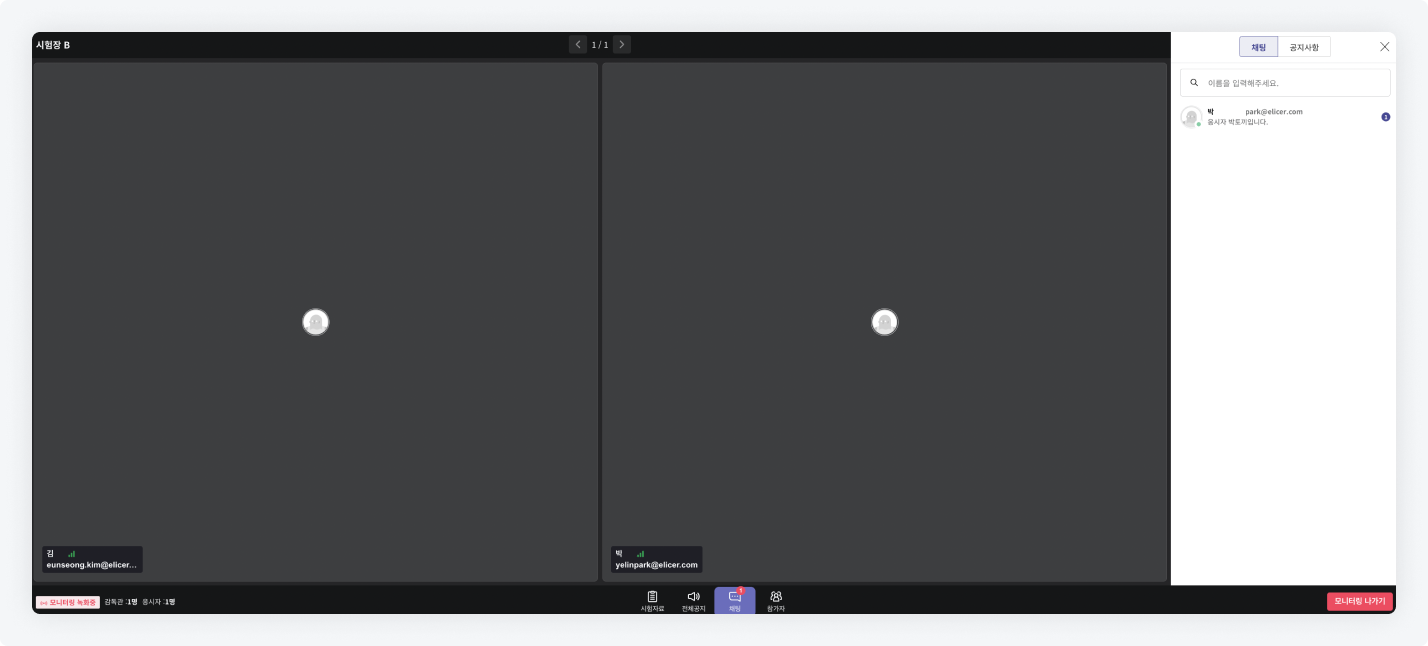
Chat: Supervisor Screen
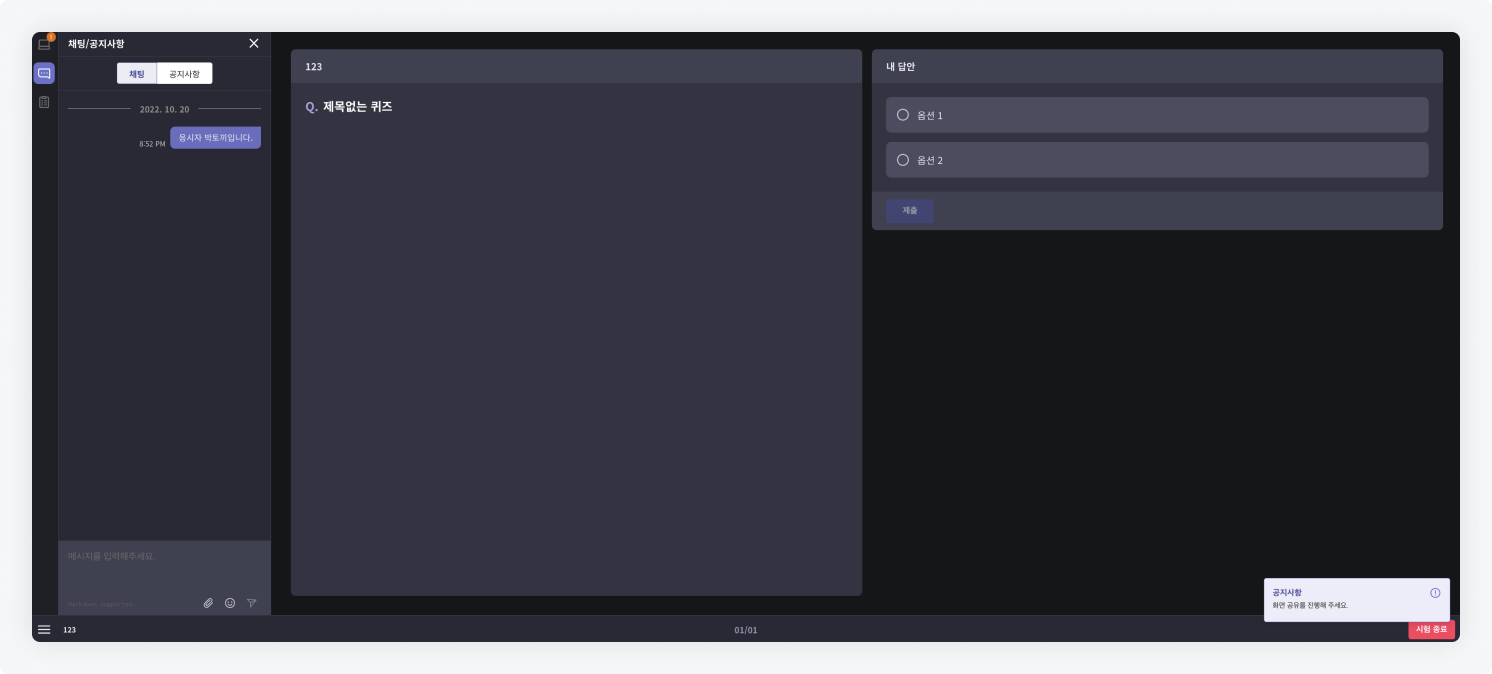
Chat: Test Taker Screen
- Supervisors can send announcements to test takers who have entered the monitoring room.
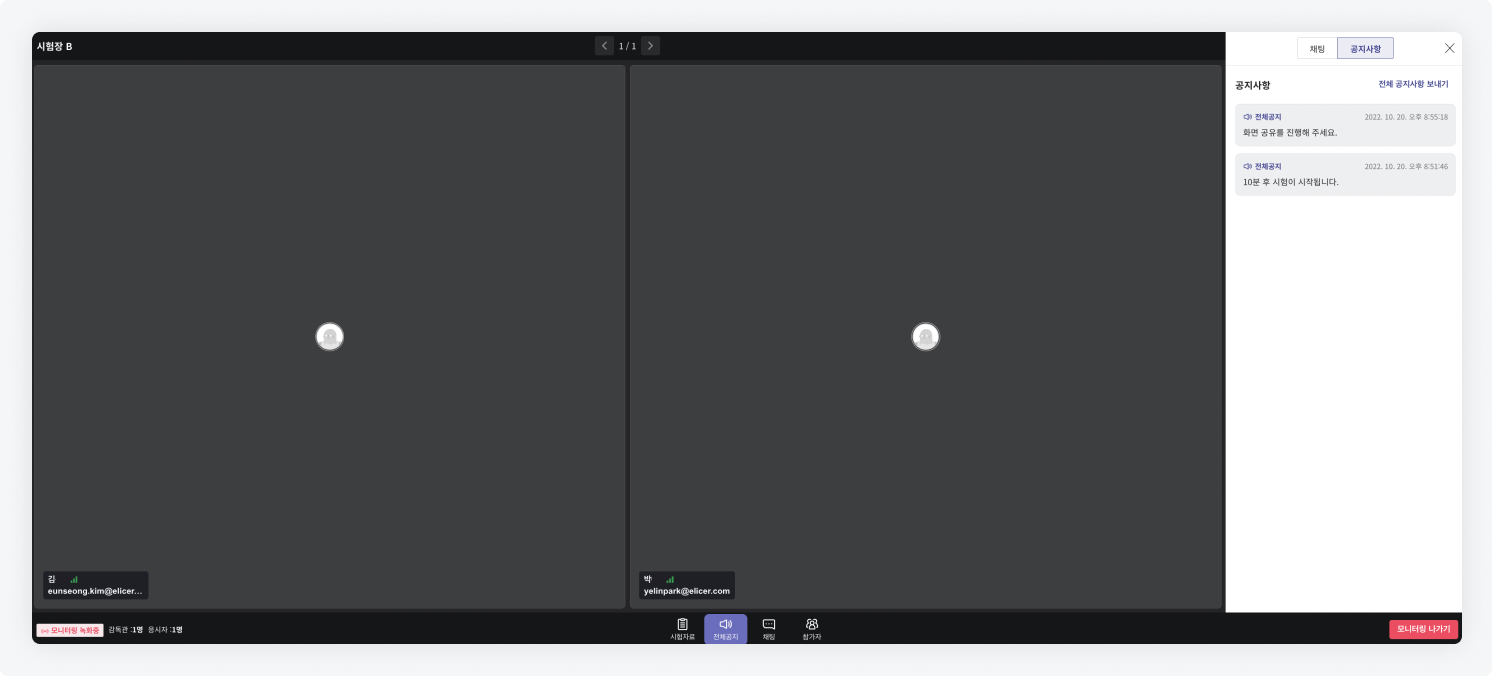
Announcement: Supervisor Screen

Announcement: Test Taker Screen
Individual Messages
- Supervisors can send personal messages to test takers.
- This can be utilized as a cheating prevention feature by observing the test taker's shared screen and webcam.
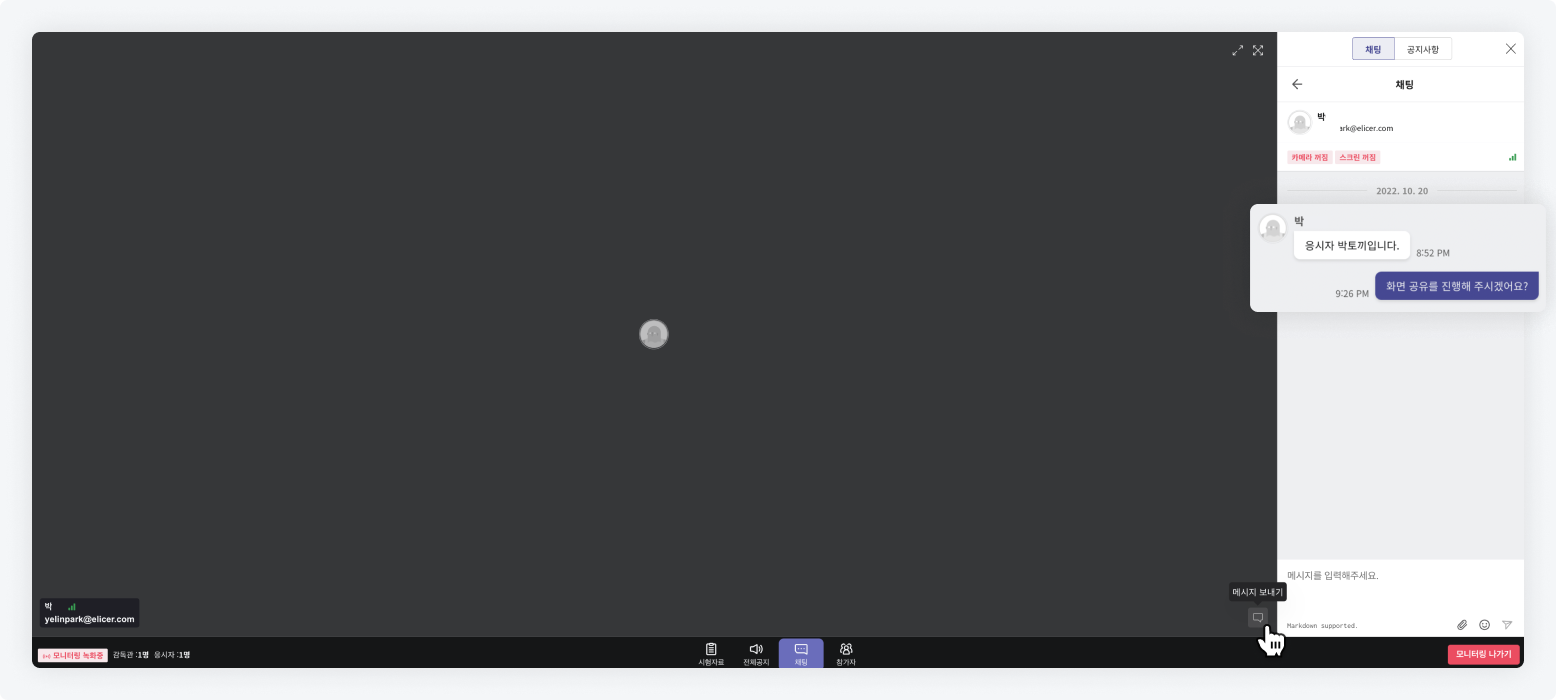
Changing Test End Time
If an unexpected event occurs during the test and it causes a disadvantage in the test time, additional time can be added. This function is especially useful for offline exams.
-
Changing the End Time for All Test Takers
You can change the end time for the test from the administrator menu under Settings > Test Time, or modify the time limit in the test settings page.

-
Changing the End Time for Specific Test Takers
Select the test taker whose end time you wish to change from the test taker list on the dashboard, and revise the test end time.

Identity Verification Function
- The identity verification function allows you to verify the identity of test takers.
How to Set Up the Identity Verification Function
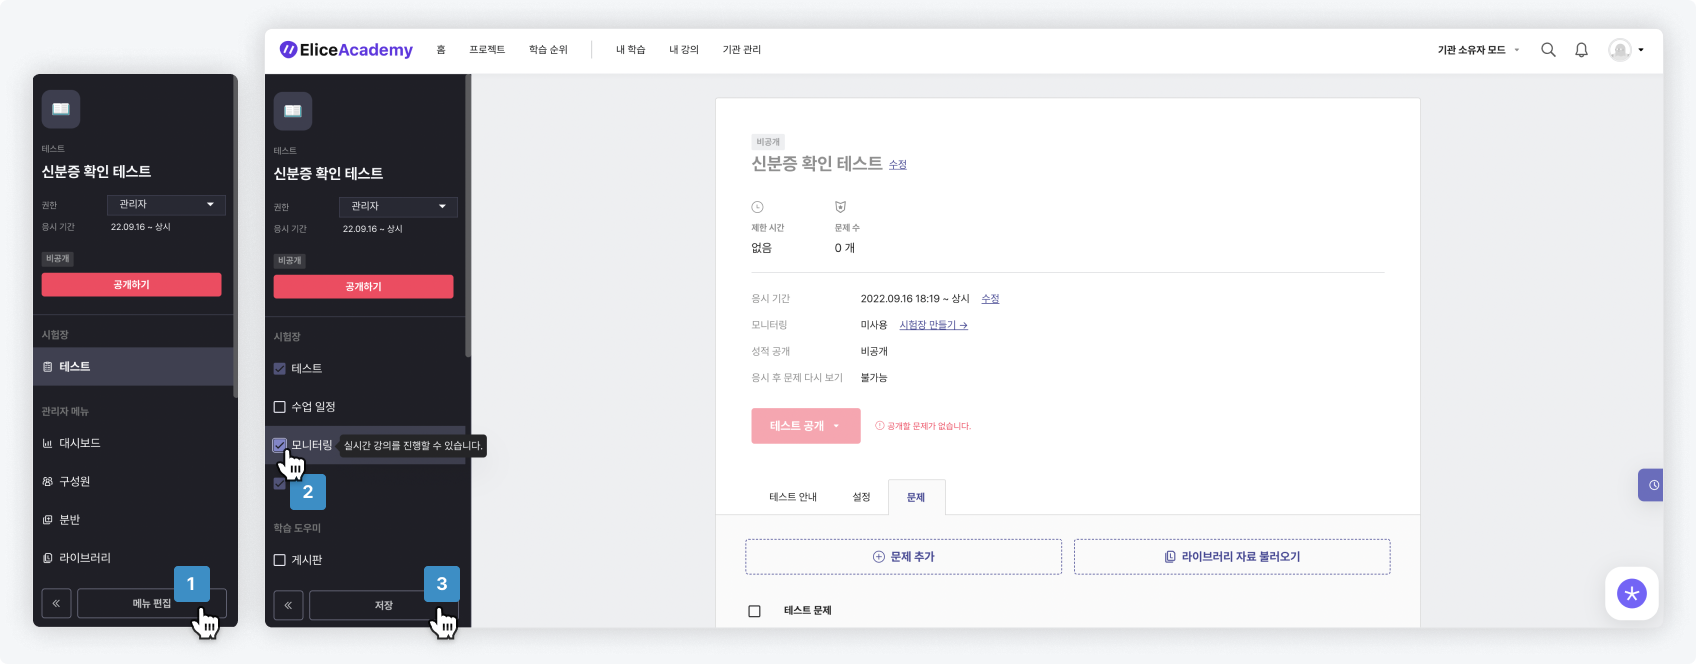
- After creating a 'Test', click the 'Edit Menu' button at the bottom left to activate the 'Monitoring' feature.
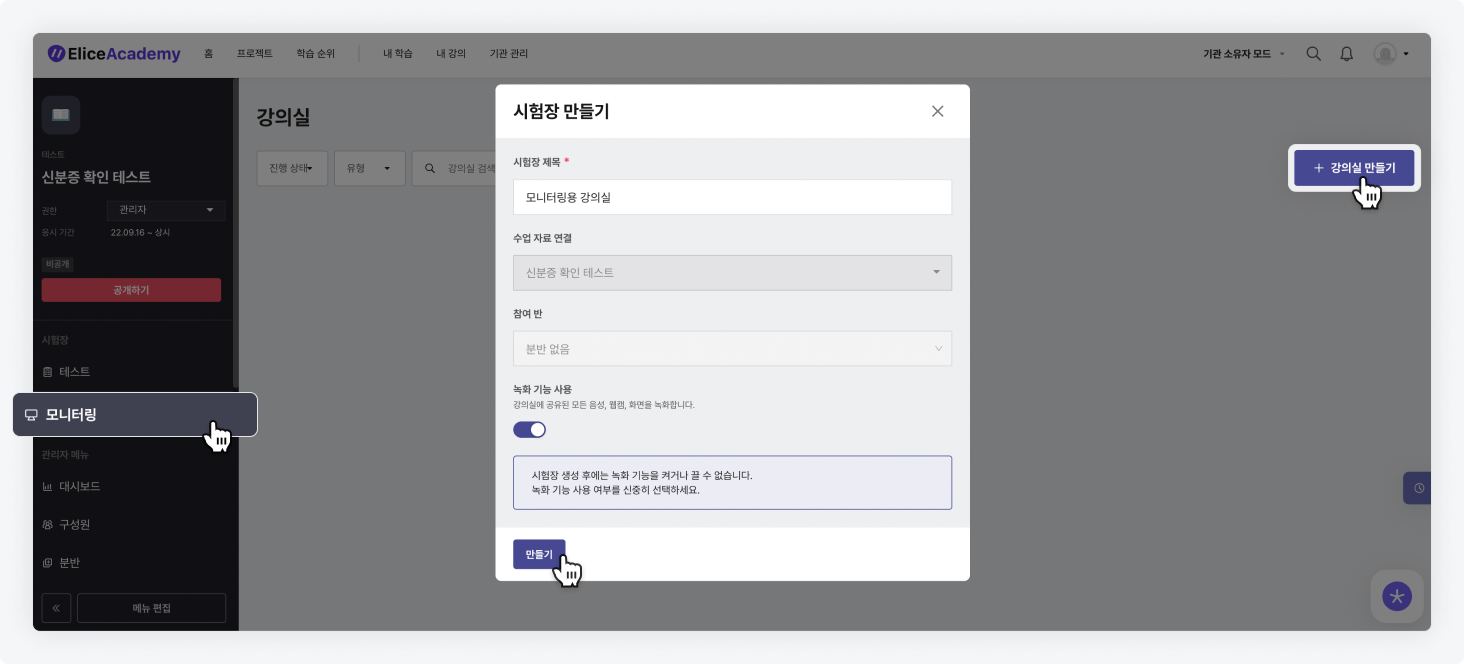
- Move to the 'Monitoring' tab and create a classroom for monitoring.
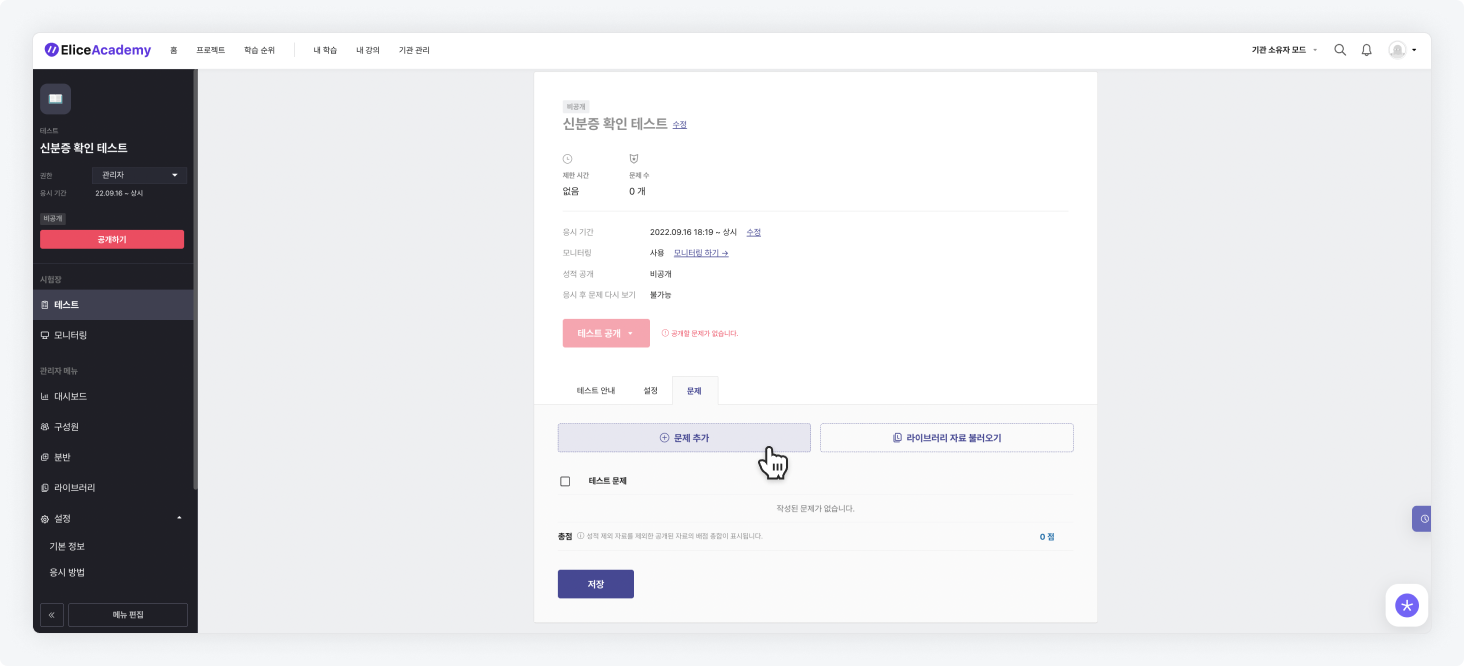
- Move to the 'Tests' list and create the test.
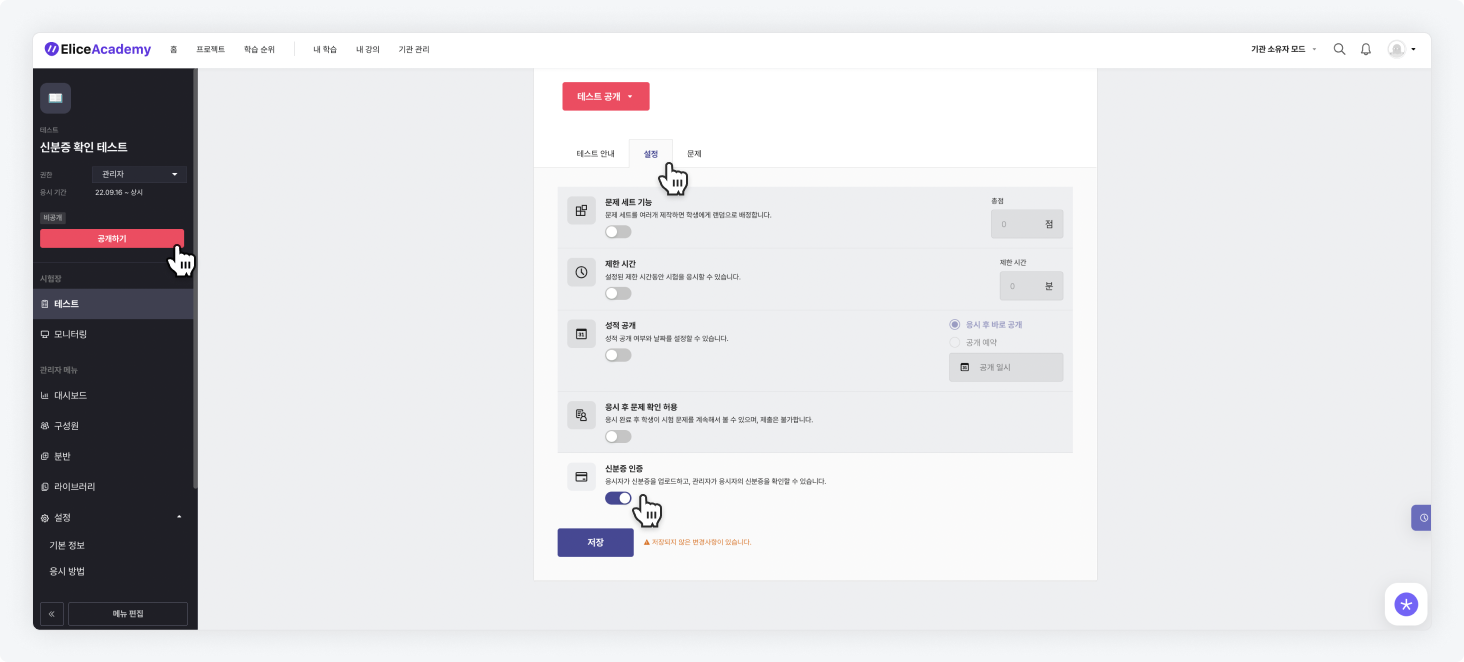
-
In the 'Tests' list, activate the 'Identity Verification' feature in the 'Settings' tab and click the 'Save' button.
-
Publicize the 'Test'.
How to Use the Identity Verification Function
- In tests where the identity verification function is activated, test takers will go through the identity verification process.
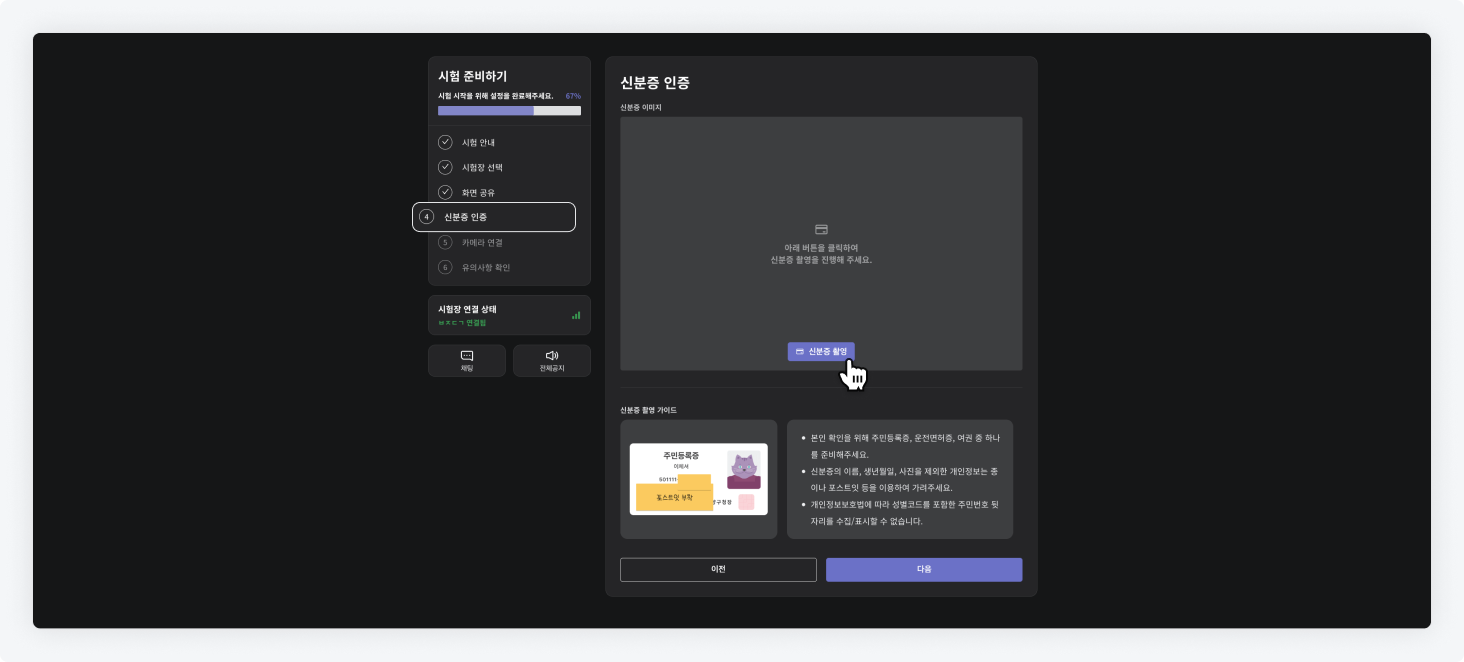
- The 'Identity Verification' step is added to step 4 of the Taking the Test process.
- The test taker must click the 'Take ID Photo' button in this step.
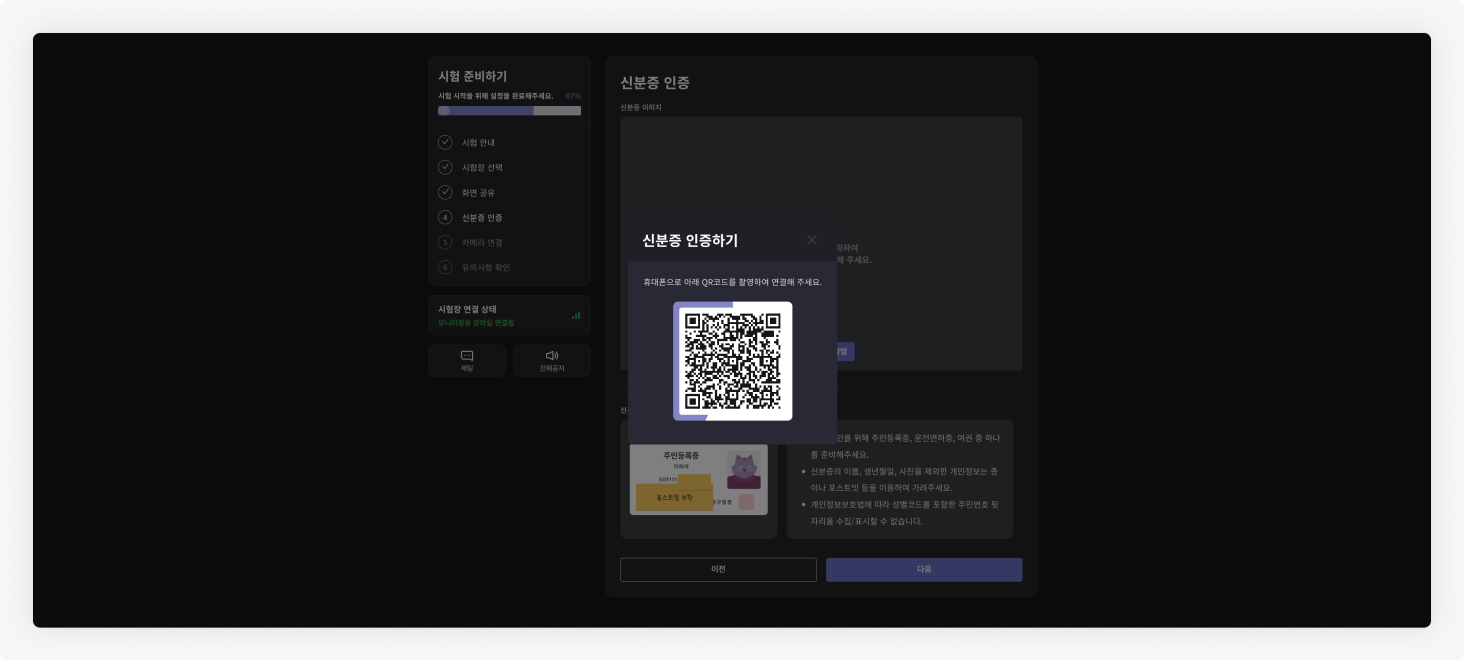
- After clicking, you will proceed to link the mobile camera for ID photo capture. (QR code verification)
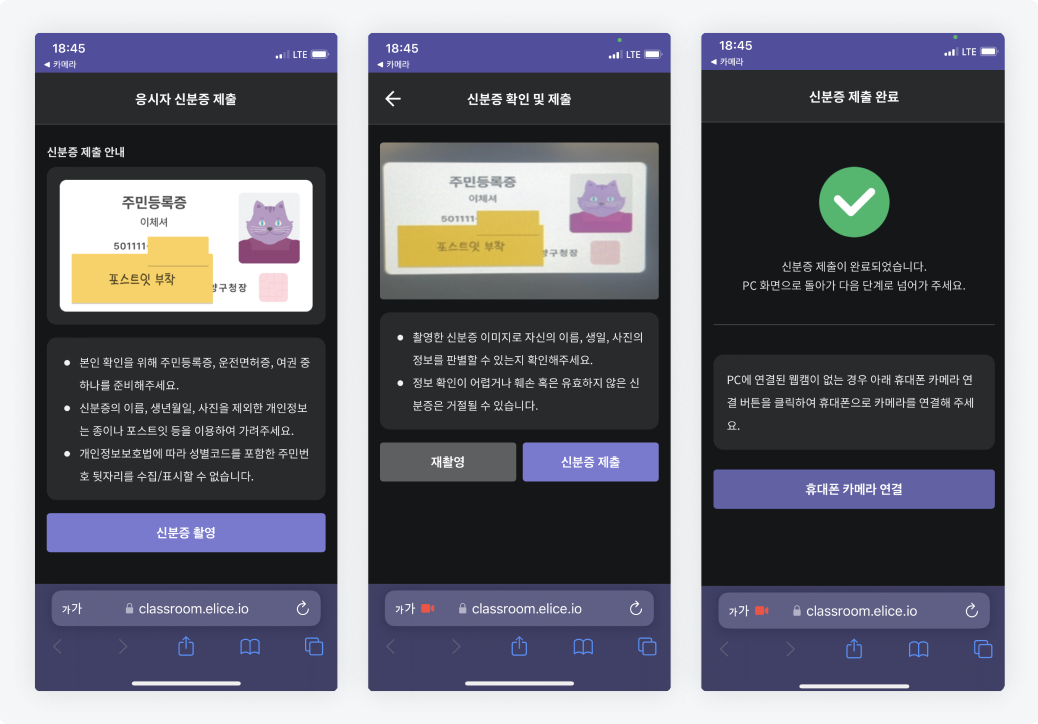
- After linking the mobile camera, the test taker will take a photo of their ID.
When capturing the ID, they must ensure that the 'rear number of the resident registration number' and 'address' are not visible in accordance with the Personal Information Protection Act.
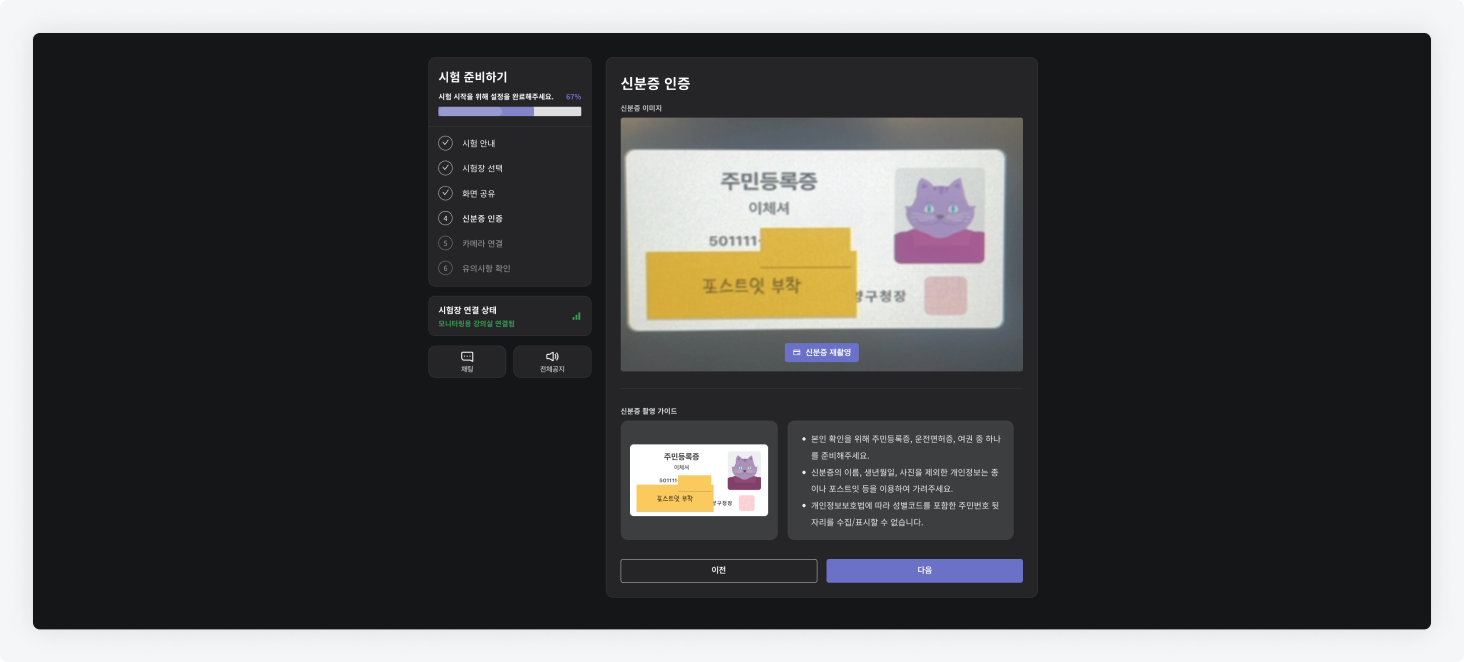
-
After the identity verification, the test taker completes the preliminary steps to take the test.
-
After entering the monitoring environment, the administrator (supervisor) can verify whether the test taker has submitted their ID.
-
The supervisor can click the 'Confirm ID Submission' button to compare the test taker’s image via the camera with their ID for identity verification.
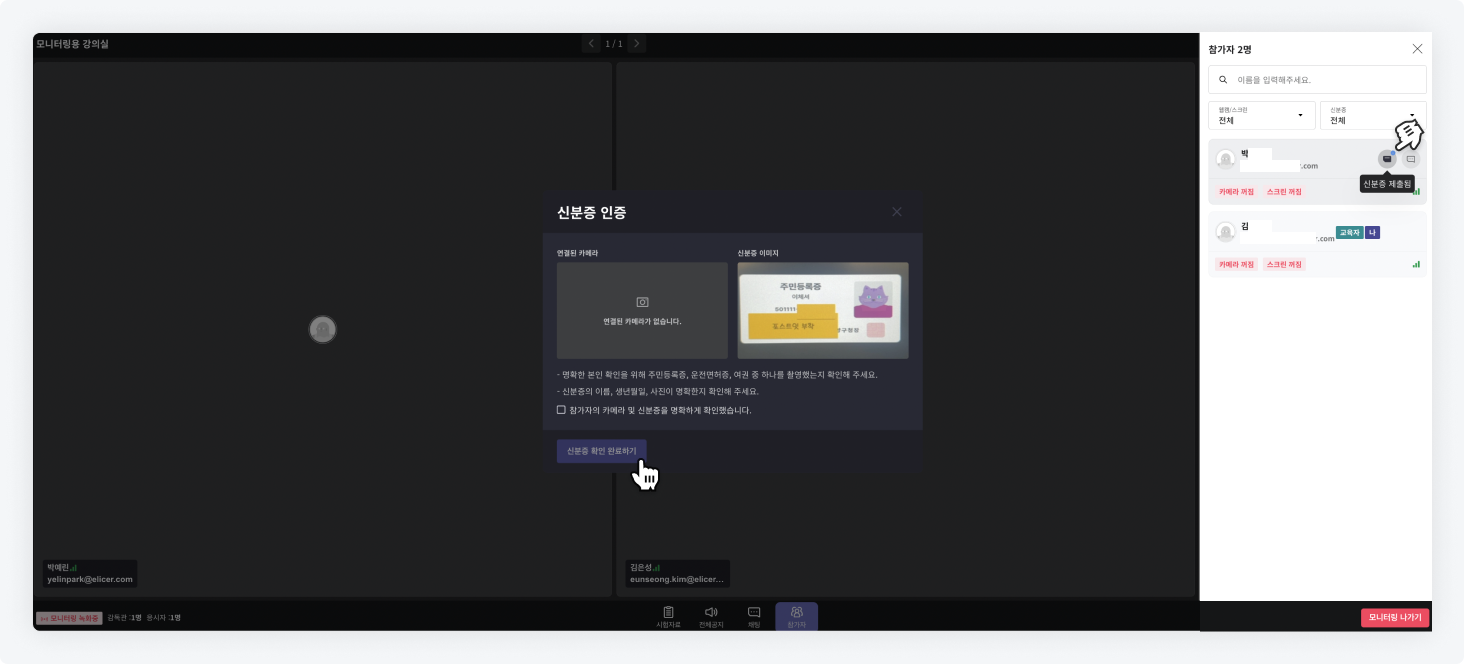
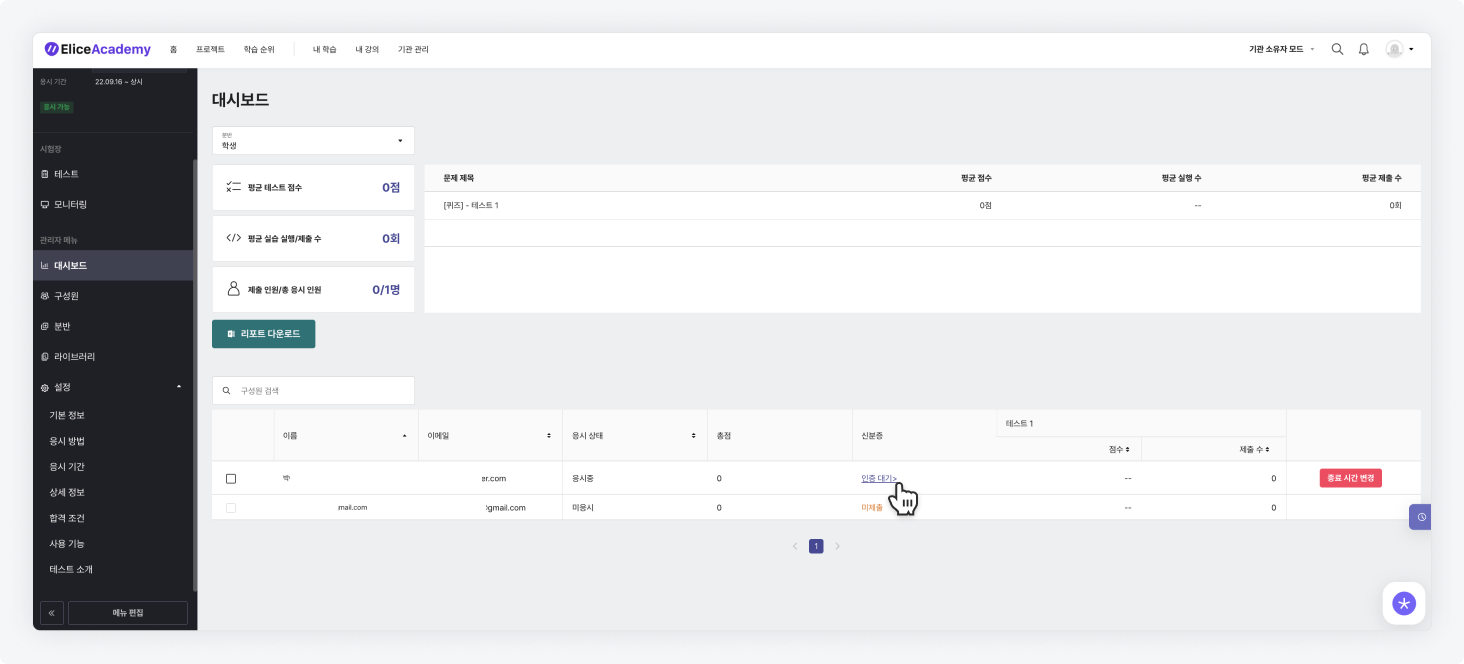
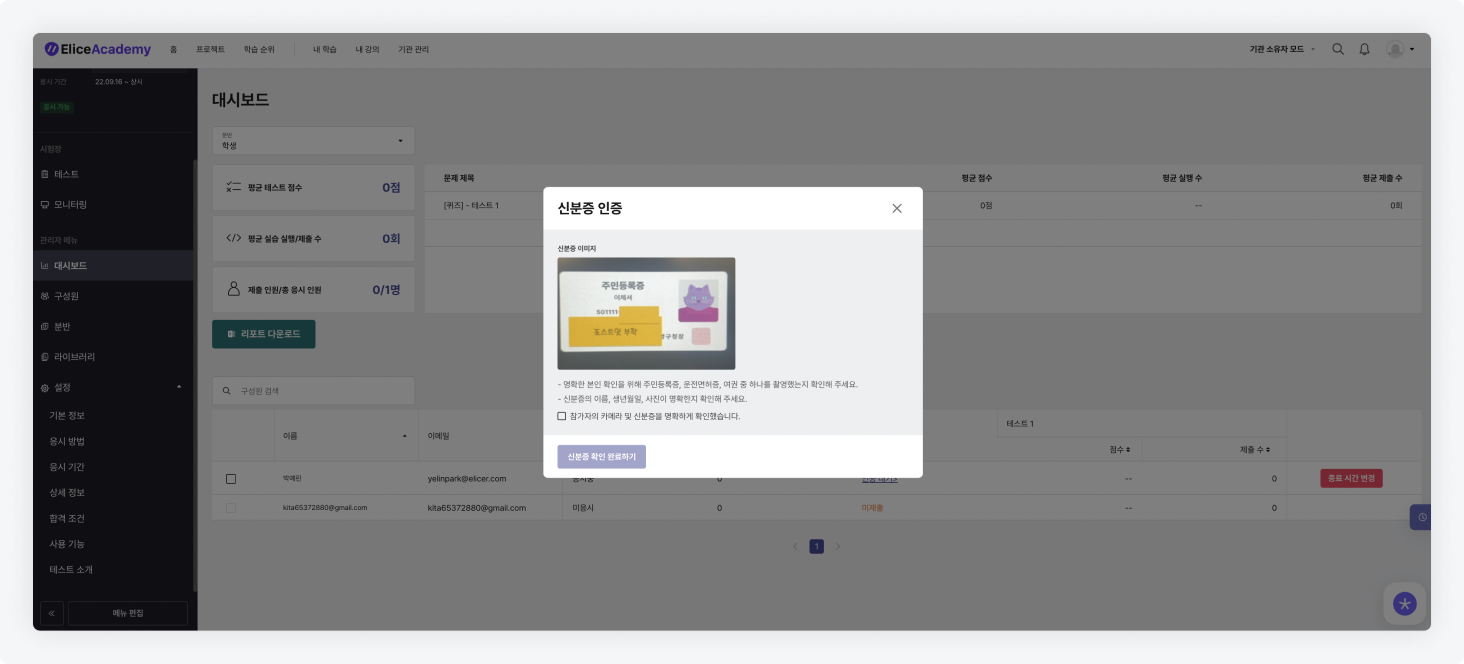
- After the test ends, you can check the ID and submission status of the student in the 'Dashboard' tab.
Cheating Prevention Function
- Elice provides various functions to prevent cheating by test takers.
- If you need inquiries about introducing these features, please contact contact@elice.io.
